


Field Technical Support Specialist
Because of its costs, it is important to take steps to protect your robotic welding system and ensure it is operating at its maximum potential.
Companies invest in robotic welding systems to improve productivity, gain more consistent weld quality, and reduce costs. Robotic welding also can set companies apart from the competition by allowing for faster completion and delivery of products.
Because of the cost for investing in this equipment, it is important to take steps to protect the system and ensure it is operating at its maximum potential. Keep in mind these best practices and troubleshooting tips to help you avoid downtime and increase throughput in your operation.
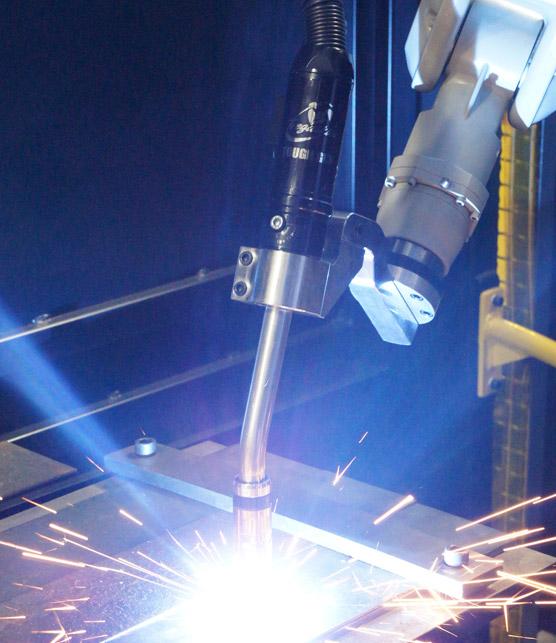
To gain the best performance from your robotic welding application, always select the right robotic gas metal arc welding (GMAW) guns, wire, and consumables for the job.
If your operation is large and requires a variety of equipment, take steps to prevent confusion and using the wrong product, which can lead to downtime and waste. A color-coding system is a good option. For example, you could color-code a 3-foot robotic GMAW gun with a red stripe and a 4-ft. gun with a green stripe. Putting in this extra effort takes time upfront, but it can help you streamline the welding process in the long run.
Another way to prevent product confusion is to standardize consumables across the welding operation when possible, such as using the same neck or nozzles on every robotic GMAW gun. Ideally, this standardization should be addressed at the integration level when designing the robotic system.
Last, always be sure to select a gun with enough amperage to meet the requirements of the application without overheating. For instance, an air-cooled robotic gun may not be able to manage the demands of some robotic applications, which often require a 100 percent duty cycle. In this case, converting to a water-cooled gun is a better option.
Erratic or poor wire feeding, a common problem in robotic welding, can be caused by numerous factors that you can easily avoid with some preventive steps.
Cutting a liner too short is particularly problematic when robotic welding with small-diameter wires, which have less column strength. If the wire isn't supported all the way through to the contact tip, it can fold at the front end or change course, which causes poor wire feeding, as well as burnbacks— the formation of a weld inside the contact tip.
Follow the manufacturer's instructions for trimming and installation, using a liner gauge to confirm the correct liner length. You also can use a liner system that employs a spring-loaded module to apply constant forward pressure on the liner. This module allows forgiveness for too-short liners and accommodates for liner movement during gun manipulation.
Extreme articulation of the gun also can lead to poor wire feeding. While it is important to program the robot for optimal productivity, take into account its speed, the position of the tooling, and the stress placed on the gun cable during welding. Too much bending can prevent the wire from feeding consistently through the front end of the gun.
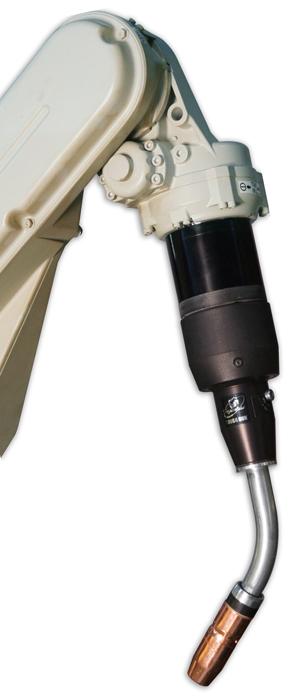
To gain the best performance from your robotic welding application, always select the right robotic gas metal arc welding (GMAW) guns, wire, and consumables for the job. The gun should provide the appropriate amperage to prevent overheating.
Program the robotic GMAW cable to stay as straight as possible. The robot may not weld quite as fast, but the trade-off of proper gun orientation can help minimize downtime to address feeding problems.
Improper drive roll selection and tension setting can lead to poor wire feeding. Consider the size and type of wire being used and match that to the drive rolls. Since flux-cored wire is softer (due to the flux inside and the tubular design), it requires a knurled drive roll, which has teeth to grab the wire and help push it through. However, knurled drive rolls should not be used with solid wire, because the teeth will cause shavings to break off, clog the liner, and create resistance as the wire feeds. Use V-groove or U-groove drive rolls instead.
To set the proper drive roll tension, release the drive rolls, then increase the tension while feeding the wire into your gloved hand until the tension is one half-turn past wire slippage.
Finally, be sure to have the correct contact tip size for the wire you use, and check that the connections between the gun and consumable are tight to avoid issues with wire feeding.
Contact tip life depends greatly on the application; you may change contact tips daily or weekly. Some preventive maintenance tips can help improve contact tip life.
Over time, debris and spatter buildup inside the liner can contribute to shortened contact tip life. It's important to occasionally blow any debris out of the liner using clean compressed air.
Match the wire size you are using to the contact tip to extend the consumable's life. When there is too much space between the wire and the tip's internal diameter, the wire can get stuck in the tip, causing a burnback.
Choose good-quality wire. Low-quality wires may not have a good lubricant coating. This factor can increase the amount of debris being pulled through the liner to the contact tip. Low-quality wires also can have a less consistent cast and helix, which can cause erratic wire feeding and keyholing—wear that results in an oval-shaped bore—in the contact tip.
Last, incorrect welding parameters can lead to burnback, excess spatter, and internal arcing, all of which can cause premature contact tip failure. Make sure voltage, wire-feed speed, and other parameters are set correctly for the application.
It can be tempting to avoid using a reamer (or nozzle cleaning station), or run it infrequently to reduce capital expenses and downtime during the welding cycle. However, a reamer plays a critical role in maximizing robotic welding performance.
This peripheral cleans the nozzle of debris and spatter, typically during routine pauses in the welding operation. The goal of this cleaning action is to ensure consistent shielding gas coverage, which helps reduce weld defects, expensive rework, and lost productivity. A reamer also helps extend the life of consumables.
Be sure to set the frequency and speed of the ream cycle at an adequate level to complete the job. Some applications are fine reaming once every 30 parts, while others need it after every single part. Note that accelerating the process runs the risk of stalling the unit and/or breaking a cutter blade. Both can cost time and money for downtime and repairs. Reducing the frequency of reaming can lead to excess spatter accumulation on consumables.
Another common mistake is the misuse of antispatter. Too much is just as bad as not enough, because an excess of this compound can damage the nozzle insulator. Spray the antispatter so that it nearly evaporates on contact and leaves a slight film on the consumables. Do not spray antispatter until it is dripping; it can easily drop into the weld pool, creating porosity and inclusions in the weld.
A preventive maintenance program is among the most effective best practices you can instill for a robotic welding system and is an ideal way to reduce unscheduled downtime and minimize costly repairs or equipment replacements. Tracking maintenance manually or via weld data monitoring also helps you monitor variables, such as consumable changeover, and narrow down potential problems when issues do occur.


The Fabricator is North America's leading magazine for the metal forming and fabricating industry. The magazine delivers the news, technical articles, and case histories that enable fabricators to do their jobs more efficiently. The Fabricator has served the industry since 1970.
start your free subscription
Easily access valuable industry resources now with full access to the digital edition of The Fabricator.

Easily access valuable industry resources now with full access to the digital edition of The Welder.

Easily access valuable industry resources now with full access to the digital edition of The Tube and Pipe Journal.

Easily access valuable industry resources now with full access to the digital edition of The Fabricator en Español.
In this episode of The Fabricator Podcast, Caleb Chamberlain, co-founder and CEO of OSH Cut, discusses his company’s...


