


President

One of the main production constraints in fabrication shops continues to be the press brake. The greater use of highly flexible and productive laser cutting machines in an ever-increasing number of metal fabricating operations over the last decade has made this issue more and more glaring.
Long press brake setup times also prevent prompt delivery of parts to downstream operations, such as welding, finishing, and assembly, which may stretch out production times and threaten on-time deliveries. Various studies have shown that the average time in North America from the last finished part on a job on a press brake to the first good part on the next job is approximately 30 minutes. The physical setup of the press brake is the major component of this nonproductive time between completing one batch of parts and starting the next one.
A key to reducing this setup time is good tool organization and the implementation of fast methods of getting tools in and out of the machine. There are, of course, other components to press brake setup, such as moving material to the machine, downloading new part programs, and making adjustments for actual material parameters, but locating and loading the correct tools at the proper positions quickly and efficiently is the most important factor in improving setup time.
Here are six ways that a fabricator can reduce the time required to set up a press brake and spend more time producing parts.
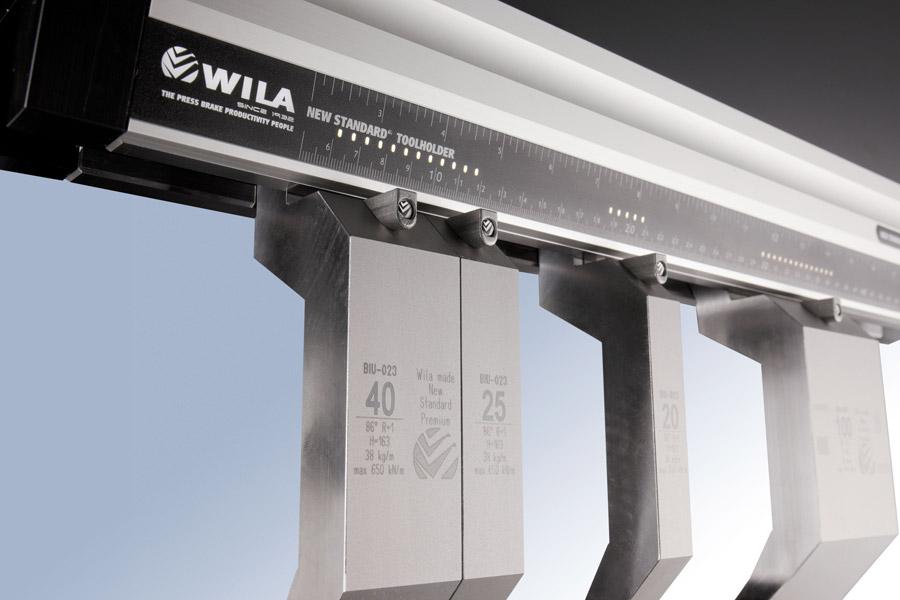
1. Tool Marking and Storage
Being able to quickly locate the required tools to form the next part is the first step in the process. Having key information clearly marked on the tools makes it much easier to select the correct tools needed and reduces the chances for error. Information that should be marked on the tooling includes:
Having tools well-organized and placed as close as possible to the press brake speeds up tooling location and tool loading/unloading as well. For precision segmented tooling, various compact tooling cabinets are available with multiple tool drawers, which are capable of storing large quantities of tooling (see Figure 1).
An important feature to look for in press brake tooling cabinets is that they have drawer inserts with slots designed to accommodate the punch and die tangs so that tools are stored in the vertical position. This increases the amount of tooling that can be stored and protects tools from damage.
To make press brake tooling cabinets more versatile, the drawer heights should be adjustable to accommodate various tool heights. The tool cabinet should also be able to be easily moved by forklift, pallet jack, or wheel casters if needed to a different workstation. For safety reasons, the cabinet should be lockable and have a protection system that allows only one drawer to be opened at a time to avoid being top-heavy and accidentally tipping over.
It is not practical to store large tools in tooling cabinets because they are too heavy to lift and quickly eat up the cabinet’s storage capacity. Recent developments to address this need to store and handle heavy tools include tool storage stations that are built next to the press brake (see Figure 2). These tool stations can be equipped with a load/unload arm that enables tools to be easily aligned with the upper and lower toolholders on the machine and allows heavy punches and dies to be quickly, effortlessly, and safely slid into and out of the press brake.
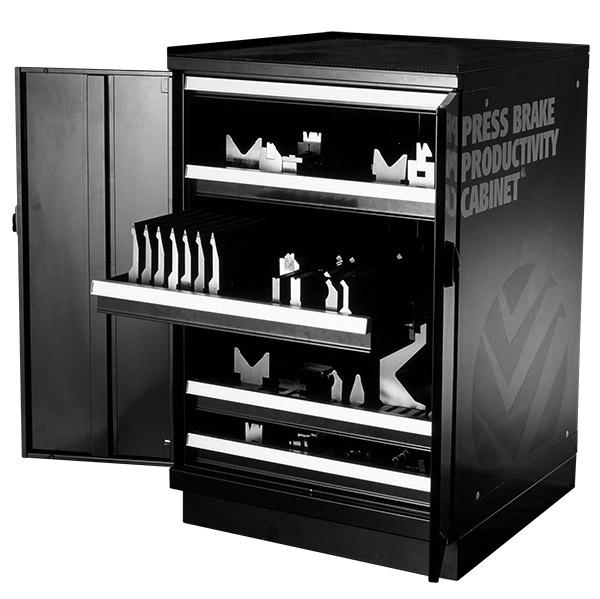
Figure 1
Tool cabinet drawers with machined polyurethane inserts hold tools vertically, increasing the amount of tooling that can be stored and avoiding tool damage.
An important component of good tooling management is keeping tools in like-new condition for as long as possible. To have a job interrupted because a press brake operator picks up a tarnished tool that can’t be used with steel that requires a highly cosmetic finish is not acceptable. Tools need to be in good shape so they can be ready for use at a moment’s notice.
The good news is that today’s tool-hardening processes protect tools from wear and maintain tool accuracy for the life of the tool—if proper care is taken. Good tooling storage systems are also vital for maintenance. Storing tools on homemade wooden shelves should be avoided as the moisture and chemicals in the wood can cause rusting and deterioration. Additionally, laying tools flat in cabinet drawers can damage them because it promotes tool-to-tool and metal-to-metal contact.
It also is important that tools are cleaned regularly after use to prevent dirt and material buildup and to remove the natural salts and acids that are present on the operator’s hands. Using a rag with alcohol or a light oil will do the job, and special wax sprays that will protect the tools are available. Fabricators should avoid using any water-based sprays and be sure to clean the tools thoroughly before adding any type of preservative.
If shop personnel with high levels of acidity in their hands can be identified, they should be encouraged to use gloves when handling tooling to avoid rusting and corrosion. If a fabricator is bending materials such as galvanized steel that quickly leave material buildup on the V-die shoulder radii, it needs to take the important step of removing the material often with a light abrasive, such as a Scotch-Brite™ pad. V dies also are available with an optional coating that prevents material buildup on the working surfaces. Proper cleaning and storage will maintain tooling performance and ensure that the tooling is ready to go for the next job.
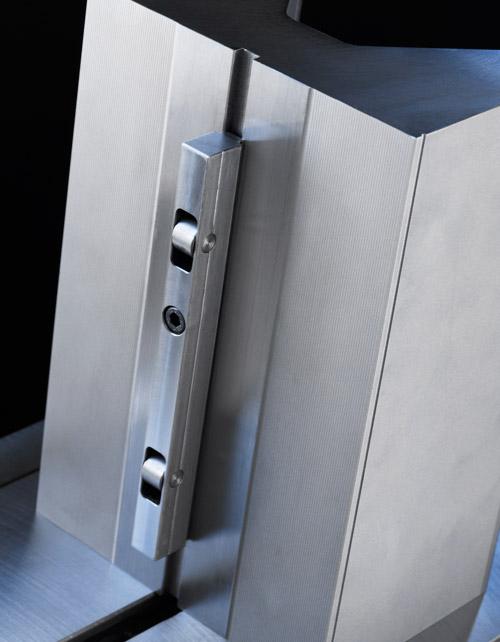
The advent of safety buttons on segmented precision punches, which allow for quick vertical loading/unloading of tools, and hydraulic clamping systems that automatically clamp, align, and seat tools in seconds have helped to greatly reduce press brake setup time for numerous fabricators. In a similar manner, roller bearing technology is now an option that can be built into the tangs of heavy punches and dies (see Figure 3). These roller bearings allow for large and heavy tools to be slid in and out of the toolholders quickly.
When multiple tool setups are needed, such as when making multiple bending lengths, it can be time-consuming for the press brake operator to determine which tool segments he needs, where to place them in the machine, and the proper sequence of the bends. To assist the operator with this, it is now possible to purchase clamping systems, crowning systems, and bottom toolholders that have LED light systems incorporated in them that are integrated with the press brake control (see Figure 4). The LED lights show the operator where to place the tools initially and then flash on and off to indicate the proper bend sequence. This greatly speeds up the process and reduces errors as well as scrap.
The LED lights also can be programmed for additional functions, such as alerting the press brake operator of a potential tooling overload situation or when to perform machine maintenance.
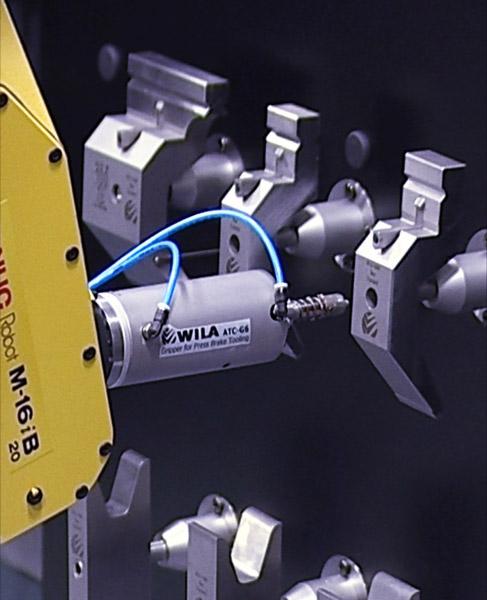
Automatic tool loading/unloading is becoming more and more prevalent, both for semiautomatic and fully automatic press brake cells. Press brake systems are now available from major machine suppliers that have automatic tool-changing capabilities. Some of them use a tooling carousel and robot arm to select the correct tools and automatically slide them into position (see Figure 5). Others use the machine backgauge to pick up the tools and place them in position, while still others use separate tool storage stations and a robot to pick up and place tools in the proper position in the machine.
Self-seating tools and hydraulic clamping of tools make this automation faster and easier. New clamping systems recently have been designed that are pneumatically operated with self-locking mechanisms that are even faster to clamp and unclamp, making them ideal for automated bending cells.
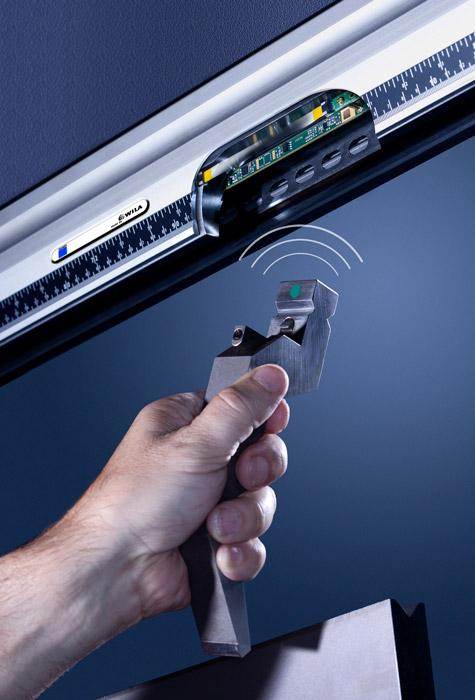
Just as machines are getting smarter and more flexible, some press brake tooling systems now have built-in intelligence (see Figure 6). Punches and dies can be supplied with an electronic chip that contains all of the vital tool information, such as tool type, length, height, radius, and maximum load. (The chip can be found in the front and back side of the tang.) The chip notifies the press brake operator if the correct tool is being used, if the length of the tool is correct, and if the tool is positioned precisely in the clamping system.

Figure 2
This toolstation with a load/unload arm enables heavy tools to be quickly and easily slid into and out of the press brake.
The clamping systems are also equipped with an electronic strip to read the stored press brake tooling information and to integrate the tooling with the press brake control and/or robot. This tool identification and positioning system enables advanced automation and provides a closed-loop system between the tooling, toolholders, and the machine.
Whether a fab shop is focusing on the loading, the unloading, the storing of press brake tools, or moving toward full automation, it should consider the techniques and newer innovations available that can help press brake operators manage tooling inventory more efficiently.
These tool management tips and technical advancements will help the shop realize significantly reduced press brake setup time and improve overall bending productivity.

The Fabricator is North America's leading magazine for the metal forming and fabricating industry. The magazine delivers the news, technical articles, and case histories that enable fabricators to do their jobs more efficiently. The Fabricator has served the industry since 1970.
start your free subscription
Easily access valuable industry resources now with full access to the digital edition of The Fabricator.

Easily access valuable industry resources now with full access to the digital edition of The Welder.

Easily access valuable industry resources now with full access to the digital edition of The Tube and Pipe Journal.

Easily access valuable industry resources now with full access to the digital edition of The Fabricator en Español.
In this episode of The Fabricator Podcast, Caleb Chamberlain, co-founder and CEO of OSH Cut, discusses his company’s...


