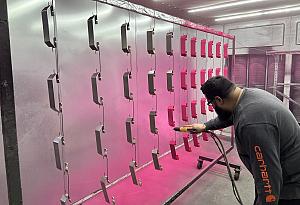


Building the perfect tool cabinet
 |
| Figure 1 |
Deciding What Works Best
All too often tooling is thrown on a shelf, pallet, or table – one tool piled on top of another (Figure 1). Operators dig through the pile, looking for a specific tool and damaging other tools in the process.
Depending on the amount of tooling to be stored and how far it needs to be moved for use, one of two cabinet designs may be right for you.
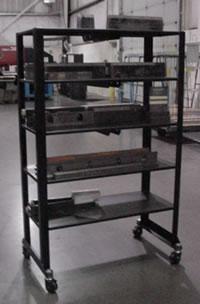
A Mobile Rack
The rack shown in Figure 2 is designed to move tooling for a specific machine or product line from one machine or cell to another. For example, if you produce the same parts in multiple cells in your facility, this rack might be your best storage option.
The rack has five shelves— two on the bottom for holding bolsters, product line accessories, and large V dies; and three slotted shelves that store punches upright, making them easy to find, store, and sort.
 |
| Figure 2 |
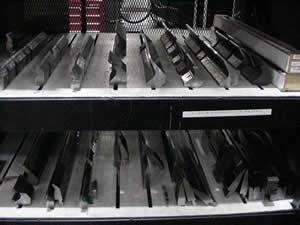
The rack in Figure 2 was made from 0.125-in. hot-rolled steel and slotted to facilitate punch tang toolholding. A problem arose when we attempted to use the rack to hold European precision-ground tooling. We found that the 0.125-in. shelves were not thick enough to support these tools, a problem we didn't even consider during the initial design and manufacturing process.
To enable the rack shown in Figure 2 to accommodate European precision-ground tooling, we added a layer of ¼-in. corrugated plastic to each shelf, both slotted and full. Protecting the tooling from the shelf itself, the corrugated plastic added another ¼ in. and stabilized the stored punches.
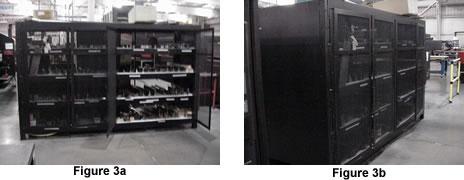
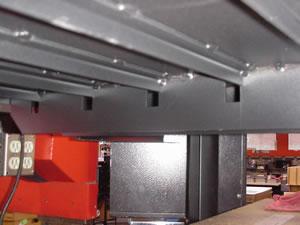
A Stationary Cabinet
While small tooling racks are a great design for their purpose, you may find that you do not need that kind of mobility. Enter the big cabinet. The cabinet in Figure 3 was set up on a frame made of 2-in. by 6-in. box tubing, with shelves made from the same 0.125-in.-thick steel and covered with plastic, like the mobile rack in Figure 2. Expanded steel mesh is around the sides and back and on the front doors of the cabinet, which allows light into the cabinet, while protecting the tooling from unauthorized use. The cabinet top is solid for storage but also could be made from expanded steel mesh.
 |
Design Safety
Whether you're designing and manufacturing a mobile or stationary rack, keep safety in mind. Pay special attention to slotted shelves, which will be weak and must be bracketed (Figure 4).
 |
| Figure 4 |
Another safety consideration is the height of the mobile cabinet. The one shown in Figure 1 is 60 in. tall, 18 in. deep, and 48 in. long. A much larger or taller cabinet could be top heavy and fall over.
Last but not least, smooth all sharp edges on the cabinet. The operator will be handling heavy pieces of tooling that, thanks to inertia, will tend to keep moving once moved. If you have ever caught a finger between a 3-foot chunk of press brake tooling and a solid object, you know that stitches will become the order of the day, even more stitches if that solid object is sharp. Make sure that you take the time to make the cabinet safe.
Don't continue to ruin your press brake tooling by improper storage. The inexpensive, easy-to-build cabinets discussed in this article are merely examples of cabinets that can help you extend tool life.
So, what are you waiting for? You have a shop; you have materials. Build yourself the tool storage system that best suits your need. You won't be sorry!
About the Author

About the Publication

subscribe now

The Fabricator is North America's leading magazine for the metal forming and fabricating industry. The magazine delivers the news, technical articles, and case histories that enable fabricators to do their jobs more efficiently. The Fabricator has served the industry since 1970.
start your free subscription- Stay connected from anywhere

Easily access valuable industry resources now with full access to the digital edition of The Fabricator.

Easily access valuable industry resources now with full access to the digital edition of The Welder.

Easily access valuable industry resources now with full access to the digital edition of The Tube and Pipe Journal.

Easily access valuable industry resources now with full access to the digital edition of The Fabricator en Español.
- Podcasting

In this episode of The Fabricator Podcast, Caleb Chamberlain, co-founder and CEO of OSH Cut, discusses his company’s...