


What to know about robotic welding gun liners
The liners used in a robotic gas metal arc welding (GMAW) gun play a significant role in the productivity, cost, and quality of your automated welding operation.
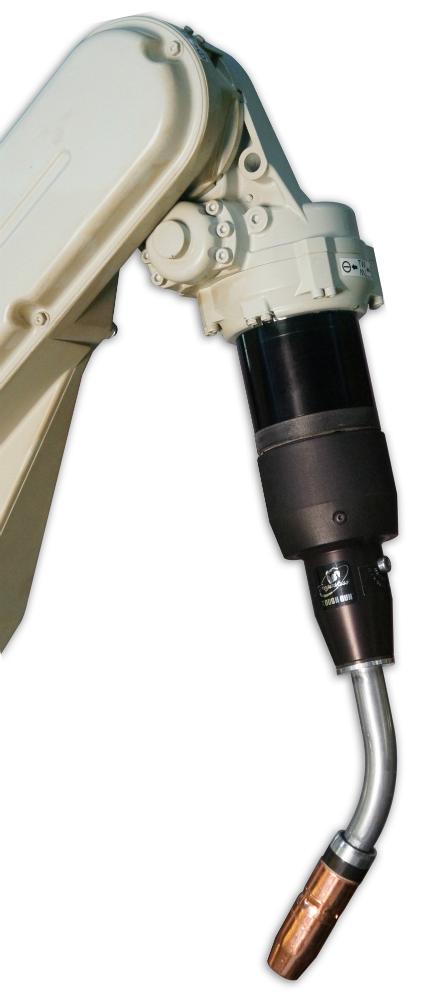
The liners used in a robotic gas metal arc welding (GMAW) gun, along with other consumables such as the nozzle, retaining head (or gas diffuser), and contact tip, play a significant role in the productivity, cost, and quality of your automated welding operation. Liners run the length of the robotic welding gun and power cable — from the contact tip to the power pin — and act as the conduit through which the wire is fed.
A poorly installed liner can lead to problems with birdnesting and excessive debris in the liner, which can cause wire feeding issues that result in downtime, the enemy of any robotic welding operation. For this reason, it is imperative to select the right liner for the wire type and diameter being used and to trim it to the proper length.
Selecting the Right Liner
The three main categories of liners for robotic GMAW guns are conventional, front-loading, and front-loading liners with spring-loaded modules. The latter offers an inch of give if a liner is imperfectly trimmed. Regardless of the liner used, you should match its diameter to that of the wire it is feeding. Pairing a liner with a diameter that is too small or too large for a given wire can cause wire feeding and quality issues.
Front-load and D-wound conventional liners (to be discussed in more detail below) are the most popular liners for robotic welding guns and are used about 90 percent of the time.
Conventional Liners. Conventional liners can be used in robotic welding, but they also are a common option for semiautomatic applications. They are installed through the back of the welding gun and can be up to 25 ft. long, depending on the application.
Conventional liners for robotic welding are available in two key styles: D-wound and galvanized. D-wound liners, which are made of stainless steel, typically are used for robotic welding applications that employ metal-cored wires. They are smoother on the inside, which helps this softer wire feed more smoothly. A galvanized liner often is used for applications with long, continuous welds. This type of liner tends to keep its shape and consistency better than other types, even when exposed to excessive heat.
Conventional liners also are available in a flat-wound and a Teflon® style, but these generally are reserved for semiautomatic welding. Teflon liners are used with aluminum wire to ensure smooth wire feeding.
Replacing a conventional liner can be a time-consuming process in a robotic welding operation. You must enter the weld cell to remove the gun from the wire feeder. If that feeder is located at a higher location, as is often the case in robotic welding cells where space is a premium, it will require climbing several feet to change the liner. This can pose safety risks.
During conventional liner changeover, it also is possible for the robotic welding gun cable to twist because of its natural helix contour. Take care that the liner is fully seated within the power pin during installation to avoid future problems with wire feeding.
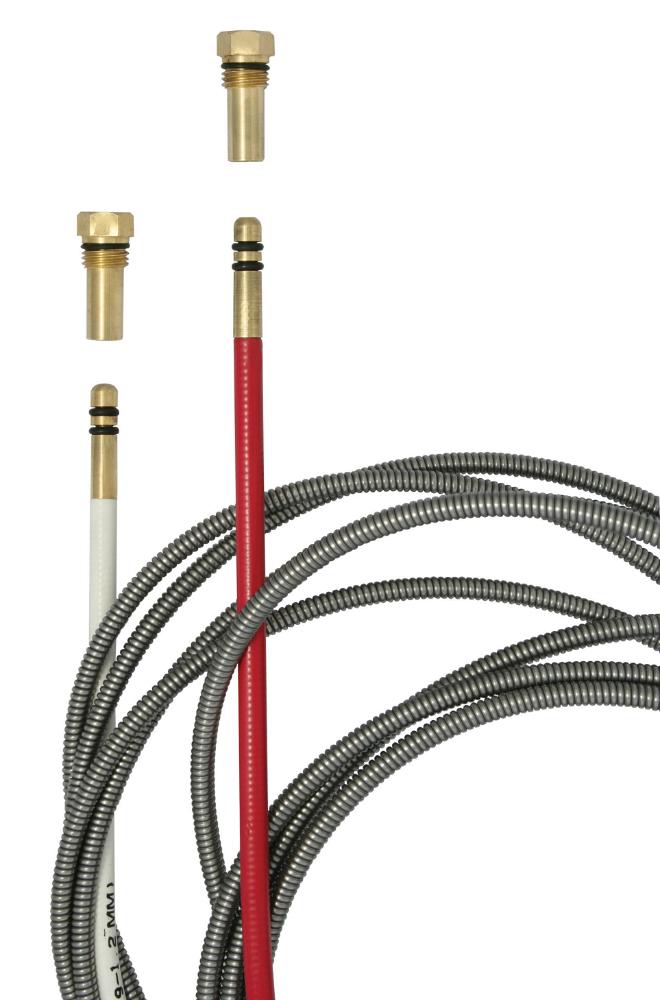
Front-loading Liners. As the name implies, front-loading liners are installed from the front of the robotic welding gun. The liner is part of a system in which the second part, a retainer, is seated in the power pin. This retainer is never removed, only the liner. Simply remove the front-end consumables from the robotic welding gun and feed the liner through the front of the gun. The gun never needs to be removed from the robot, which reduces downtime and increases safety by eliminating the need to enter the weld cell.
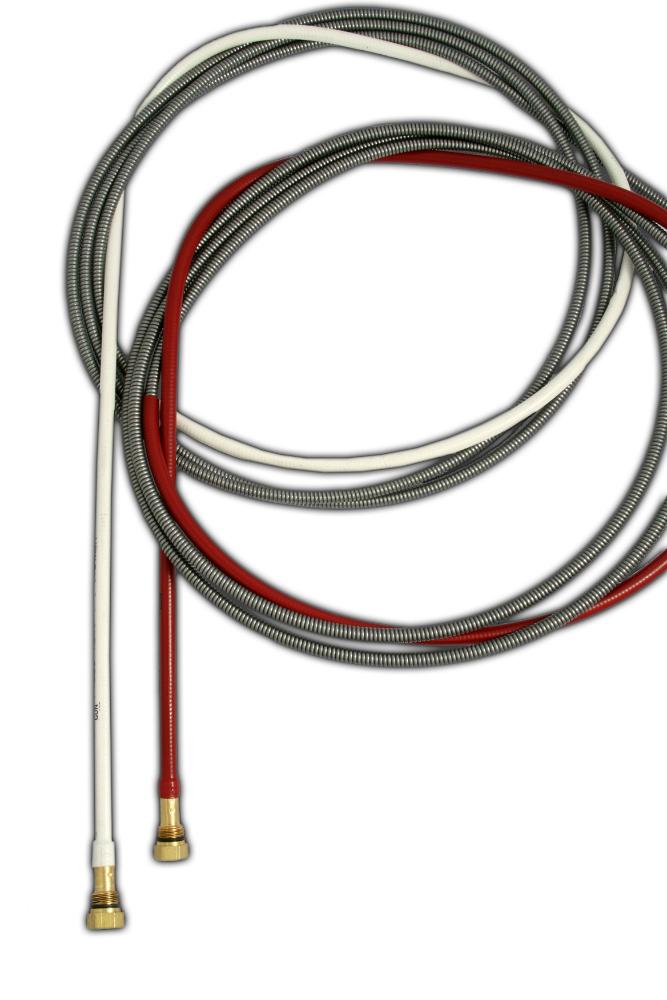
Conventional liners can be used in robotic welding, but they are also a common option for semiautomatic applications. They are installed through the back of the welding gun and can be up to 25 feet long, depending on the application.
Photo courtesy of Tregaskiss.
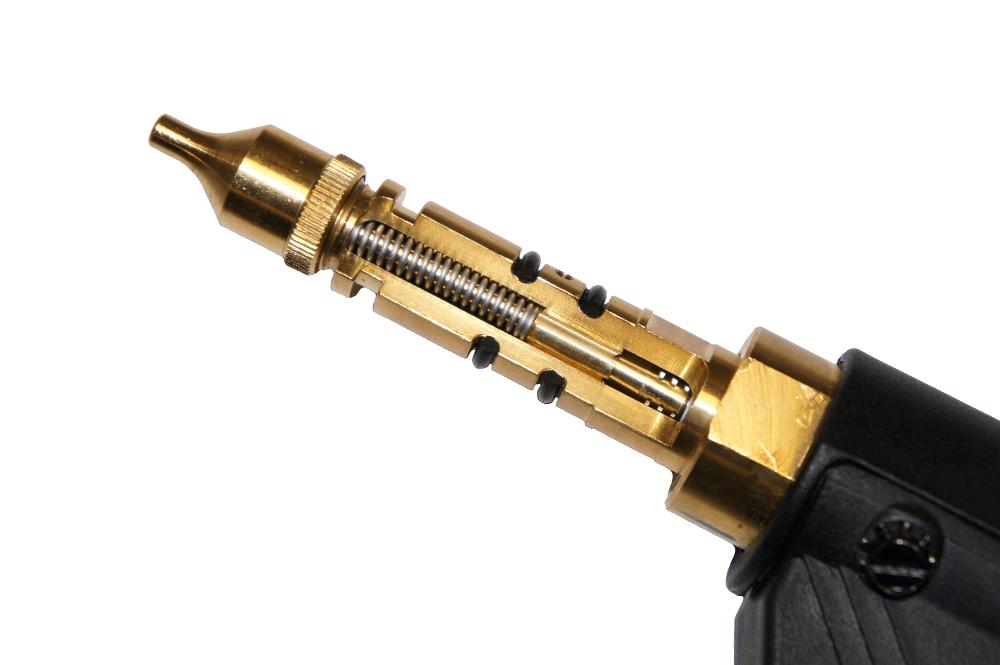
Spring-loaded Front-loading Liners. The third option of liners for a robotic welding gun is a front-loading liner with a spring-loaded module housed in the power pin. This module offers up to one inch of forgiveness, if the liner is too short, and accommodates liner movement during welding. It is designed specifically to minimize downtime and wire feeding and quality issues commonly associated with an incorrectly cut length.
The spring-loaded module applies constant forward pressure on the liner, keeping it seated properly. This system can help decrease burnbacks caused by misalignment between the liner and contact tip and improve wire feedability.
Optimizing Liner Performance
While liners might seem insignificant in the larger context of a robotic welding operation, they can have a big impact on weld quality, costs, and performance. Proper installation and maintenance can reduce downtime, wasted wire, and costly rework associated with poor wire feeding and inconsistent weld quality.
A high-quality liner provides reliable performance. Always choose the right liner size for the wire being used and follow these best practices:
- Always wear gloves when installing a liner to keep it clean and prevent debris from entering.
- Never drag the liner on the floor during changeover.
- Ensure the liner seats securely into the retainer in the power pin.
- Remove any burrs on the liner with wire cutters after it is installed. Doing so prevents the wire from catching in the front and causing an erratic or unstable arc or burnback.
Tips for Installing Conventional Liners
- Cut the wire and remove the power pin from the feeder to take the wire and liner out of the back of the robotic welding gun.
- Feed the liner through the back side of the gun, being sure to thread it through the power pin.
- When retrofitting a gun from a conventional to a front-loading liner, remember the initial installation will take place from the back of the gun, since it will need a receiver on the back end to ultimately accommodate the converted front-loading liner.
Tips for Installing Front-loading Liners
- Ensure the gun is straight and the cable is flattened before removing the front-end consumables. This enables the liner to feed all the way through more easily.
- Remove any beads of molten wire that form after welding by trimming the wire at the front of the robotic welding gun.
- Unravel the coiled liner and put the brass end, which goes into the receiver at the back of the gun, over the wire and through the neck.
- Use short strokes to feed the liner through the front to avoid creating a kink in the liner.
- Once the front-loading liner clicks or snaps into place and after hitting the receiver in the power pin, place the liner gauge on top of the liner and trim it accordingly.
Remember, every component plays a role in providing the weld quality and uptime sought in welding automation. Taking steps to ensure the proper functioning of a liner can pay off in the long term.
About the Author
About the Publication

subscribe now

The Fabricator is North America's leading magazine for the metal forming and fabricating industry. The magazine delivers the news, technical articles, and case histories that enable fabricators to do their jobs more efficiently. The Fabricator has served the industry since 1970.
start your free subscription- Stay connected from anywhere

Easily access valuable industry resources now with full access to the digital edition of The Fabricator.

Easily access valuable industry resources now with full access to the digital edition of The Welder.

Easily access valuable industry resources now with full access to the digital edition of The Tube and Pipe Journal.

Easily access valuable industry resources now with full access to the digital edition of The Fabricator en Español.
- Podcasting

In this episode of The Fabricator Podcast, Caleb Chamberlain, co-founder and CEO of OSH Cut, discusses his company’s...
- Trending Articles
1
AI, machine learning, and the future of metal fabrication

2
Employee ownership: The best way to ensure engagement

3
Steel industry reacts to Nucor’s new weekly published HRC price

4
Dynamic Metal blossoms with each passing year

5
Metal fabrication management: A guide for new supervisors
