President
- FMA
- The Fabricator
- FABTECH
- Canadian Metalworking
Categories
- Additive Manufacturing
- Aluminum Welding
- Arc Welding
- Assembly and Joining
- Automation and Robotics
- Bending and Forming
- Consumables
- Cutting and Weld Prep
- Electric Vehicles
- En Español
- Finishing
- Hydroforming
- Laser Cutting
- Laser Welding
- Machining
- Manufacturing Software
- Materials Handling
- Metals/Materials
- Oxyfuel Cutting
- Plasma Cutting
- Power Tools
- Punching and Other Holemaking
- Roll Forming
- Safety
- Sawing
- Shearing
- Shop Management
- Testing and Measuring
- Tube and Pipe Fabrication
- Tube and Pipe Production
- Waterjet Cutting
Industry Directory
Webcasts
Podcasts
FAB 40
Advertise
Subscribe
Account Login
Search
Troubleshooting sheet metal defects: Part II
Selected defect types and root causes
- By Daniel J. Schaeffler
- March 8, 2016
- Article
- Metals/Materials
Editor’s Note: Part I of this series covered the production terms heat, master coil, slit mult, and pup coil.
Melting and Casting Defects: Inclusions
Alloyed metals are composed of specific elements in well-defined amounts selected to impart desired characteristics in the final product. The main element of the alloy (such as iron or aluminum) is not available in its pure form when extracted from the earth; it is iron ore or aluminum ore (bauxite). These ores contain a significant amount of oxygen and other elements that are removed using thermochemical or electrochemical reactions while the product is molten. If not removed completely, these undesirable components can remain in the final product.
Not surprisingly, the container that holds the molten alloy needs to have a higher melting temperature than the alloy itself. The inside walls of these vessels are lined with high-temperature ceramics. As the molten alloy is stirred in the vessel, abrasive contact can cause small pieces of the ceramic to be knocked off and left in the melt.
The molten metal is poured into a ceramic tundish, and the liquid flows through a ceramic nozzle and into the continuous casting machine or ingot mold. The turbulent flow increases the risk of ceramic particles being dragged into the solidifying product. Once these particles are in the slab or ingot, they cannot be removed.
Because these particles typically are ceramic, they are called nonmetallic inclusions, or more simply, inclusions. They are high in strength but very brittle. While every slab or ingot has inclusions, the type, shape, and number of inclusions determine how detrimental they are to the product.
Inclusions are crack-initiation sites, since they represent a discontinuity in the otherwise uniform metal microstructure. If they occur at or near the surface, these hard particles may affect the visual appearance. If they elongate in the rolling direction of the metal, the material’s ductility will decrease in the perpendicular direction. Using a practice called inclusion shape control, steel mills can prevent the inclusions from elongating, thereby minimizing the reduction in ductility.
If you discover inclusions are causing a problem in your metal, provide its heat number to your sheet mill. This will help the mill determine if anything was noted during melting or casting that could be prevented in the future to improve product quality.
Rolling Defects: Roll Marks
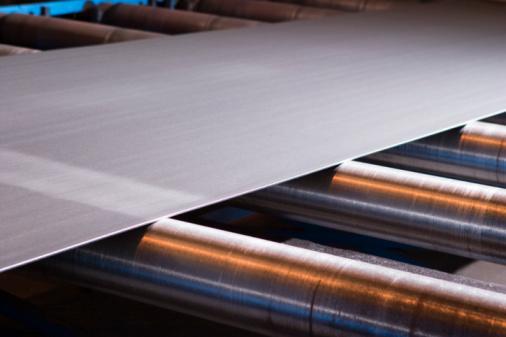
A slab or ingot that begins at 20 feet long may end up being more than a mile in length after it is rolled down to your ordered thickness. The reduction rolls used at the mill rotate at very high speeds, moving coils through the hot rolling mill at speeds as high as 30 miles per hour (MPH), or 44 ft. per second (FPS).
Just as adhesive and abrasive wear can occur on tools used in stamping, particles can adhere to or be removed from these reduction rolls. When this happens, a roll mark is produced.
Even if the offending particle is knocked off after several revolutions, a length of material will be affected. The rolls rotate at about 3 revolutions per second, so if the particle remains on the reduction roll for a dozen revolutions, it will be imprinted on the sheet for four seconds. With the sheet moving at 44 FPS, 176 linear ft. of material will be affected. That doesn’t mean there will be roll marks on all 176 ft. of material, just on the sections that came in contact with the mark on the roll.
If you know the repeat distance between roll marks, you can determine the circumference of the offending roll. Sheet metal mills use rolls of different diameters, so they can match the repeat distance to a specific roll. For better traceability, provide the sheet mill with the coil number so it can check maintenance records. If there is no match, then other sources should be investigated, such as your blanker or a pinch roll that feeds into your press.
If you see a mark in the same location on every blank or every part, it almost definitely was not produced during rolling. Instead, look at your blanking or stamping operation for something that could cause the mark.
Mult Defects: Crown and Wedge
When sheet metal is rolled down to your ordered thickness, the center width position of the master coil is slightly thicker and the coil edges are slightly thinner than the body of the coil. This effect is called crown. The magnitude of the crown can be minimized with certain rolling practices, but thickness will always drop off slightly at the coil edges. This usually isn’t much of a concern, since the coil edges typically are where the carrying web is located in progressive stampings or are part of the engineered scrap in blank-fed stampings.
Issues begin to creep up when your order calls for the master coil to be slit to a width narrower than the master coil. As an example, assume the master coil was produced to a width of 60 inches, but your order calls for 12-in.-wide coils. The mill will produce five mults out of the master coil. The central three mults will have a nearly rectangular cross section, but the outer two mults will have a profile that is wedge-shaped. If your tooling clearances are set to accommodate your ordered thickness (the central three mults), you might see more wrinkles on parts produced from the outer two mults since a portion will be thinner than the remainder.
Keep in mind that the two outer mults have profiles that are mirror images—the thinnest portion is on opposite sides of the slit mult. Depending on your tooling setup, only one of these mults might cause a problem. Worse yet, if you get an edge mult for tooling tryout and you set your clearances and shims accordingly, you may have problems when the 80 percent of the remaining master coil is used, even though the same tensile and chemistry properties appear on the certs.
Tensile Test Locations
Most orders that require the mill to run a tensile test call for one test per coil taken from the head or tail of the coil. This test, usually taken in the rolling direction of the coil (the grain direction), is obtained from the quarter-width or center-width position.
In general, you can assume the test is representative of the entire coil length and width based on adequate mill process control. But that is only an assumption. If you are running into stamping difficulties, try testing the blank that is the next in the lift or one from an adjacent section of the coil.
In addition, to try to save money, some manufacturers perform only one tensile test per heat. The results from this test almost certainly will not represent the properties of all the coils that were produced from the heat, even if they were rolled under the same nominal target conditions. This type of cost savings may turn out to be very costly.
About the Author

Daniel J. Schaeffler
P.O. Box 187
Southfield, Michigan 48037
248-539-0162
Related Companies
subscribe now

The Fabricator is North America's leading magazine for the metal forming and fabricating industry. The magazine delivers the news, technical articles, and case histories that enable fabricators to do their jobs more efficiently. The Fabricator has served the industry since 1970.
start your free subscription- Stay connected from anywhere

Easily access valuable industry resources now with full access to the digital edition of The Fabricator.

Easily access valuable industry resources now with full access to the digital edition of The Welder.

Easily access valuable industry resources now with full access to the digital edition of The Tube and Pipe Journal.
- Podcasting
- Podcast:
- The Fabricator Podcast
- Published:
- 04/16/2024
- Running Time:
- 63:29
In this episode of The Fabricator Podcast, Caleb Chamberlain, co-founder and CEO of OSH Cut, discusses his company’s...
- Industry Events
16th Annual Safety Conference
- April 30 - May 1, 2024
- Elgin,
Pipe and Tube Conference
- May 21 - 22, 2024
- Omaha, NE
World-Class Roll Forming Workshop
- June 5 - 6, 2024
- Louisville, KY
Advanced Laser Application Workshop
- June 25 - 27, 2024
- Novi, MI


