Senior Applications Engineer
The importance of appropriate abrasive belt tensioning cannot be overstated. The harmony between the sanding or grinding head and the belt that it carries is imperative for a variety of reasons.
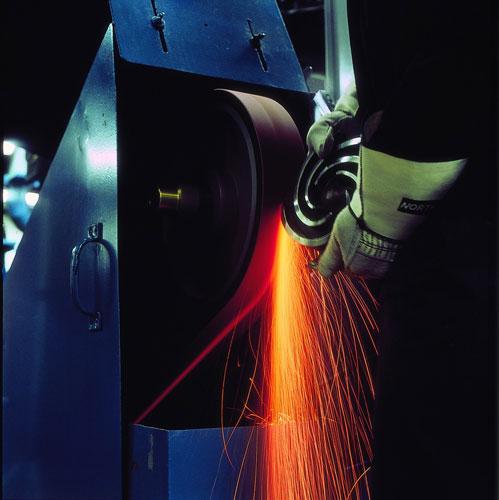
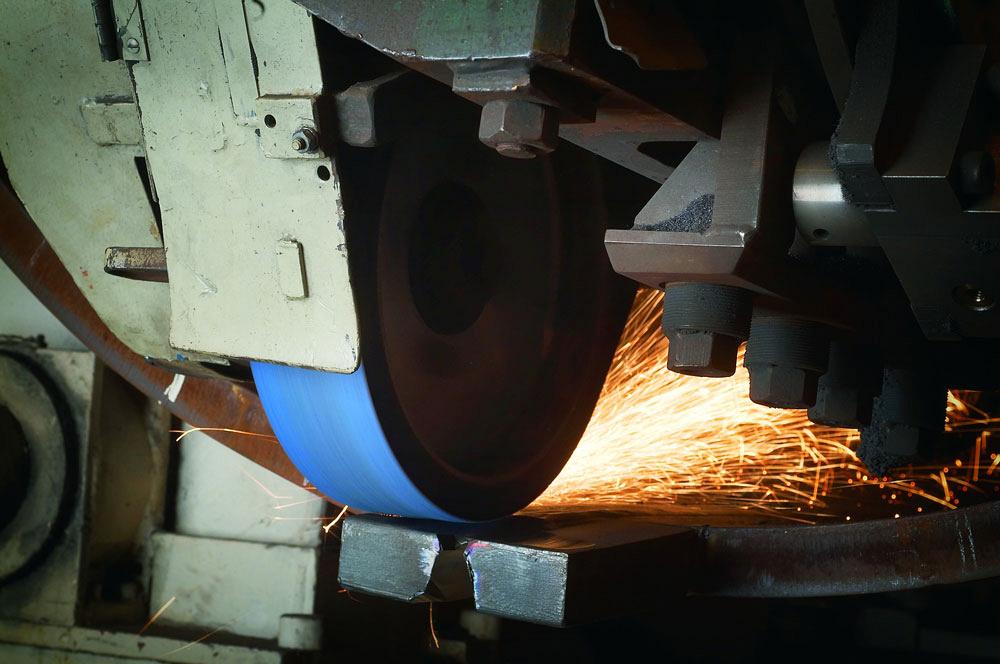
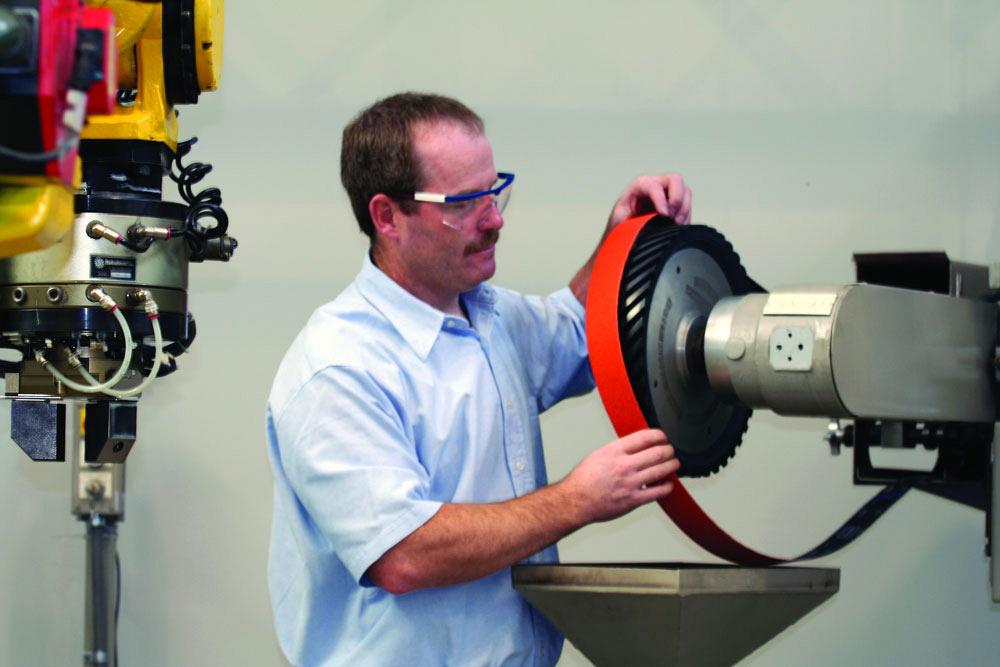
Many types of grinding and sanding equipment use abrasive belts. Abrasive belts of all sizes require tension to operate, whether they are 1/8 in. wide, 128 in. wide, or any size in between. Although some machines use spring pressure to create belt tension, and some wide-belt sheet and coil polishing equipment has hydraulic belt-tensioning cylinders, most machines use pneumatic belt-tensioning cylinders.
The range and design features of machinery that uses abrasive belts vary widely. Although some machines process similar parts, their unique designs can require different amounts of belt tension.
It’s common practice to set the belt tension at the point at which the abrasive belt does not slip on the drive wheel (narrow belts) or roll (wide belts) when sanding or grinding. This is good practice, in theory, but where is that point, exactly? Even if you determine this point, it changes as the abrasive belt wears and friction increases between the part and the belt face as you apply more pressure.
The optimal tension setting is a moving target. For this reason, you need to know the symptoms of high or low belt tension, and how to make the appropriate adjustments to get abrasive belt tensioning back on target.
Low belt tension has a variety of symptoms, including belt tracking problems, such as when a belt randomly tracks off the head in either direction. Before taking corrective action, however, note how the tracking problems occur. The belt tracking off in the same direction (not randomly but always to the left or to the right) may indicate excessive wear on the tracking wheel or roll or other tracking components. It also can indicate side-to-side length variation on the belt (that is, the belt circumference varies slightly across the belt width).
Another low-belt-tension symptom: The printing on the back of the belt shows a high degree of wear. The belt is slipping on the drive roll, which wears the print off on the back side of the belt.
Also watch out for skip marks on the parts being finished. Those marks may have come from the belt slowing down or stopping, which again occurs when the belt randomly slips on the drive roll for short periods. This can be a typical problem when the head encounters higher work loads.
Also listen for short, high-pitched whining when the head starts up or parts are processed. This too may be a result of the belt slipping off the drive roll. Such whining often occurs when the belt has even less tension than the previously described scenarios.
A very common symptom of low belt tension is when a belt folds over onto itself and (usually) breaks. However, this also can be related to roll wear, or a combination of both roll wear and low belt tensioning.
If the belt breaks at its joining tape on the back, the belt has probably been slipping on the drive drum, which, of course, can wear the joining tape excessively.
And finally, look out for reduced belt life. This happens because the abrasive grain does not break down and sharpen as it should, due to less pressure being applied when the belt slips.
A belt tension set too high also can cause tracking problems, but for a different reason. Specifically, high tension can overwhelm the tracking cylinder, which is typically much smaller than the tension cylinders.
The bearings on the head’s drive, tracking, or idler rolls may wear prematurely. In fact, the higher the belt tension is on any type of grinding or sanding equipment, the more wear there is on all related bearings. The overtensioned abrasive belt pulls the roll or roll-shaft ODs against the outer race of the bearings at higher pressures than recommended. This creates higher pressure between the balls/rollers and the inner and outer bearing races. When you are sanding workpieces that produce combustible particulate, these types of bearing failures can be fire hazards.
Highly tensioned belts also tend to break easily. The tension reduces the belt’s ability to absorb high or fluctuating shock loads. Breakages will occur in the body of the belt or near the joining tape.
High belt tension also increases wear on all rolls within the head. Wear typically occurs where the abrasive belt tracks back and forth toward the outside edges of the rolls. However, with higher belt tension, such wear increases excessively.
Pressure Gauging
The vast majority of sanding and grinding equipment runs well under certain conditions. For contact roll heads made of steel or rubber that is 80 durometer (Shore A scale), use 20 to 25 pounds of pressure per linear inch of belt width. For combination heads (contact roll with platen) and platen heads, use 15 to 20 lbs. of pressure per linear inch of belt width.
You can measure belt tension by, among other methods, using certain tools specifically designed for the job. These gauges take a lot of the mystery out of the belt-tensioning process.
In most cases, use the OEMs’ recommended belt tension gauge pressure. However, if the pressure is set to the recommended PSI and you are still experiencing some of the conditions described earlier, check your air gauge for accuracy. Inaccurate gauges can cause expensive, unscheduled downtime.
To check the gauge, you can convert a standard air regulator into a working measurement tool. The regulator must have two output ports and one inlet port. Fit the inlet port with an air plug that matches the coupler on the air line closest to the grinding or sanding equipment. Next, fit a quality air gauge in good condition on one of the outlet ports. Try using a glycol-filled gauge, which is much less likely to lose its accuracy or be affected by environmental conditions. The second outlet port should be fitted to accept the threads of the belt tension air gauge.
When the tool is complete, thread the air gauge to be tested into the outlet port it belongs in and plug the air supply line into the regulator. Compare the air pressure readings between the “good” gauge and the “suspect” gauge at various PSI settings for accuracy. Store this gauge-checking tool in a secure place where it cannot be tampered with or disassembled.
While belt tension air gauges are important, so are their related air regulators, which can leak. Sometimes these air regulators are even used without air pressure gauges, with plant air directly hooked to the tension cylinder. This, of course, isn’t recommended.
These conditions directly affect the air supply to the tension cylinders. Unregulated air going to the tension cylinders can cause high belt tension, while insufficient air supply can cause low belt tension.
The bottom line: Check all regulators periodically for any condition that would prevent them from working properly.
Air leaks, common in many plants that use compressed air, can contribute to abrasive belt tension problems. Leaks can occur in the air supply system as well as in the seals of the tension cylinders themselves.
Many underestimate the problems these air leaks cause and the cost of the wasted compressed air. Be sure to repair all air leaks, and try conducting periodic air audits throughout your facility. Making your compressed air system more efficient is an inexpensive way to generate potential cost savings.
Maintaining the right belt tension takes good preventive maintenance, both of the machine itself and of the air supply line. Operators also need to know the telltale signs that point to a tensioning problem.
As with so many things in manufacturing, it boils down to good training and good maintenance. Doing both can help operators become much more efficient in maintaining what remains a critical yet still commonly overlooked operational parameter.
Photos courtesy of Norton|Saint-Gobain Abrasives.
Abrasive Belt Tension Formulas:
Example:
Tension cylinder has a 3-in. inside diameter, 1.5-in. radius; air gauge PSI is 15.0 (gauge must be accurate); 4-in. belt width.


The Fabricator is North America's leading magazine for the metal forming and fabricating industry. The magazine delivers the news, technical articles, and case histories that enable fabricators to do their jobs more efficiently. The Fabricator has served the industry since 1970.
start your free subscription
Easily access valuable industry resources now with full access to the digital edition of The Fabricator.

Easily access valuable industry resources now with full access to the digital edition of The Welder.

Easily access valuable industry resources now with full access to the digital edition of The Tube and Pipe Journal.

Easily access valuable industry resources now with full access to the digital edition of The Fabricator en Español.
In this episode of The Fabricator Podcast, Caleb Chamberlain, co-founder and CEO of OSH Cut, discusses his company’s...