Owner, Brown Dog Welding
- FMA
- The Fabricator
- FABTECH
- Canadian Metalworking
Categories
- Additive Manufacturing
- Aluminum Welding
- Arc Welding
- Assembly and Joining
- Automation and Robotics
- Bending and Forming
- Consumables
- Cutting and Weld Prep
- Electric Vehicles
- En Español
- Finishing
- Hydroforming
- Laser Cutting
- Laser Welding
- Machining
- Manufacturing Software
- Materials Handling
- Metals/Materials
- Oxyfuel Cutting
- Plasma Cutting
- Power Tools
- Punching and Other Holemaking
- Roll Forming
- Safety
- Sawing
- Shearing
- Shop Management
- Testing and Measuring
- Tube and Pipe Fabrication
- Tube and Pipe Production
- Waterjet Cutting
Industry Directory
Webcasts
Podcasts
FAB 40
Advertise
Subscribe
Account Login
Search
Fabricating metal whirligigs with my retired millwright father-in-law
How making and fixing metal lawn ornaments became the perfect hobby for a former UAW tradesman
- By Josh Welton
- July 4, 2019

When Josh Welton’s father-in-law retired after decades of working as a millwright and a millwright instructor, he took up fabricating metal whirligigs for family, friends, and his own yard.
My father-in-law, Bob Burl, retired from Warren Truck Assembly and Chrysler in 2009. At the time everyone in the family wondered what he was going to do with all his extra time.
Bob was a millwright and/or millwright instructor for more than three decades, and he always worked loads of overtime. Skilled tradespeople in the United Automobile Workers (UAW) labor union and around the auto industry tend to work a lot of hours, and he was on 7-12s, working 84-hour weeks more than not.
With his kids all grown up and out of the house, as well as his inability to terrorize the ballfields like he used to due to foot and knee issues from wear and tear over the years, we all kind of thought he’d go nuts sitting around the house with this new free time.
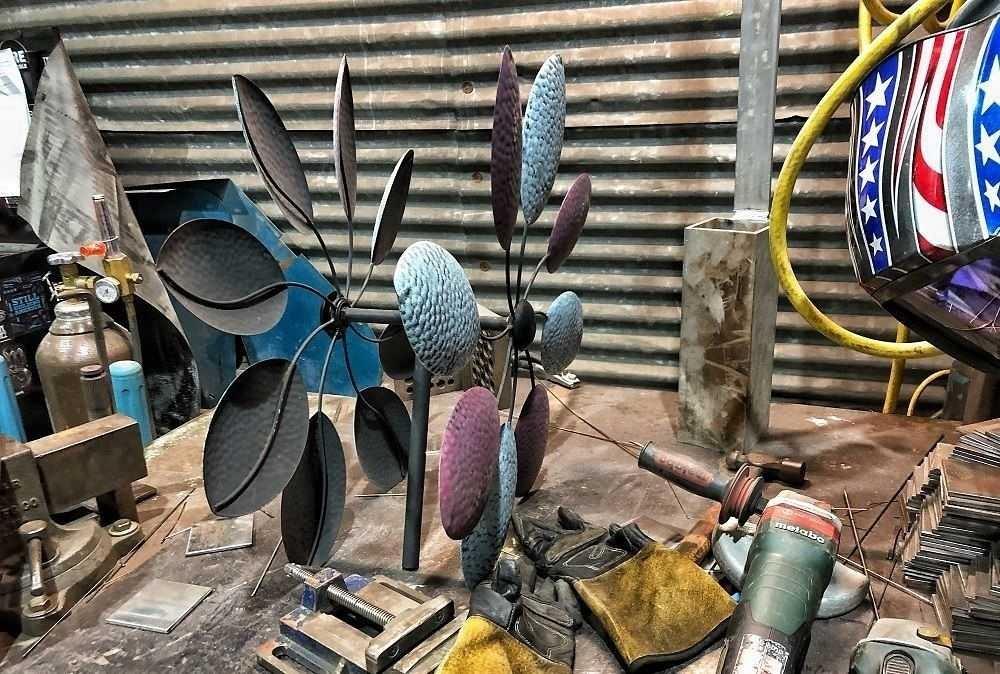
Then he started making whirligigs for family, for the neighbors, and for his own yard. What exactly is a whirligig? It’s simple, really: just a plastic or metal object that sticks in the ground with rotating arms or blades, like a pinwheel (you'll see plenty of them donned with stars and stripes this extended Independence Day weekend). He’d find old ones to repair, and he’d make his own. He doesn’t have his own MIG or TIG welder yet (although he’s going to borrow my Miller Multimatic 215), so sometimes he needs a hand.
A while back he gave me a steel whirligig to fix. I took forever to get to it, but finally I did. The factory tack welds holding the main vertical support to the horizontal axle housing had cracked.
The metal was superthin and dirty, so I broke out the silicon bronze filler once again to use with my Miller Multimatic 220. This is one of those “it’s not always going to be pretty” repairs. The metal wanted to curl away at the first sign of an arc, but eventually I was able to bridge the gap. You can see I used the broken tacks like puzzle pieces to line it up. If I use that technique on more structural pieces, I’ll go back once the piece is securely in place and grind out the tacks or broken edges.
With the SiB rod and the Multimatic 220 I could also have used AC, but I stuck with DC. Once I gooped enough filler in there, I cleaned up the joint with a Weiler flap disc in one of my Metabos.
Bam! Better than new and ready to take a spin in Bob’s yard.
subscribe now

The Fabricator is North America's leading magazine for the metal forming and fabricating industry. The magazine delivers the news, technical articles, and case histories that enable fabricators to do their jobs more efficiently. The Fabricator has served the industry since 1970.
start your free subscriptionAbout the Author

- Stay connected from anywhere

Easily access valuable industry resources now with full access to the digital edition of The Fabricator.

Easily access valuable industry resources now with full access to the digital edition of The Welder.

Easily access valuable industry resources now with full access to the digital edition of The Tube and Pipe Journal.
- Podcasting
- Podcast:
- The Fabricator Podcast
- Published:
- 04/16/2024
- Running Time:
- 63:29
In this episode of The Fabricator Podcast, Caleb Chamberlain, co-founder and CEO of OSH Cut, discusses his company’s...
- Trending Articles
AI, machine learning, and the future of metal fabrication

Employee ownership: The best way to ensure engagement

Steel industry reacts to Nucor’s new weekly published HRC price

Dynamic Metal blossoms with each passing year

Metal fabrication management: A guide for new supervisors

- Industry Events
16th Annual Safety Conference
- April 30 - May 1, 2024
- Elgin,
Pipe and Tube Conference
- May 21 - 22, 2024
- Omaha, NE
World-Class Roll Forming Workshop
- June 5 - 6, 2024
- Louisville, KY
Advanced Laser Application Workshop
- June 25 - 27, 2024
- Novi, MI


