


Contributing Writer
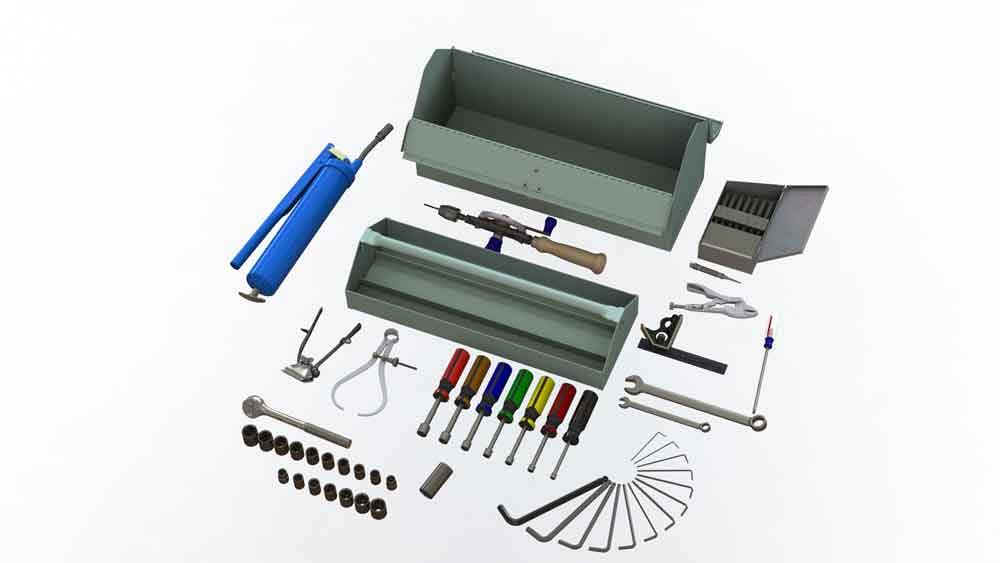
Figure 1
CAD prop models are actors in this new CAD model. The props are useful for visual verification of service access in a design and for preparing illustrations.
Editor's Note: If you would like to download the 3D CAD files associated with this column, click here.
Figure 1 shows some props—CAD models of hand tools—created by the author. These props are useful for predicting and illustrating access for service or assembly in a design. Several of the models in Figure 1 also have been used in this column as topics to explain CAD techniques.
Here’s a side note: Most of the models shown in Figure 1 have been around for years. Many are available as download links in related episodes. It may be informative to examine the details of their modeling techniques:
The nut drivers, snap-center punch, and box end wrench are old projects that debuted here but remain candidates for future articles. Such prop models are not intended to be manufactured, but their semblance must be very representative of the real deal.
While props of all kinds are available nearly instantly, an occasional carefree workout to create a prop improves CAD jockey proficiency. When you are evaluating an applicant for a CAD position, a review of their body of hobby work can be informative.
Here’s another side note: The mainstream 3D CAD package being used in support of this article has an accessory called Toolbox. To avoid confusion here, the green toolbox shown in Figure 1 is our tote box prop. Please give welcome as the FMA Tote Box debuts in this article.
The tote box shown in Figure 2 is presented as both a CAD topic and as an object that might be fabricated, perhaps as part of an apprenticeship program tailored to your shop or perhaps as a resume or calling card. A person who can produce such a finished item has a journeyman’s suite of trade skills and access to some versatile and pretty accurate machinery. Apprentice topics found in this tote box might include print reading; drafting; creating flat layouts; shearing; CNC programming for laser cutting, plasma cutting, and punching machines; blue dying and scribing; notching and filing; deburring; forming jogs, hems, and odd angles; tube rolling, creating hinges; spot welding; riveting; and painting. There might even be a bit of plastic crafting in there.
The completed tote box as a diploma of craft skill is only part of the story. As a product line, the tote box presents challenges to production planning, manufacturing engineering, purchasing, and accounting. Many functional business units could get involved.
In a former life as an estimator, I predicted time and material, as well as pondered the collected actual time and material. The feedback improved my aim as a guesser. An accountant converted my time and material into monetary value. Planning, building, and doing a postmortem cost analysis on this box would have been a marvelous experience for us both.
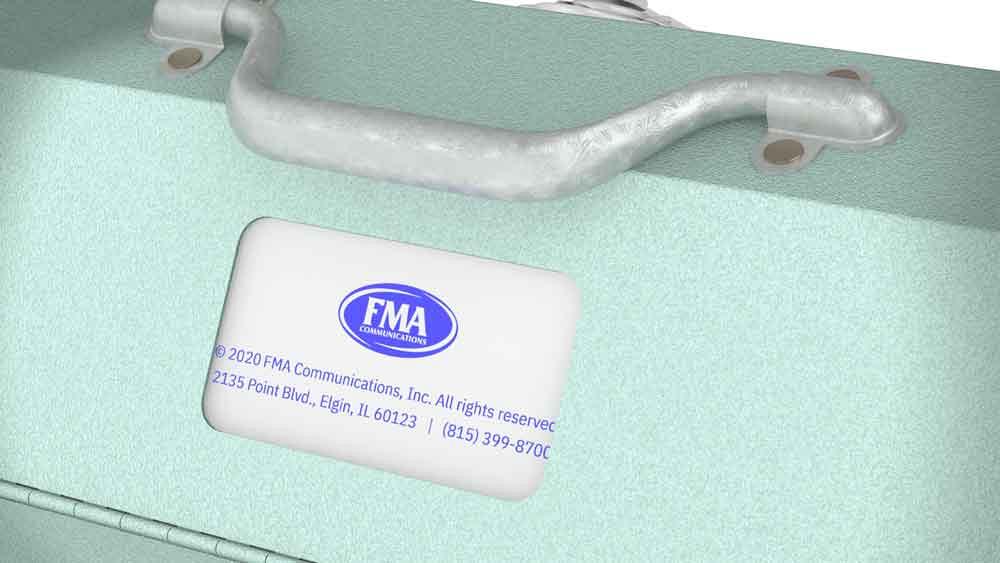
As an entry-level design for a tote box, this is a simple forming and spot welding job. Perhaps the closest thing to innovation is the business card holder/plastic windowed cutout shown in Figure 3. An elaborate feature like this works nicely for identifying what is in the tote box. This design uses a 1/16-in. clear polycarbonate cover to protect a business card-sized label.
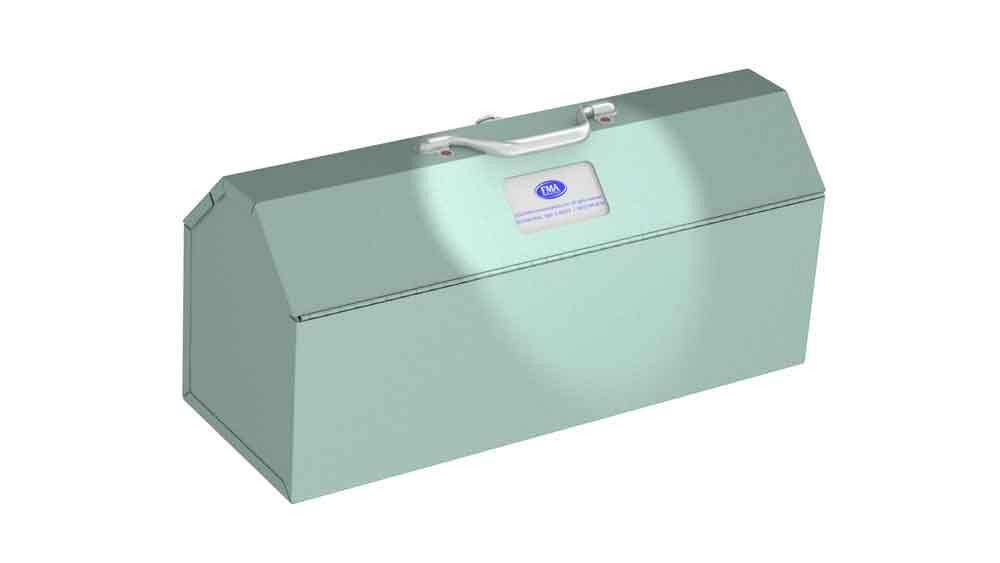
Figure 2
The completed toolbox is called a tote box in this article. This might be a diploma of trade skills, including various CAD skills.
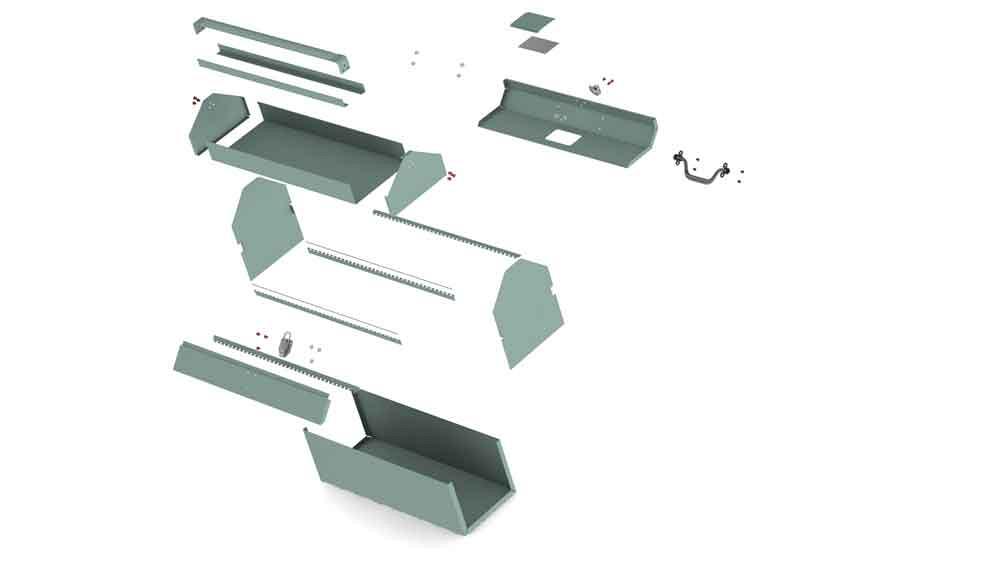
Figure 4 is an exploded view of the tote box project. As a “simple” exercise in sheet metal fabrication, this puppy got a little carried away. Based on recollections of the days when high schools had craft shops with manually operated stomp shears and box and pan brakes, I included some features on this tote box that are created with the use of powered machinery. If necessary, however, a manual tool like a Pexto could do most of it.
To explain the exploded view, six of the items in Figure 4 are really just two piano hinges. Each leaf and pin of the 20-ga. piano hinges, with 1-in. opening, ¼-in. knuckle, and 1/16-in. pin, are shown. The folding handle and bale latch are riveted, not welded, as is the tray handle.
All of the sheet metal is of the same thickness (20 ga., which is about 0.036 in. thick). Unusual features are the card holder, plastic window, paper label, and corresponding cutout in the lid.
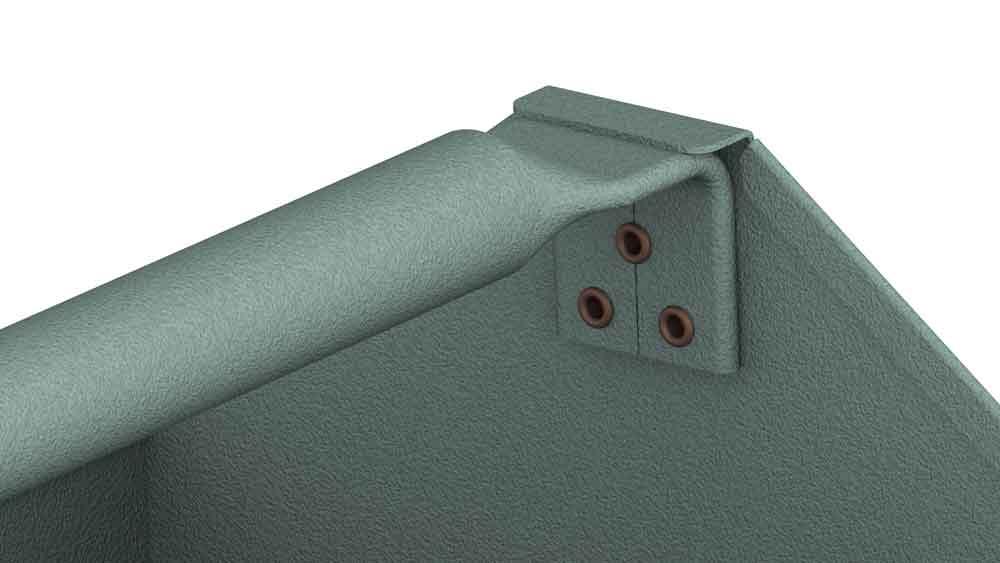
The tray handle—see the closeup in Figure 5—is an open-seamed tube with smashed ends yanked over at 90 degrees and staked with match-drilled rivets. The fabrication process and the degree of craftsmanship are evident in this component.
The source of the tube stock for the tray handle is, of course, optional. It is modeled as the same sheet metal gauge. With the right machine, it is practical to roll the tray handle from sheet stock.
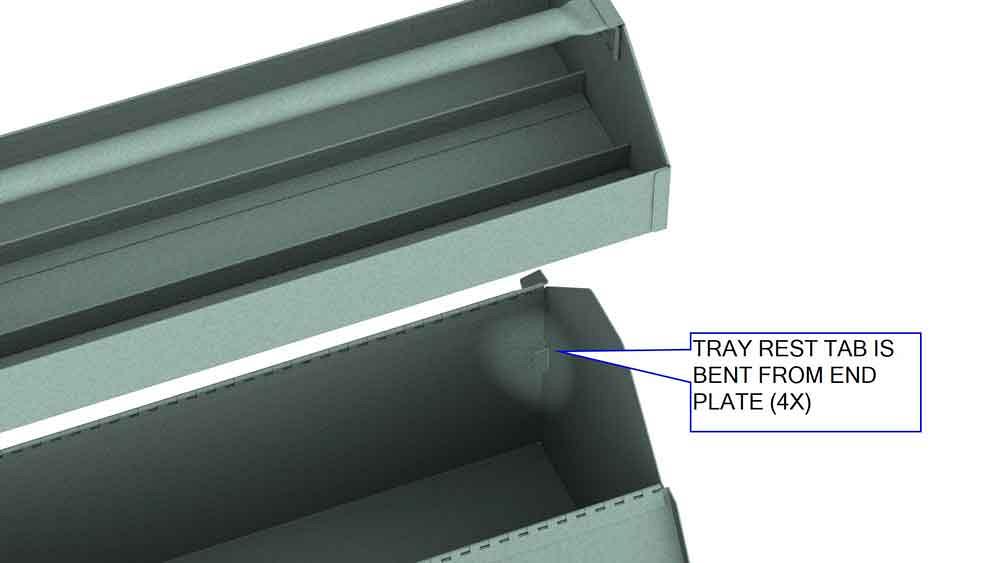
The forming operations for this box include four little tabs (see Figure 6). These tabs, bent from the sheet metal ends of the main box, create four rest stops for the lift-out tray. In a pinch, those tabs could be bent virtually with the pliers shown in Figure 1. CAD jockeys love wry humor.
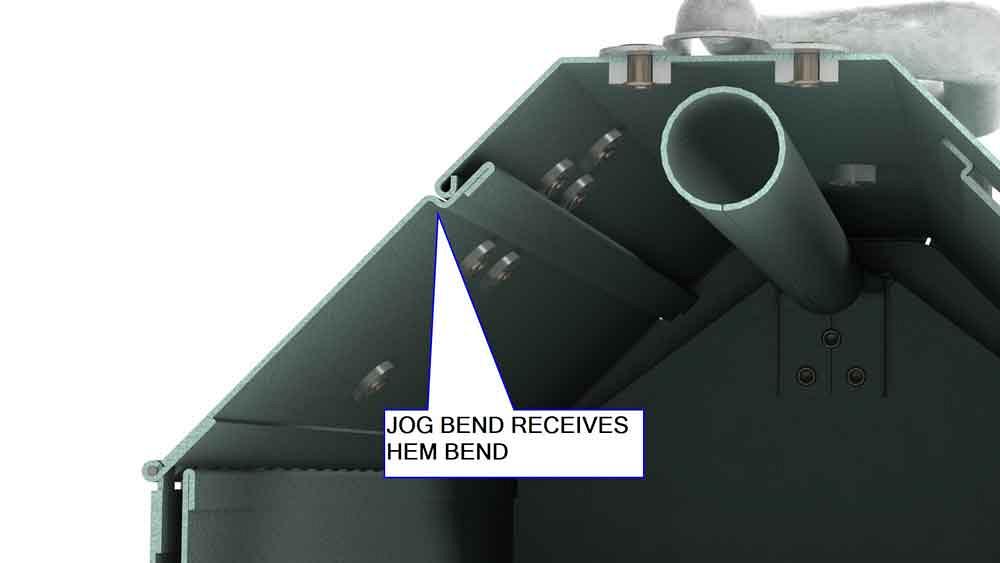
Figure 7 is a cross-section view of the tote box with closed lids. The jog bends in the smaller latch lid allow the hem in the big lid to nestle so the latch connects nicely.
That’s the FMA Tote Box overview. Expect tips for modeling piano hinges and other parts of this project in upcoming episodes. We’ll also cover BOMs, prints, and work orders. Stay tuned.
Gerald would love for you to send him your comments and questions. You are not alone, and the problems you face often are shared by others. Share the grief, and perhaps we will all share in the joy of finding answers. Please send your questions and comments to dand@thefabricator.com.


The Fabricator is North America's leading magazine for the metal forming and fabricating industry. The magazine delivers the news, technical articles, and case histories that enable fabricators to do their jobs more efficiently. The Fabricator has served the industry since 1970.
start your free subscription
Easily access valuable industry resources now with full access to the digital edition of The Fabricator.

Easily access valuable industry resources now with full access to the digital edition of The Welder.

Easily access valuable industry resources now with full access to the digital edition of The Tube and Pipe Journal.

Easily access valuable industry resources now with full access to the digital edition of The Fabricator en Español.
In this episode of The Fabricator Podcast, Caleb Chamberlain, co-founder and CEO of OSH Cut, discusses his company’s...


