


Industrial Storage Sales Engineer

What exactly makes a Ford F-250 cost more than an F-150? From the outside, they look pretty much the same, right? It’s not until you lift the hood and check the undercarriage that you notice what makes the F-250 capable of handling higher payloads. That’s what makes it worth more of your hard-earned cash.
The same idea applies to structural storage racking. When comparing different systems at face value, you see I-beam construction, heavy-duty bolts, and structural bracing. It’s easy to assume they can handle the same weight—especially if the advertised steel sizes and weight capacities are the same.
The truth, however, is that just like pickup trucks, you need to do more than kick the tires to ensure you’re getting a racking system engineered to safely handle your required loads over years of use. The racking you select should contain five critical design elements: 50-KSI I-beams, A325 bolts, a 100 percent load utilization, fully welded arms, and full load-bearing cradles and shelves (where applicable).
Let’s have a look under the hood to see how each of these design aspects affects how effective and safe your racking can be.
When it comes to storing heavy materials, the shape and type of steel used for columns, arms, and shelf beams significantly affect the racking system’s performance. Hot-rolled, wide-flange, or standard-shape I-beams offer sufficient mass to handle high loads. They also resist damage from material handling equipment.
Thin-gauge cold-rolled or roll formed steel relies on its shape to support the weight. Once this type of steel is damaged, it becomes compromised and may no longer support its designed weight capacity.
The soda can trick illustrates this concept. When executed carefully, a small person can stand on a soda can without crushing it—not because it’s extremely sturdy but because its design, in an undamaged state, can handle the weight. However, push a small dent in its side and the can will collapse under the same weight.
The same principle applies to roll formed steel in racking. Its design can hold certain thresholds of weight, but the steel members are susceptible to damage, which can compromise the racking system’s integrity.
Deflection in racking systems is normal. As heavy material is loaded and unloaded, the racking shelf or arm will deflect from holding heavy material and return to its original position when unloaded. This can happen thousands of times over the life of a rack.
The stronger the steel is, the more product it can support before permanent deformation becomes evident. Over time, as products are repeatedly loaded and unloaded, deformation will begin to appear in a cheaper grade of steel, whereas 50-KSI steel will continue to bring the shelf or arm back to its original position.
Another benefit to using steel with a higher KSI is that the rack design can handle heavier loads with less mass. For example, a cantilevered arm made of a lower-KSI steel will need to be larger to handle the same weight as an arm fabricated out of 50-KSI steel. Choosing a system built with 50-KSI steel can help save space.
To build a sturdy, heavy-duty racking system, it’s crucial to have strong connections between the arms, beams, and columns. This is especially true for cantilever rack systems, which provide unobstructed storage for elongated materials like pipes and tubes. Cantilevered racks have just one end of the arm supported by a central column.
The connections matter, as do the type of bolts used. Using high-performing hardware like the ASTM A325 bolt can make a real difference in the rack’s overall integrity.
The A325 bolt is the grade of choice for bridge and building construction. Its heavy hex head and long shank length (the nonthreaded portion of the bolt body) make it a suitable choice for structural rack systems as well.
The oversized hex head provides a wide bearing surface to distribute the load. The long shank length ensures that the shear plane—between the arm connector plate and the column I-beam, for example—falls on the solid shank and not on the threads. The weakest section of a bolt is the threaded region, so while this may appear to be a small design difference, it does create a stronger connection. An A325 bolt also adds strength in an overload situation in which a rack is holding more material than it was engineered to handle. The bolts also can be hot-dip galvanized to resist corrosion and provide a weather-resistant connection.
Most commonly applied to cantilever racking, 100 percent load utilization means all arms are loaded simultaneously to their maximum rated capacity for a given application.
To economize the column and base design, racks sometimes are engineered for average loading, which is less than 100 percent utilization. The idea is that a shop manager believes at no point will all arms be used fully, so the base and column do not need to be engineered to that full capacity.
Consider a cantilever rack with 10 arms, each with a 3,000-pound capacity. When fully loaded, that’s 30,000 lbs. of material to support. A manager in charge of installing a rack might insist that no more than eight of the arms will be used at any one time. To save money, engineers design the column and base to hold 24,000 lbs.
This is never a good idea. Simply put, whatever the cumulative maximum capacity is on the arms or shelves, the base and column must be engineered to match.
If you are installing double-sided cantilever racks, ensure that the system is engineered to support uneven loading. The rack should be safe and stable, even if it’s fully loaded on one side and empty on the other—a common condition when loading the rack for the first time. Never rely on material weight on one side to balance out the material weight on the other side.
You will see no visual cues to tell you whether a system is engineered to meet this capability. For this reason, the design and engineering documents should disclose that the double-sided cantilever racks have been engineered to be fully loaded on one side, regardless of the loading condition on the opposite side.
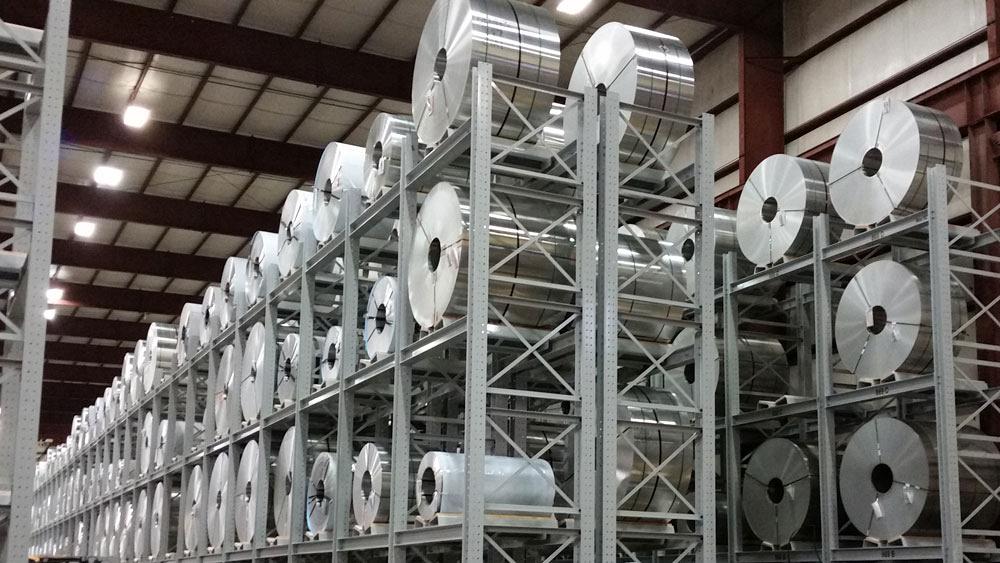
When storing heavy coils, tools, and dies, it’s hard to plan for future weights, shapes, and sizes. Some items will span the width of the shelf and rest on both steel support beams, but others won’t. When this is the case, it’s important to have a storage rack designed to be fully load-bearing, no matter where the material sits.
For example, when storing narrow coils, it’s common practice to place the coil in the center of the cradle so that it doesn’t rest over one or both shelf beams. To compensate, rack manufacturers should adjust the angle, width, and thickness of cradle supports to handle the highest load at the weakest point—the center of the cradle. Coil cradles also should be designed so that the coils always rest on a flat surface rather than the edges of the cradles, which can lead to severe creasing or flattening.
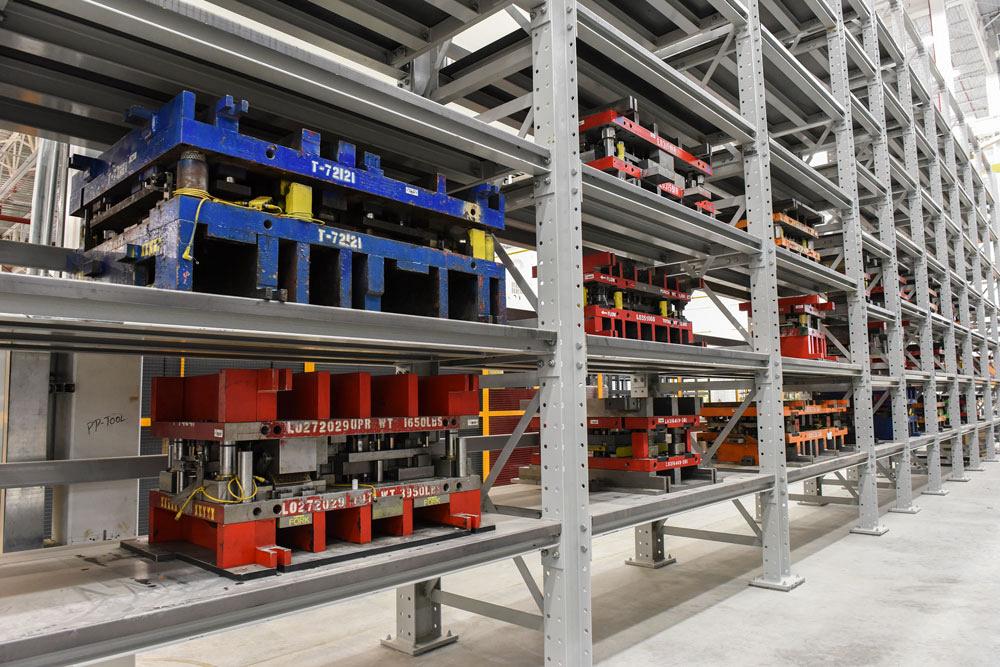
Tools and dies come in a variety of shapes and sizes; sometimes they’re very compact and yet very heavy. As a result, they might not rest evenly over one or both support beams, but their heavy weight still must be supported. Without a rack engineered to be fully load-bearing, these items eventually may deform the rack beams and endanger the products being stored—and, most critically, the people handling those products.
Safe, heavy-duty racking should have fully welded beams and arms. This is especially important on cantilever racks.
When a forklift driver accidentally pushes the forks up under a rack arm, he creates an uplift load condition that can be especially damaging to an arm that isn’t fully welded. A forklift with a mere 6,000-lb. loading capacity can significantly damage an arm, especially if it does not have any weight stored on it. Welding around the entire perimeter of the I-beam at the connector plate increases support to protect the arm from these uplift loads.
While it’s uncommon to find cantilever racks that aren’t fully welded, you can check the weld to make sure. If it’s not fully welded, the area most likely to be missing a weld is the bottom of the flange or the side of the web. The rack should have a fillet weld that is continuous around the arm material and connector plate. While some aspects of the weld are hard to inspect after painting, you can check to make sure the weld is placed evenly at the root of the joint between the arm and plate material.
Because rack manufacturers design their systems using various engineering methods and materials, buyers should understand how these differences affect durability, loading capacity, and safety.
Specifying these five design elements in your next racking system will result in not only a more durable and sturdy system, but one that’s safe for both products and employees. Yes, it may cost a little more up front, but just like the F-250, you know you have a product that’s built to handle the job.
Tracy Buck is industrial storage sales engineer at Ross Technology, 104 N. Maple Ave., Leola, PA 17540, 800-345-8170, www.rosstechnology.com. Images provided by Ross Technology.

The Fabricator is North America's leading magazine for the metal forming and fabricating industry. The magazine delivers the news, technical articles, and case histories that enable fabricators to do their jobs more efficiently. The Fabricator has served the industry since 1970.
start your free subscription
Easily access valuable industry resources now with full access to the digital edition of The Fabricator.

Easily access valuable industry resources now with full access to the digital edition of The Welder.

Easily access valuable industry resources now with full access to the digital edition of The Tube and Pipe Journal.

Easily access valuable industry resources now with full access to the digital edition of The Fabricator en Español.
In this episode of The Fabricator Podcast, Caleb Chamberlain, co-founder and CEO of OSH Cut, discusses his company’s...


