Product Manager, CWI

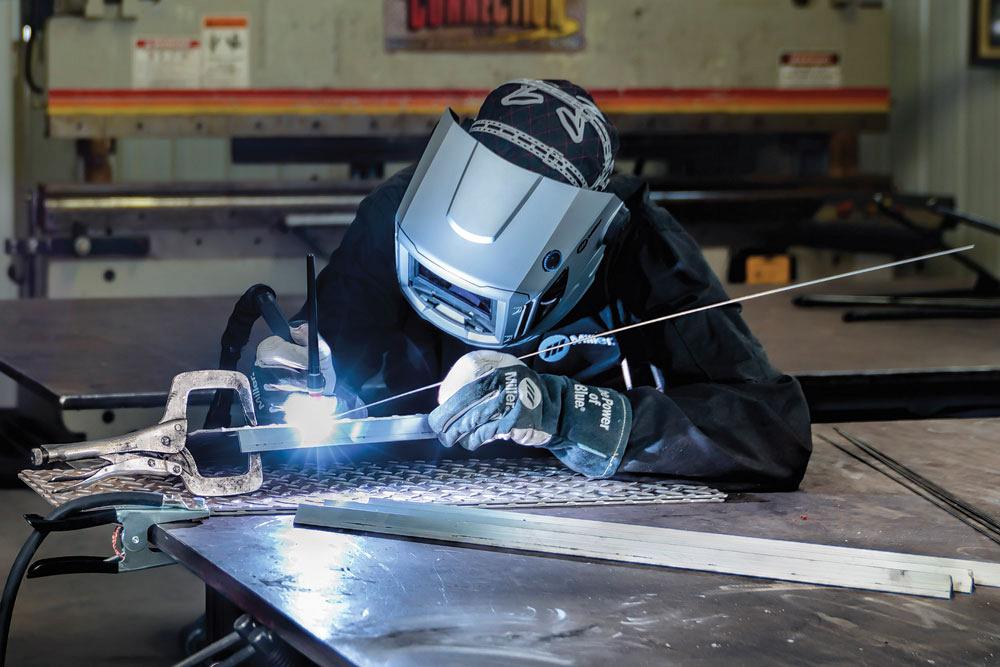
Adding more filler metal is one technique you can use to achieve the stacked-dimes look when welding aluminum with GTAW.
Manufacturing products with aluminum can help extend part life, reduce weight, and deliver greater integrity in cold temperatures, making the material well-suited for applications such as truck and trailer manufacturing, cryogenic piping, and boat components.
However, welding aluminum presents some challenges, from controlling heat input to dealing with the oxide layer. Gas tungsten arc welding (GTAW) has traditionally been considered the go-to process for welding aluminum because of the high weld integrity and aesthetic appearance the process provides.
Achieving high-quality welds—and getting the coveted stacked-dimes appearance—when welding aluminum with GTAW takes practice and skill. It’s also helpful to follow some key best practices.
While GTAW is a slow process and not typically used in high-production manufacturing, it is often a good choice in aluminum welding applications where productivity isn’t as important as quality and appearance.
During aluminum welding with the gas metal arc welding (GMAW) process, filler metal is fed into the puddle as soon as the welder squeezes the gun trigger. These “cold starts” can result in lack of fusion and insufficient penetration.
With GTAW, you control when the filler metal is added and are able to establish the puddle and ensure proper penetration before adding filler metal. Keep in mind that having more control over this variable adds another layer of complexity and operator skill compared to other processes such as GMAW.
Proper heat input is a critical factor in successfully welding aluminum with GTAW. Because aluminum is so conductive, the heat of the weld puddle can be pulled away quickly. This characteristic requires putting in a lot of heat to establish the weld puddle. However, this heat must be controlled to prevent a runaway puddle or burn-through.
Heat in welding is a function of amperage and voltage, which means the higher the arc voltage, the more power going into the part. Although welding with a longer arc increases arc voltage, which in turn produces more heat, it also heats a much larger area of the material. This can cause a runaway puddle that grows quickly. To prevent this, use a shorter arc length to help localize the heat to a small area.
In addition to properly controlling heat, consider these seven tips to optimize results when welding aluminum with GTAW.
Many operators, especially those new to aluminum welding, may not realize the material generates an oxide layer. Oxidation on aluminum tends to be a dull silver color and is harder to see than red oxidation, or rust, on steel. In addition, the melting point of aluminum oxide is about three times the melting temperature of the base material.
Aluminum is conductive, so the heat of the weld puddle can be pulled away quickly. This characteristic requires putting in a lot of heat to establish the weld puddle, but controlling that heat is key to preventing a runaway puddle or burn-through.
Cleaning the oxide layer with a dedicated stainless steel wire brush or carbide cutter before welding is important. However, even with proper cleaning, the oxide layer begins re-forming immediately, which can obstruct your view of the weld puddle.
This makes it critical to use alternating current (AC) polarity with the GTAW process on aluminum. With AC, the direction of current flow continuously changes throughout the weld. AC polarity provides a cleaning action that helps remove the oxide layer on aluminum, allowing you to see the molten weld pool.
Another step that contributes to making a good aluminum weld is setting the proper balance control. When you are welding in AC polarity, the weld has an electrode-negative (EN) cycle and an electrode-positive (EP) portion of the cycle. EN is often considered the welding side of the AC waveform, while EP is where the cleaning or oxide removal occurs. On modern welding equipment, the balance control feature allows you to adjust the ratio between the two in response to what you’re seeing in the weld puddle.
While older equipment had a truly balanced 50-50 ratio of EN and EP, many modern GTAW power sources have a factory preset balance control of 75 percent EN to 25 percent EP. If small black flecks appear in the puddle during welding—often referred to as “peppering”—your balance control is not adjusted properly. Turning the balance control down so there is less EN and more EP helps remove more oxide during welding and should reduce the peppering.
Turning the EN down to provide more cleaning action may be necessary when you are welding material that’s been in service or exposed to the elements and, as a result, has a thick oxide layer that wasn’t completely removed during material preparation. But be aware that using a lower balance setting (more EP) puts the majority of the heat on the tungsten and can cause the tungsten tip to ball back, which affects your ability to control arc direction and placement of the weld.
Adjusting the balance control does not replace the need for proper material prep and cleaning when welding aluminum.
Another factor that makes weld placement easier is the AC output frequency. This also can be set and adjusted on modern welding power sources. AC output frequency shouldn’t be confused with high-frequency arc starting, which only comes into play for arc starting.
The output frequency references how many times per second the power source switches polarity. Older GTAW power sources are 60 hertz, which is determined by the input power, but modern equipment has a factory preset of 120-Hz output frequency. The higher the AC output frequency, the more stable the arc becomes. This results in a tighter, narrower arc column that provides more directional control, allowing you to more easily weld in tight spaces and weld precisely without the arc wandering.
Turning down the AC output frequency to 80 or 90 Hz provides a wider arc cone, which can be helpful when welding an outside corner joint.
Use an output frequency of 150 to 250 Hz on thin materials that require accurate weld placement to prevent heating up a large area or burning through. For welding thick materials, a low AC frequency of 80 to 120 Hz is typically well-suited for materials 3⁄8 in. and thicker and will help you to achieve a wider weld bead profile.
Proper heat input is a critical factor in successfully welding aluminum with GTAW.
In GTAW, amperage is controlled with a foot pedal or fingertip control, but it’s best to set the appropriate maximum amperage on the equipment. The rule of thumb for aluminum GTAW is to use 1 amp for every thousandth (0.001) of material thickness. In other words, welding a base material that is 1⁄8 in. (0.125) thick would require about 125 amps.
When the base material is more than ¼ in. thick, the rule of thumb begins to deviate, and not as much amperage is needed. For example, you can weld 3⁄8-in. material with a 280-amp power source.
Joint geometry also can affect the necessary amperage. When you are welding a T-joint, the heat can flow in three directions, compared to welding a butt joint where the heat can flow only in two directions. This means a T-joint requires more heat input.
Some modern welding power sources allow you to set the AC amperage independently, which helps achieve greater penetration and productivity.
With this feature, you can increase the amperage during the EN portion of the cycle to drive greater penetration in the weld, since more amperage is generally correlated to more penetration.
This feature generally is used in higher-amperage applications that may need only 200 amps for the EP cycle to achieve the necessary oxide cleaning, but you may want 300 amps for the EN cycle to achieve more penetration. Setting the AC amperage independently can also prevent the need for increasing tungsten size, since most of the heat is put on the tungsten in the EP portion of the cycle. A power source with the right technology allows you to tailor each amperage independently to achieve the desired results.
The balance control and the independent AC amperage may sound the same, but they control two different aspects. Adjusting the balance control affects the level of oxide cleaning, while adjusting the AC amperage can provide more penetration while maintaining tungsten geometry.
Adding more filler metal is one technique you can use to achieve the stacked-dimes look when welding aluminum with GTAW.
Because filler metal is a solid being consumed into a molten liquid, it requires energy to change the material state—like putting ice cubes into a glass of hot water. The ice cubes melt but also cool the liquid.
The same idea applies to adding filler metal during GTAW. Adding more filler rod causes a cooling effect on the back side of the weld puddle that helps produce the stacked-dimes appearance of the finished weld. Adding more filler metal with each dab produces a more pronounced appearance, whereas adding less filler metal with each dab produces a weld with a fairly smooth appearance.
Although it’s not necessary, some operators also use the foot pedal to vary amperage to help achieve the stacked-dimes look. Different welders use various techniques but can achieve similar results.
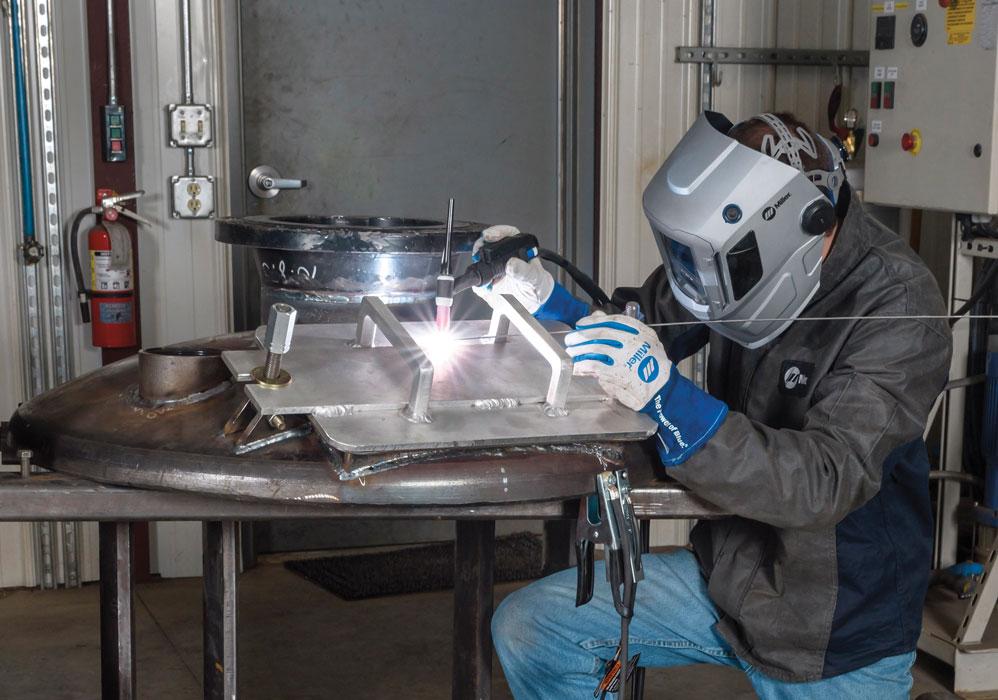
While GTAW is traditionally a clean welding process with no spatter, it’s still important to wear the proper personal protective equipment, including safety glasses, a welding jacket, gloves, and welding helmet. Since aluminum is highly reflective and requires a great amount of energy to weld, the arc intensity of GTAW can cause sunburn to exposed skin.
Because it’s so critical to clearly see the arc when welding aluminum, consider new helmet technology that improves visibility and clarity of the weld pool. Technology available on some autodarkening helmets allows more colors to come through the lens so you can see more contrast among objects in the viewing area. This can help you to achieve better results while reducing eye strain and fatigue.

The Welder, formerly known as Practical Welding Today, is a showcase of the real people who make the products we use and work with every day. This magazine has served the welding community in North America well for more than 20 years.
start your free subscription
Easily access valuable industry resources now with full access to the digital edition of The Fabricator.

Easily access valuable industry resources now with full access to the digital edition of The Welder.

Easily access valuable industry resources now with full access to the digital edition of The Tube and Pipe Journal.

Easily access valuable industry resources now with full access to the digital edition of The Fabricator en Español.
In this episode of The Fabricator Podcast, Caleb Chamberlain, co-founder and CEO of OSH Cut, discusses his company’s...