Field Technical Support Specialist
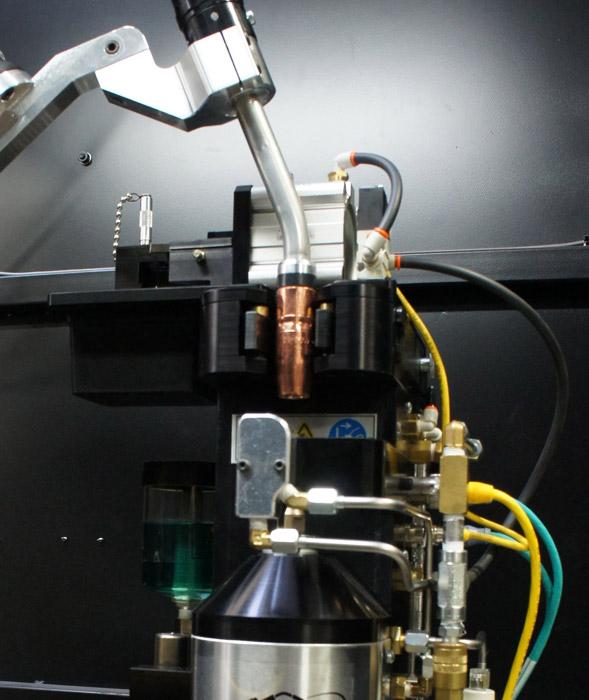
Figure 1
By minimizing the accumulation of spatter and debris in the nozzle, reamers help improve the overall efficiency of a robotic welding system.
Robotic welding can be extraordinarily efficient—until it starts producing bad welds. Weld defects have numerous causes, but one culprit can be a dirty nozzle. This is where a nozzle cleaning station, or reamer, can help.
A reamer can be integrated into an automated welding system to maximize its performance (see Figure 1). It removes accumulated spatter from inside the gas metal arc welding (GMAW) gun’s front-end consumables, including nozzles, contact tips, and retaining heads. In doing so, it extends consumables life and reduces downtime for maintenance. It also prevents the loss of shielding gas coverage, a problem that can lead to expensive rework to correct porosity and other weld defects.
The reamer typically takes about five or six seconds to clean a nozzle, while parts are cycling down the line or while the tooling is indexing. It could take more than five minutes for a welding operator to enter the weld cell and do the job manually.
A reamer significantly reduces the risk of spatter lodging between the contact tip or retaining head and the nozzle, which can result in arcing against the part. Removing the spatter frequently also ensures smooth shielding gas coverage to protect the weld pool. By minimizing spatter and debris in the nozzle, reamers help improve the overall efficiency of a robotic welding system.
Reamers are either analog or digital. Analog reamers generally have a multiconductor cord set and an air supply. Each conductor relays a specific task, signaling the system to start, spray, and return to the home position.
Digital reamers use a network cable to send commands to an IP address. They can control individual functions without being limited to the number of leads in the cord set, as an analog reamer is. Beyond being told to start and spray, a digital reamer also can be told to clamp, lift, lower, and turn the motor on and off—all of the functions that make up a ream cycle.
A digital reamer also allows for remote monitoring, which streamlines troubleshooting. If a certain unit is having issues, the operator can monitor the status of each function to determine where the problem lies. This helps determine what is wrong before a part has to be pulled off the line.
A reamer can be mounted in nearly any orientation, as long as it doesn’t allow debris to collect in the clamp housing. For easy access, place the reamer close to the welding robot. If the reamer is on an angle, with the base plate not parallel to the floor, and if it has an antispatter sprayer, make sure that the spray reservoir does not leak when full.
Using a multifeed system can help, as it operates in the same manner regardless of the reamer’s orientation. A multifeed system allows for the feeding of antispatter compound to multiple reamers from a single drum placed on the floor or a nearby shelf, thereby eliminating the need for a sprayer reservoir.
Make sure that the V-block inside the top of the reamer is the correct size for the nozzle, the cutter blade is the correct size for the nozzle bore, and the insertion depth of the nozzle to the reamer is adequate (see Figure 2). Aligned properly, the nozzle should sit tangent on the two angled faces of the appropriately sized V-block.
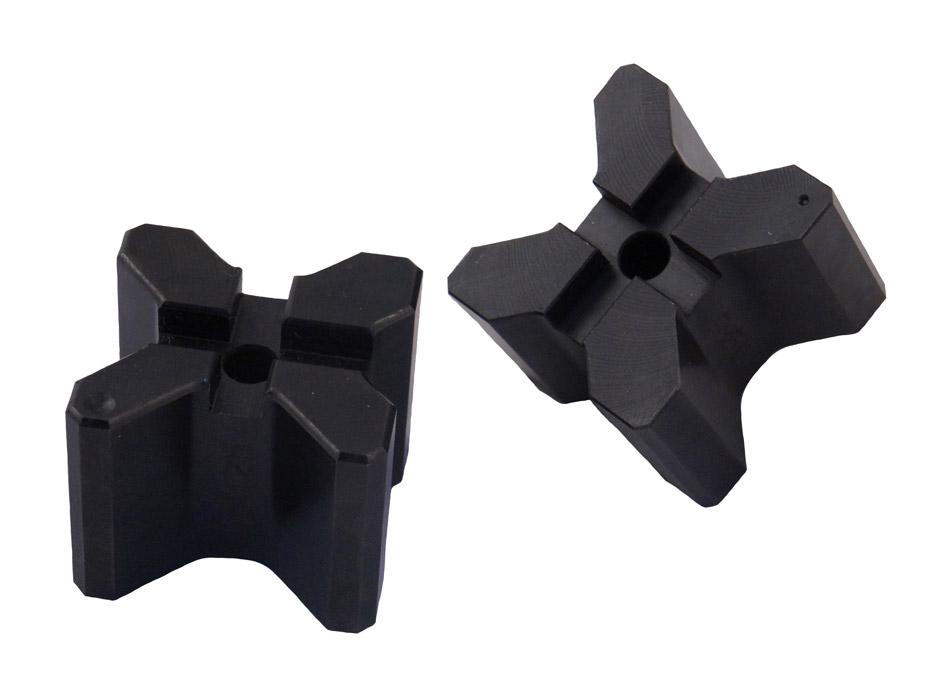
Figure 2
The appropriate V-block size, at the top of the reamer, should allow the nozzle to sit tangent on the two angled faces of the V-block. Four points of contact—the two faces on the V-block and the two faces on the reamer clamp—hold and align the nozzle over the cutter blade during cleaning.
Four points of contact—two faces on the V-block and two faces on the reamer clamp—hold and align the nozzle over the cutter blade during cleaning.
If you need to change the nozzle size, be sure to also change the position of the two angle faces on the V-block (see Figure 3). This keeps the nozzle concentric. If you use the incorrect V-block size for the nozzle, the reamer will be off-center and the cutter will crash into the nozzle when it advances for a reaming cycle.
Some reamers remove spatter all the way up to the gas ports of the diffuser, rather than just at the opening of the bore. This ensures smooth shielding gas flow and reduces the risk of weld porosity.
The aim is for the cutter blade to reach the gas holes without rubbing against them. If the reamer reaches too deep, the cutter blades can push the gun upward and potentially pull the nozzle off the retaining head. If not concentric, the cutter blades rub against the diffuser when the reamer clamps are open. To realign them, follow these steps:
Monitoring the reamer’s home signal reduces issues during the cleaning cycle and minimizes guesswork as to whether the reamer is ready for use after cleaning. When a reamer starts its cleaning cycle, the home signal drops off because the start signal closes the clamps and raises the spindle.
Once the cycle completes, the clamps open, the spindle hits the lower limit, and the home signal returns. This indicates that timing is appropriate for the robotic GMAW gun to move away from the reamer. If the gun moves away from the reamer too early, the reamer can pull the nozzle off the gun.
A reamer can be used by itself or with a sprayer that applies an antispatter compound. For optimal spray coverage, always follow the manufacturer’s chart for proper setup based on the nozzle bore size. If the sprayer is too far away from the nozzle, it will not provide adequate coverage to prevent spatter buildup. If the sprayer is too close, it may spray too much and saturate the nozzle insulator.
The sprayer should spray for only a half-second. Any longer generally means the sprayer is too far away, which can also make a mess in the weld cell. Positioned properly, the sprayer should apply anti-spatter to the part rather than blowing the compound into the air.
You can add a spray containment unit to help capture excess antispatter (see Figure 4).
Remember to inspect the unit regularly, and clear any spatter or debris that could prevent it from working properly.
Regular maintenance keeps reamers in good running condition, potentially for decades. Clean the V-block and jaws of debris. Buildup on these parts can push the nozzle out of position, leading to the fit-up no longer being concentric and potentially broken cutter blades.
Keep all clamp faces clean by scraping them on the V-block to remove debris. Also be sure to clean the top seal on the spindle under the cutter. If excess spatter or debris accumulates on the seal, it starts to score the shaft on the spindle, leading to expensive reamer repairs.
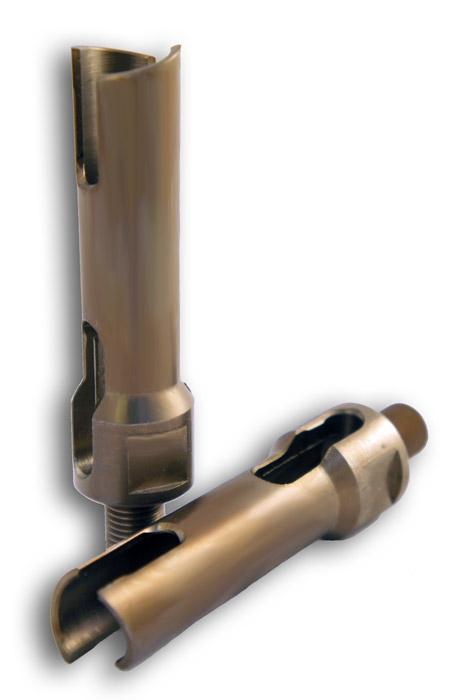
Figure 3
For optimal cleaning, make sure the V-block is the correct size for the nozzle, the cutter blade (shown here) is the correct size for the nozzle bore, and the insertion depth of the nozzle to the reamer is adequate.
Adding an air blast feature to a robotic GMAW gun can help support the reamer’s function. An air blast blows high-pressure air through the gun’s front end, removing debris and other contaminants with it. This function can reduce the required frequency for reaming, allowing you to ream after every 15 parts instead of every five, for example.
How often you need to ream depends on the part and the application. Reaming too frequently wastes production time; reaming too infrequently allows heavy spatter buildup that is difficult to remove. To determine the best reaming frequency, observe the operation and make the appropriate adjustments.
A reamer helps prolong the life of the robotic welding gun and consumables. It also reduces downtime and labor for component changeover, as well as equipment costs.
Ultimately, a clean nozzle helps provide better weld quality and prevents problems that could lead to rework. Put another way, a clean nozzle and other consumables help produce a clean weld, which in turn makes robotic welding much more productive.
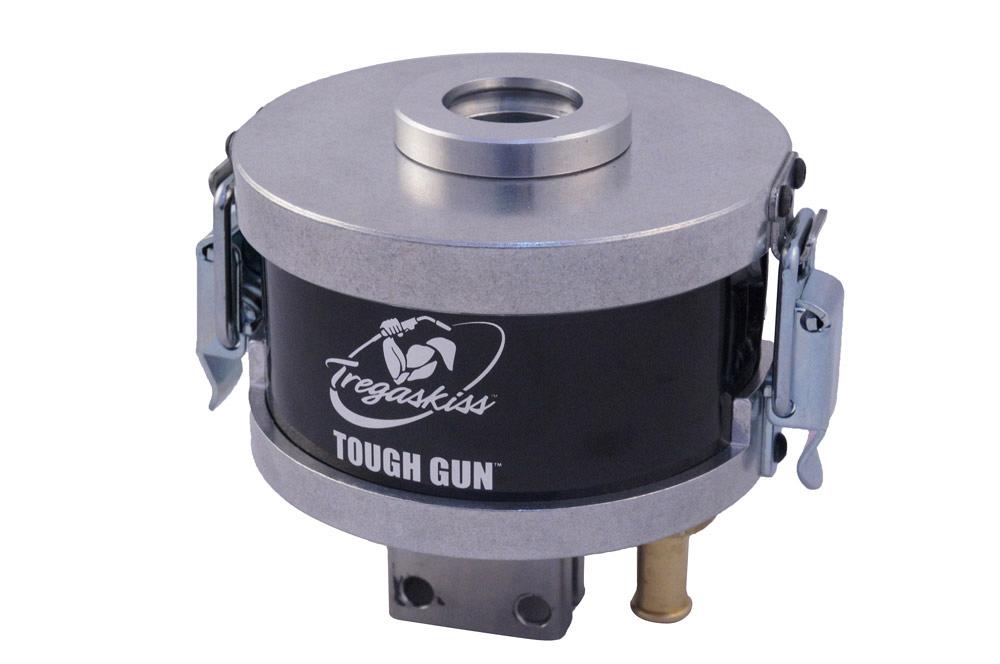
Figure 4
You can add a spray containment unit to help capture excess antispatter. Remember to inspect the unit regularly, clearing any spatter or debris that could prevent it from draining.


The Fabricator is North America's leading magazine for the metal forming and fabricating industry. The magazine delivers the news, technical articles, and case histories that enable fabricators to do their jobs more efficiently. The Fabricator has served the industry since 1970.
start your free subscription
Easily access valuable industry resources now with full access to the digital edition of The Fabricator.

Easily access valuable industry resources now with full access to the digital edition of The Welder.

Easily access valuable industry resources now with full access to the digital edition of The Tube and Pipe Journal.

Easily access valuable industry resources now with full access to the digital edition of The Fabricator en Español.
In this episode of The Fabricator Podcast, Caleb Chamberlain, co-founder and CEO of OSH Cut, discusses his company’s...