


Editor-in-Chief

A welder’s best friend is a clear and precise welding procedure specification. It puts the welder on the right path to turning out a quality weld that meets customer expectations. tdub303/E+/Getty Images
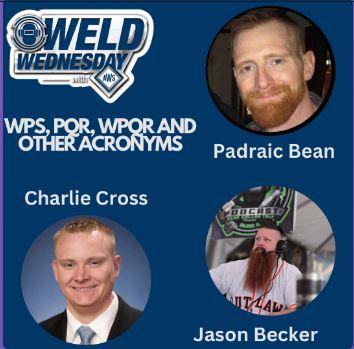
Editor’s Note: On Sept. 20, Jason Becker, host of the Arc Junkies Podcast, recorded an episode titled “WPS, PQR, WPQR, and other acronyms,” with Lincoln Electric Charlie Cross, welding technical specialist, and Padraic Bean, weld process consultant. The episode, part of the AWS Welding Wednesday series, focused on welding procedures and procedure qualification records and their importance in delivering quality fabrications. This is an edited adaptation of that conversation.
Developing a welding procedure specification (WPS) is the way a metal fabricating company can document best practices in the welding department. These documents are necessary for shops that weld to a code, standard, or a contract specification, but they are also useful for any shop looking to improve quality.
Developing a thorough WPS, however, involves taking four important steps to ensure that it is done correctly, so that it is useful to the welder and will stand up under the glare of a potential audit.
Before welding procedures are created, a basic question needs to be asked: “What do I need to weld together?”
Charlie Cross, welding technical specialist, Lincoln Electric, suggests that it begins with consulting code requirements or contract documents and then answering questions that lead to the creation of a procedure qualification record (PQR), the first step on the way to the WPS.
“The PQR matrix is going to tell us everything else,” Cross said. “Here’s a list of the base material, dimensions, and sizes we need with the joint designs. It’s going to help us get organized and move on to getting prepared for everything else.”
Cross referred to the “big six” questions that guide the creation of the WPS:
Once these questions have been answered, the next step is to start collecting data related to the welding assignment.
“So before you go into the shop, you have a good idea of how you’re going to weld it, what your drawing configuration is going to be like, and how the electronics are set,” said Padraic Bean, weld process consultant, Lincoln Electric. “You get all of that information together, so that you can start collecting data.”
This is not an informal exercise. There needs to be a commitment to capture all elements of the task, even requiring others to be part of the data collection. For instance, someone needs to be watching the screen, keeping track of amperage and voltage. Of course, digital data collection is extremely helpful, and that real-time information can be put directly into the PQR.
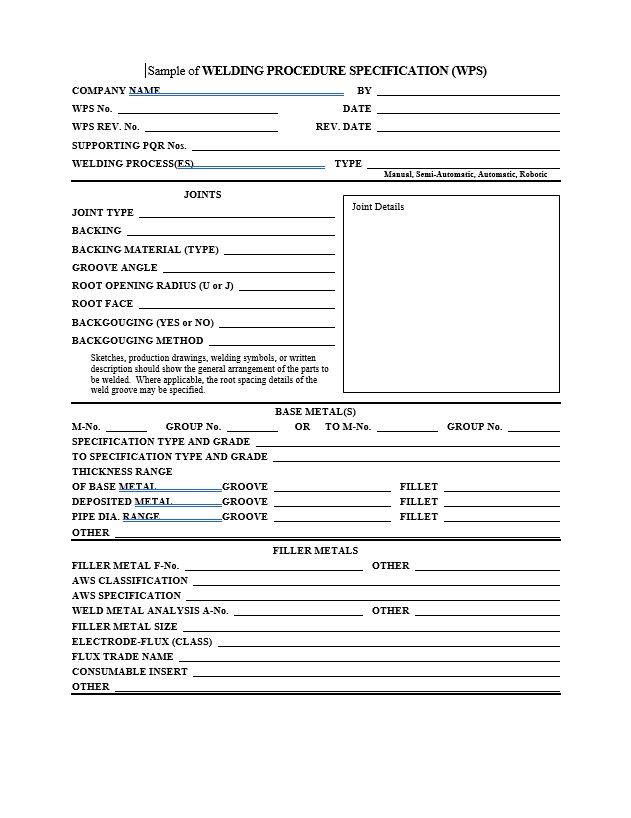
A sample of a welding procedure specification document.
This type of data collection is also suitable for companies that aren’t fabricating to code requirements, according to Cross. Once this information is documented, it can be used as some sort of baseline for operational and financial tracking. This preliminary information gathering is a good starting point for any type of continuous improvement activity involving the welding department.
Bean added that incorporating some sort of mechanical test to this qualification effort makes sense because it solidifies what works and it’s good experience for the welder.
“Even if you’re running a prequalified WPS, you should do something as simple as a fillet weld break test. Cut a macro [for an etch test]. It doesn’t have to be anything crazy,” he said. “It doesn’t even matter if you're qualifying a procedure. What if you are a welder who builds products out of the garage? Don’t you want to have some idea that what you're doing is effective?”
With the preliminary work done to set up the welding procedure that’s to be tested, it’s time to start welding. The data collected at this time will make its way into the PQR.
This is where the welder needs to understand the code that he is working to because those variables that need to be collected might change depending on the code. Meanwhile, it’s important to remember when preparing a PQR that ranges are not included on this document. The PQR is the record of exactly what was done when that weld took place.
“It’s a snapshot in time of exactly what took place—the exact amount of amps, volts, wire feed speed, travel speed, and gas composition flow. It captures all of that stuff,” said Jason Becker, host of the Arc Junkies Podcast and a certified welding inspector and educator.
Bean recommended having a copy of the code nearby during test welding. That way the parties involved in preparing the PQR can check off the requirements as the progress.
“My goal when teaching people to write welding procedures for a welding program, if you are fabricating to a code, is to have the WPS be audit-proof,” Bean said. “The best way to do that is to just follow the book for essential variables and check all of the boxes.”
Cross said to keep in mind that sometimes contract documents, which spell out what needs to happen in the welds, trumps the code books. This happens more than you think because industry codes typically lag what is happening on a day-to-day basis in industry.
“You can’t have too many details on the WPS,” Becker said. “If I want a welder to make the same repeatable welds every single time, and I only list the amperage value for a process like gas metal arc welding, he’s going to be out there just twisting knobs trying to figure out the right amperage. But if I tell that same welder, ‘Hey, you need to be in between 350 to 375 IPM and ideally that should yield X amount of amps,’ that welder can actually walk out there, set the wire feed speed, set his voltage, and start welding. Then a check of the machine can be done to see if he is getting the appropriate amperage. If it’s not, he can go up or down from there.”
This welding documentation discussion was one of many subjects discussed on the Arc Junkies Podcast, hosted by Jason Becker. To explore other episodes, visit arcjunkies.com.
Remember that the time spent trying to interpret welding process documentation is time that a person is not welding.
To qualify a welding procedure, the weld joint needs to be inspected, and visual inspection is one of a welder’s most powerful tools.
“I love telling welding professionals that they are their own best welding inspectors,” Cross said.
He added that a welder should be aware of the four components of a visual inspection of a test part: flat face, proper placement, fairly uniform, and good wash-in.
Of course, the code or the contract documents might have the welder tackle different nondestructive testing methods. This could be penetrant, mag particle, radiographic, or ultrasonic testing.
The mechanical tests are likely to follow, if the test part passes all of the nondestructive testing requirements. This could include cut bends, tensiles, and Charpy V-notches.
If the test part fails any of the mechanical tests, it’s time to go back to the drawing board. A WPS can’t be validated because the weld metal doesn’t meet the base metal requirements.
Becker said the data collected up until this point is helpful because everyone can go back and check it for possible clues as to why the part failed the mechanical test. For example, if porosity is an issue, a gas adjustment might be necessary. In another example, if the part failed a Charpy V-notch test, it could have something to do with heat input. The actual results of those tests are going to tell the welder what variables need to be reviewed and adjusted.
Once the test part passes all of the tests and meets the code or specification requirements, the PQR is set. At this point, it’s placed where it can be accessed if someone inquires about process validation.
But before it’s locked away, it’s going to be referenced in the creation of the WPS. In turn, this is shared with the welding professionals doing the actual fabrication.
“I like to say we’re not an art class. We’re working on very serious things, and most individuals that work to code standards and specs, they believe that the least expensive weld is only made once. We want to keep that in mind,” Cross said.
“So we don’t get to play with the knobs and do what we want to do. The WPS is the clear direction on how we’re supposed to weld the specimen, how we’re supposed to clean the specimen, what the thermal conditions should be, and what the welding parameters should be.”
Looking back on this entire process qualification effort, Bean said that a company should realize that the work done to develop a PQR isn’t necessarily tied to just one welding procedure. Depending on the code or standard, the PQR that was used to create the WPS for a complete joint penetration groove weld on a piece of plate might be able to be used to write a WPS for a fillet weld.
“We talk about the amount of money it takes to develop a PQR, so we need to make sure you’re getting your bang for your buck. Make sure you’re qualifying your procedures that are going to give you the most leeway to write more than one WPS potentially,” Bean said.
Becker warned that, when preparing the WPS, a welder needs to be aware of the ranges that are sometimes allowed in applicable code books or contract documents. These ranges, whether voltage or wire feed speed, for example, provide the welder with a little more room to work with when actually making the weld, but that might not be a good thing in the hands of a novice welder.
“I know when I did jobs when I was doing structural steel work, the D1.1 said I could have plus or minus 10%, but the contract documents said I could have plus or minus 4 amps. I mean, they had it isolated down to that small of a range,” Becker said. “I could only have plus or minus 4 amps on that weld, and it was monitored every single pass.”
That type of leeway in the WPS is particularly helpful for a knowledgeable welder. They can let a welder’s technical knowledge and expertise shine to deliver quality welds that meet the approval of any inspector.
For people new to creating documentation for welding procedures, resources are available to help with the transition. A lot of code books will have sample forms. In fact, you find examples at the back of code books such as the AWS D1.1, D1.3, and D1.6 codes.
These same forms also are found at www.aws.org. A sample of a WPS document can be downloaded from the website.


The Fabricator is North America's leading magazine for the metal forming and fabricating industry. The magazine delivers the news, technical articles, and case histories that enable fabricators to do their jobs more efficiently. The Fabricator has served the industry since 1970.
start your free subscription
Easily access valuable industry resources now with full access to the digital edition of The Fabricator.

Easily access valuable industry resources now with full access to the digital edition of The Welder.

Easily access valuable industry resources now with full access to the digital edition of The Tube and Pipe Journal.

Easily access valuable industry resources now with full access to the digital edition of The Fabricator en Español.
In this episode of The Fabricator Podcast, Caleb Chamberlain, co-founder and CEO of OSH Cut, discusses his company’s...


