Contributing Writer

One attendee told me that his company runs high-speed progressive dies at nearly 1,000 strokes per minute. I asked him, “When you run a die without electronic die protection at 1,000 strokes per minute, what happens in case of misfeed?” He said, “Its a bad deal,”” and promised to explain more the next day.
The following day he brought a photo to me and said, “Yesterday you asked me what happens to a high speed die when it is misfed. Well, you’re looking at it! Yep, it turns to ‘die dust” (see Figure 1 ).
Don’t get me wrong— not all die crashes are this bad. Believe it or not, some are worse!
I had visited hundreds of die and stamping shops all over the world, and it seems as though each toolroom has a special archive of munched, crushed, flattened, and bent tools and die components. I had seen everything from crushed dowels, bent Allen wrenches, and flattened micrometers to a mangled 24-inch digital height gauge. Some shops even showcase their broken tools as training tools for new hires.
Human Error
It’s a simple fact: Being a good press operator requires a great deal of self-discipline. It can be easy for press operator to lose their focus on the mundane task at hand—and that can lead to double-loaded and misgauged dies—and possibly a crash.
Here are two suggestions to help prevent these problems:
1.Educate press operators about the fundamental of dies. Teach them what to look for in each of the die types. Make sure they understand the basics of how the press works. Even if you have implemented a sophisticated die protection system, nothing can take the place of a well-educated operator. Be sure to train them:
Poor Setup Procedures
Statistically speaking, the strip is a very important step and requires careful attention. Starting the material in the wrong position can result in half-hits of half-forms. Unbalanced cutting or forming then can cause the upper and lower dies to misalign and shear, resulting in die damage.Also, incorrectly starting the material can leave lose scrap in the die. If the scrap is not removed, double metal results and is fed into the tool. This condition can cause severe die damage. A good die designer establishes a distinct first-hint line by placing a positive spring-loaded stop at this point, rather than a simple line with a “start strip here” message (see Figure 2 ).
Following are some items operators should double check during setup:
Die Design
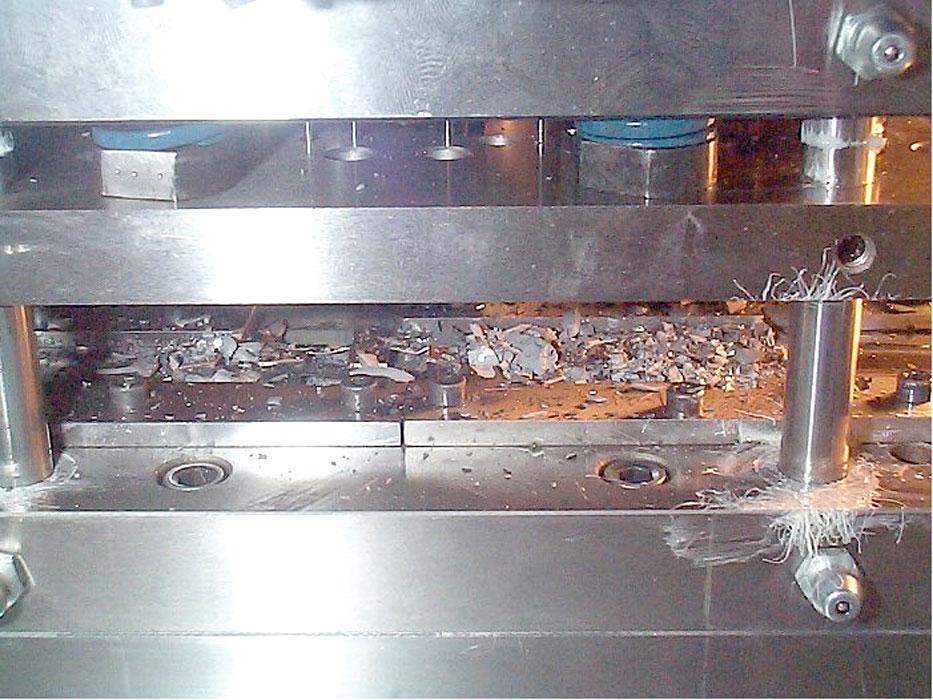
Figure 1
This is what happens to a high-speed die
when it is misfed. It turns to dust.
With a little effort on the part of the die designer, builder, setup person, and operator, die crashes can be reduced. Of course, they can’t be eliminated, because as long as humans are involved in creating and running a stamping process, ether will be errors. To err is human, after all.
Until next time… Best of luck!
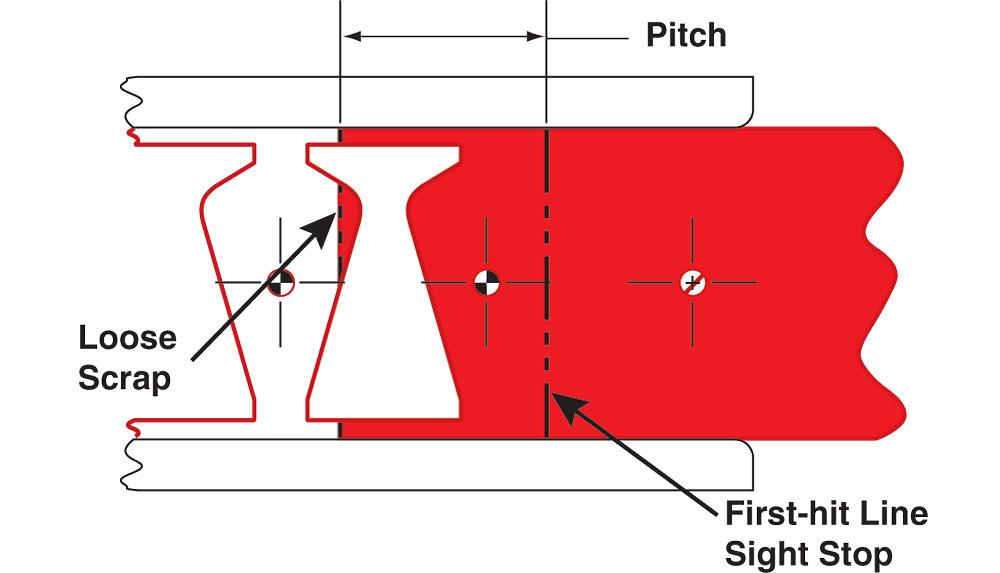
Figure 2
A good die designer establishes a distinct first-hit line by placing a positive spring-loaded
stop at this point, rather than a simple line with a “start strip here” message.


The Fabricator is North America's leading magazine for the metal forming and fabricating industry. The magazine delivers the news, technical articles, and case histories that enable fabricators to do their jobs more efficiently. The Fabricator has served the industry since 1970.
start your free subscription
Easily access valuable industry resources now with full access to the digital edition of The Fabricator.

Easily access valuable industry resources now with full access to the digital edition of The Welder.

Easily access valuable industry resources now with full access to the digital edition of The Tube and Pipe Journal.

Easily access valuable industry resources now with full access to the digital edition of The Fabricator en Español.
Seth Feldman of Iowa-based Wertzbaugher Services joins The Fabricator Podcast to offer his take as a Gen Zer...