


General Manager, Americas
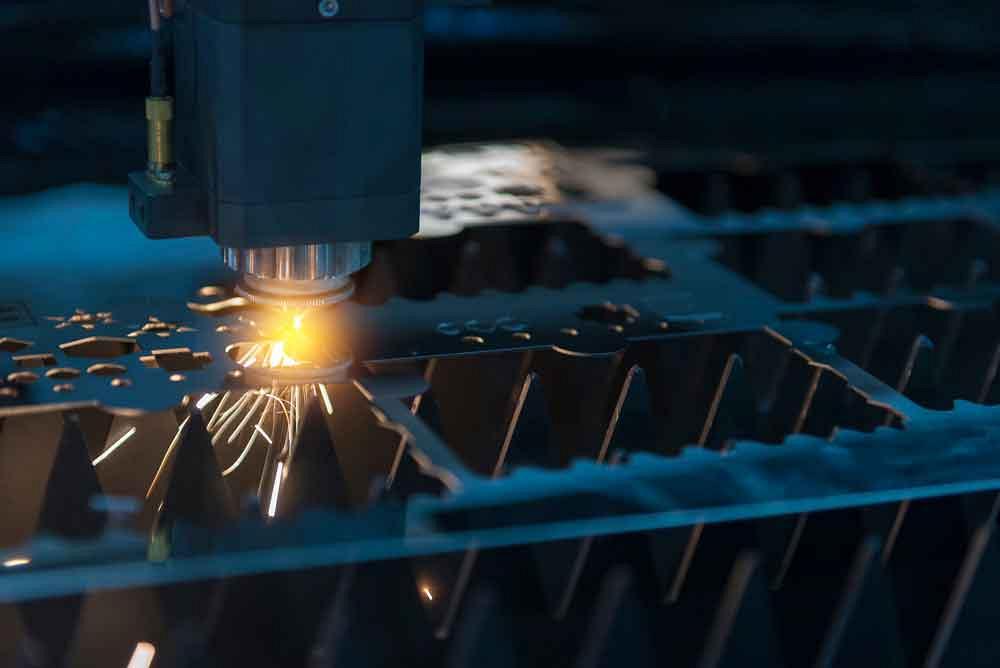
Strategic nesting is a balancing act between sheet metal and plate fabrication. You want optimal material yield and cutting process stability, but you also need to consider downstream operations. Getty Images
While fabricators understand that nesting is geared for optimal efficiency, they often learn the hard way that implementing technology doesn’t replace the need for an accurate picture of how nesting processes affect shop work flow. Reading the clues left behind by your skeleton can help you gain a more accurate picture of your nesting process and serve as the launch pad for a game plan to achieve the results you’re after.
After looking at the “bones” of your nesting process, you might find that you could be generating more efficient nests. Know, however, that it pays to consider whether the results you’re after are the results you’ll actually get if you make a change. Yes, the skeleton can tell you how well you’re maximizing material and how efficiently your machine is cutting, but knowing what to do with that information can be tricky. Nesting is one step of a production process with many moving parts, so you need to balance the benefits of greater material yield with the work flow of the entire shop.
If you work at a large shop that processes significant quantities of material or works frequently with expensive material, even minor improvements in sheet utilization can yield impressive results. Medium-sized and small shops might also make significant gains with more efficient nests.
Regardless of your potential savings, finding the right balance between greater material yield and minimal work-in-process (WIP) is the challenge. If parts move smoothly downstream, the real question is whether you can send more parts down the stream without rocking, or sinking, the boat.
While expanding your part mix might increase nesting efficiency, it also could increase time that operators downstream spend on machine setups, accounting for frequent material and tooling changes. In addition to holding up secondary operations, a larger mix of parts on a nest might keep your welding department waiting for the last part in the assembly before moving forward with a job, or keep the paint line waiting for the last component before a color change.
When considering the entire work flow of your shop, be sure to investigate how much time it actually takes to load and change tools between jobs, change the cutting gas on a laser, or load different NC programs into a controller. Also, does your CAM system allow you to edit an automatically generated nest?
It also helps to understand how much time and effort are invested in managing and tracking denested parts, especially if laser or punch operators are tasked with finding creative ways to stack the parts around a machine.
Changing your nesting processes can provide tremendous benefits if you carefully consider the downstream journey your parts take. Efficiencies can improve even if machinery and staff are added in response to increased demand. Regardless of your situation, closely investigating the real needs of your shop is the right place to start.
Dynamic nesting is typically the fastest and easiest way to deal with a variety of parts. Dynamic, true-shape nesting accounts for the unique shapes of various parts and nests them on sheets. If, for example, you have a part shaped like a window frame, another part can be nested within it to fully utilize the sheet. You’re not likely to see a significant amount of material left on your skeleton with dynamic nesting because it’s designed to automatically utilize as much material as possible.
One of the latest nesting advancements is batch nesting, which entails nesting across several sheets at a time for the best overall material utilization. This paves the way for better yield because a wider range of parts can be nested efficiently across not just one but several sheets.
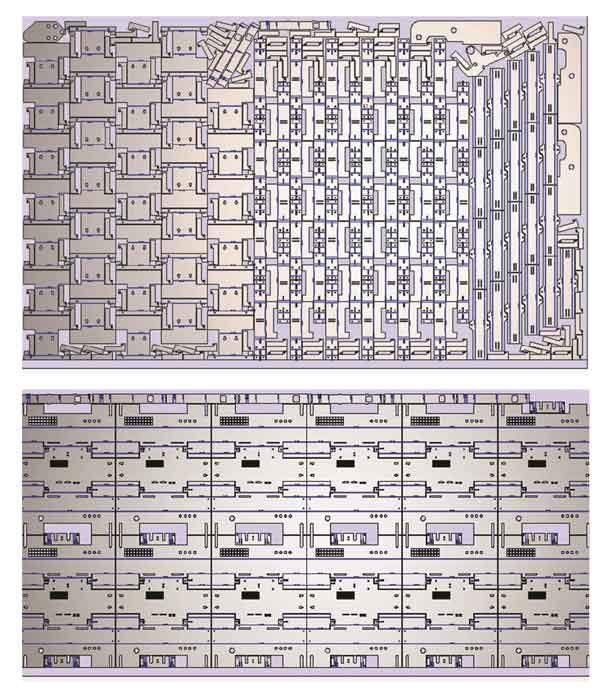
These nests exhibit the potential of high material utilization, part stability, and sorting ease.
Static nesting typically is used when a shop performs the same job often, so the static nests can be reused as needed. Depending on the strengths of your CAM or nesting system, the time it takes to make a change to an existing job may further erode the savings gained by increasing material yield.
Applying common-line cutting can help you gain cutting efficiency, especially on certain nest layouts. But in some cases, it isn’t likely to create major gains in time, material yield, or manpower.
That said, when it comes to maximizing materials, use of the ideal sheet size might also be a factor. This doesn’t necessarily mean you need to have multiple sheet sizes at the ready, but it is a good idea to perform some trials or test runs while allowing the nesting software to look at multiple sheet sizes and make the right choice based on the part mix.
The question here isn’t whether or not you have a skeleton in the closet. You know you’ve got a skeleton, but it’s on the shop floor, spilling all of your production secrets to anyone who will listen. Is that skeleton in good shape, or does it indicate that your processes could use a little tweaking? Did you get so carried away with nesting parts that the sheet was scrapped in the machine, or did it suffer a nasty collision? How much material has been left behind?
Despite your hard work reading all of the available clues, there are times when our best-laid plans simply don’t work when put into practice. For instance, you can achieve incredibly high material utilization by diligently generating the best nests possible, and yet the wheels come off of your entire operation when actually cutting those nests.
In order for nests to work in action, the nesting software has to be compatible with the machine, as the nest can only be cut to the best of the machine’s capabilities. The quickest way to pile up a skeleton under the punch press, or possibly take off the laser head, is to generate a bad cutting path.
To generate successful nests, consult your skeleton and keep these tips in mind:
• Move small parts away from the clamped edge to maintain skeleton integrity. This will give your skeleton the structure it needs to provide a strong frame for your parts.
• Avoid heat buildup for part accuracy and collision avoidance. On a laser or plasma machine, cutting multiple holes or small parts in a concentrated area can warp the material. On a punch press or laser, a part may come loose from the tabs holding it in place.
• Increase material yield by nesting between the clamps. Perform common-line cutting without destabilizing the sheet, and use maximum part group sizes to create subnests that are common-line cut.
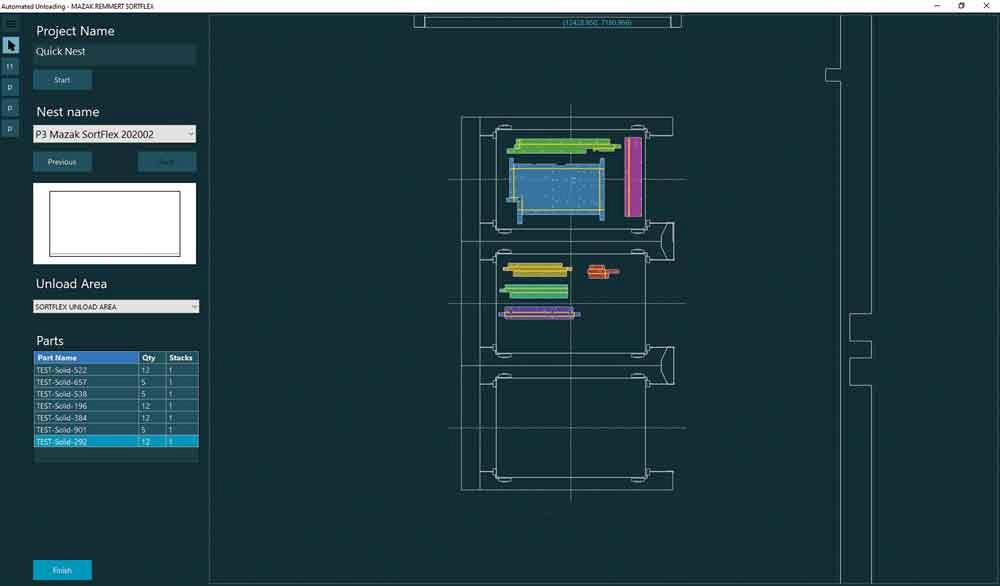
Automatically unloaded blanks are color-coded in the software to help streamline part sorting.
Maximizing remnants can be key to ramping up profits. To ensure consistent results over time, save your ideal remnant settings to a manufacturing database. You might decide to crop remnants to simplify handling of the leftover material. The caution here, however, is that creating too many unique remnants can become difficult to locate and manage.
A great option is to use ideal remnant widths so that they’re easy to collect when retrieved from storage and you can limit the number of remnant sizes the operators have to deal with. If you crop the sheet right after the last part on a nest, you typically end up with a unique size—48 by 33.625 in., for example. Using Ideal widths, rounding the sheet crops to 6- or 10-in. increments, you can create standard remnant sizes. You will sacrifice a little material but gain in simplifying the logistics—such as in the previous example, resulting in a remnant that’s 48 by 36 in.
Beyond reading the skeleton for sheet utilization, the bones left behind after nesting can tell you about denesting and part quality challenges related to web spacing, excessive tabbing, and poor tabbing locations. Tracking these results is key to assessing quantity and quality of output. With these results, you can build a database that will help you uncover best practices.
Developing nesting processes ideal for your workflow, machinery, and CAM software might require some trial and error, but the effort will reduce scrap and improve processes over the long haul. Your database should include best practices for success, including material type and thickness, type or style of tabs, and preferences for tab location and size.
When nesting processes are truly optimized, they should be applied consistently to maximize material in a way that fits with the demands of your shop. You can make changes to the overall work flow and prepare for a possible influx of a variety of parts, but consider the big picture before you throw a potential wrench into the works.
To optimize nesting, ideal circumstances would include a manufacturing execution system (MES), enterprise resource planning (ERP), or similar platform integrated with your CAM software. Such integration allows your business software to tell you what parts you need to cut and when, allowing just-in-time parts to be moved easily downstream for secondary operations without forcing your operator to spend a lot of time managing stacks of parts. An ideal setup might include part removal and stacking automation, which could reduce error and give the operator more time to devote to other tasks.
Anything that’s easy to read and understand at a glance is a benefit on the shop floor. Strategic part identification, such as color-coded nest reports, can simplify and errorproof sorting. And adding part identification during the nesting process, such as etching part numbers or printing labels that can be manually or automatically applied, identifies parts before they’ve even left the nest.
While not every shop has the resources necessary to achieve the ideal setup immediately, especially without disrupting processes that generally work well, incremental changes can be made over time. After all, the goal isn’t necessarily to be the perfect shop, but to be the shop that’s perfect for the conditions in which you already work.


The Fabricator is North America's leading magazine for the metal forming and fabricating industry. The magazine delivers the news, technical articles, and case histories that enable fabricators to do their jobs more efficiently. The Fabricator has served the industry since 1970.
start your free subscription
Easily access valuable industry resources now with full access to the digital edition of The Fabricator.

Easily access valuable industry resources now with full access to the digital edition of The Welder.

Easily access valuable industry resources now with full access to the digital edition of The Tube and Pipe Journal.

Easily access valuable industry resources now with full access to the digital edition of The Fabricator en Español.
In this episode of The Fabricator Podcast, Caleb Chamberlain, co-founder and CEO of OSH Cut, discusses his company’s...


