


Product Manager, R&D, Finishing and Coated Abrasives
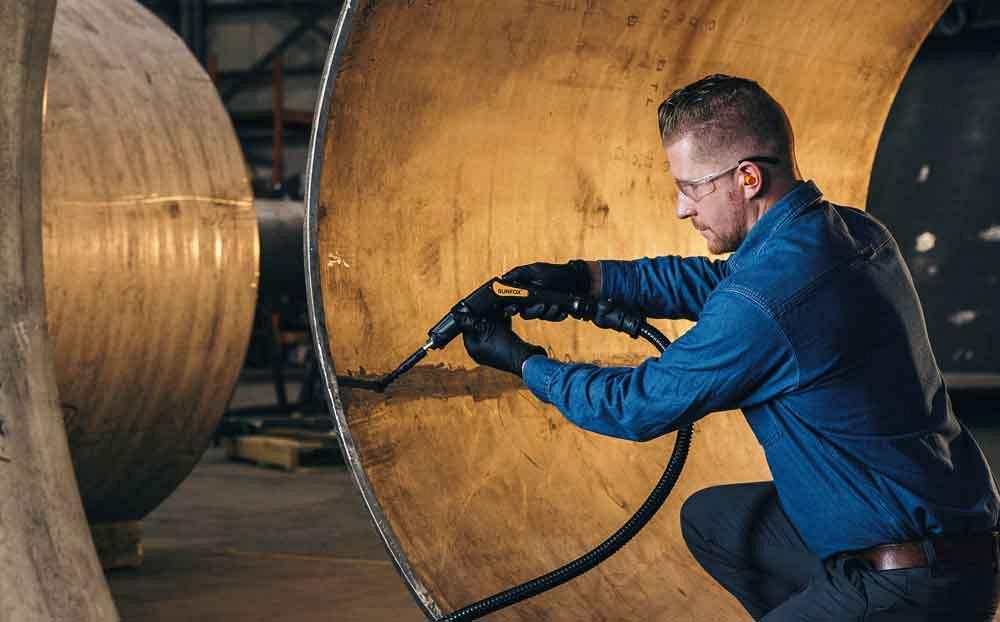
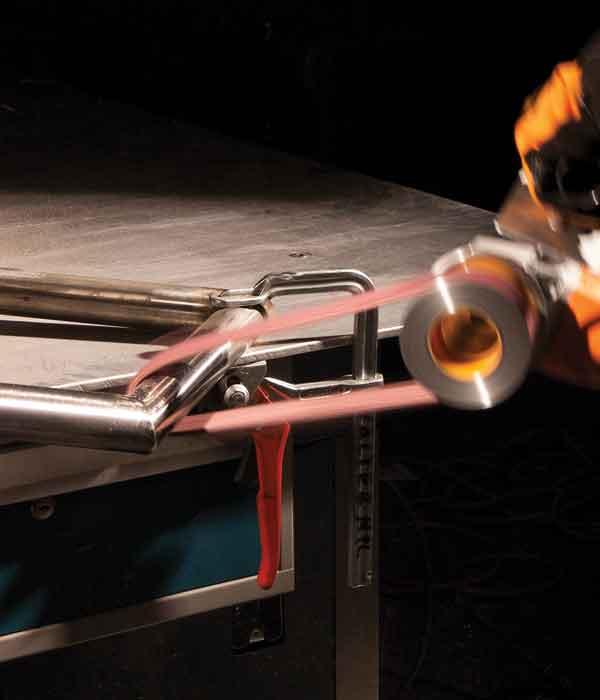
To ensure proper passivation, a technician electrochemically cleans a longitudinal weld seam in a rolled section of stainless steel. Images provided by Walter Surface Technologies
Imagine a fabricator lands a contract involving critical stainless steel fabrication. Sheet metal and tubular sections flow through cutting, bending, and welding, then land at the finishing station. The part consists of a plate welded vertically to a tube. The weld looks OK, but it’s not the stack-of-dimes perfection the customer is looking for. So the grinder spends time removing a bit more weld metal than usual. Then, alas, some significant bluing emerges on the surface—a telltale sign of excessive heat input. In this case this means the part won’t meet customer requirements.
Usually performed manually, grinding and finishing require dexterity and finesse. Mistakes in finishing can be extraordinarily expensive, considering all the value that’s already been put into the workpiece. Add an expensive, heat-sensitive material like stainless steel, and costs for rework and scrap mount even more. Add complications like contamination and passivation failure, and a once profitable stainless steel job can become a money-losing, even reputation-losing misadventure.
How can fabricators prevent all this? They can start by developing a knowledge of grinding and finishing, what role each plays, and how each affects a stainless steel workpiece.
They aren’t synonymous. In fact, each has a fundamentally different goal. Grinding removes material like burrs and excess weld metal, while finishing puts a finish on the metal surface. The confusion is understandable, considering those grinding with a large-grit wheel remove a lot of metal quickly and in so doing leave a “finish” of very deep scratches. But in grinding, scratches are just the aftereffect; quick material removal is the goal, especially when working with heat-sensitive metal like stainless steel.
Finishing occurs in steps as the operator starts with a larger grit and steps down to finer-grit sanding discs, nonwoven abrasive, and perhaps a felt cloth and polishing paste to achieve a mirror finish. The goal is to achieve a certain final finish (scratch pattern). And each step (finer grit) removes the deeper scratches from the previous step and replaces them with smaller scratches.
Because grinding and finishing have different goals, they often do not complement one another and, with the wrong consumable strategy, actually can work against each other. To remove excess weld metal an operator uses a grinding wheel and leaves very deep scratches, then passes the part on to a finisher who now must spend a lot of time removing those deep scratches. This sequence, moving from grinding to finishing, might still be the most effective way to meet a customer’s finishing requirements. But again, they’re not complementary processes.
Quite often workpiece surfaces designed with manufacturability in mind do not require both grinding and finishing. Parts that undergo only grinding do so because grinding is the fastest way to remove a weld or other material, and the deep scratches left by the grinding wheel fall well within customer requirements. Parts that require only finishing are fabricated in such a way that they don’t require excessive amounts of material removal. A prime example is a stainless part with a good-looking gas tungsten arc weld that only needs to be blended and matched to the base material’s finish pattern.
A grinder with a low-removal-rate grinding wheel can face significant challenges working with stainless steel. Again, excessive heat can cause bluing and change the material properties. The goal is to keep stainless steel as cool as possible throughout the process.
To that end, it helps to choose a grinding wheel with the fastest removal rate possible for the application and budget. Wheels with zirconia grains grind faster than aluminum oxide, but in most cases a ceramic grinding wheel works best.
Extremely tough and sharp, ceramic grains wear in a unique fashion. Instead of wearing down smooth, they maintain their sharp edge as they gradually break down. This means they can remove material extremely quickly, often in just a fraction of the time other grinding wheels can. This usually makes ceramic grinding wheels well worth their extra cost. They’re well-suited for stainless applications because they remove large chips quickly, generating less heat and distortion.

A worker at the weld prep station grinds stainless steel pipe.
No matter what grinding wheel a fabricator chooses, it needs to keep the potential of contamination in mind. Most fabricators know they can’t use the same grinding wheel on both carbon steel and stainless steel. Many physically separate their carbon and stainless steel grinding operations. Even a miniscule spark from carbon steel landing on a stainless workpiece can cause contamination problems. Many industries, like pharmaceutical and the nuclear sectors, require consumables rated as contaminant-free. This means that grinding wheels used on stainless steel must be nearly free (less than 0.1%) of iron, sulfur, and chlorine.
Grinding wheels on their own don’t grind; they need a power tool. Anyone can tout the benefits of an abrasive wheel or a power tool, but the reality is that power tools and their grinding wheels work as a system. Ceramic wheels are designed to work with angle grinders with a certain amount of power and torque. Although some pneumatic grinders have the necessary specifications, most ceramic-wheel grinding occurs with electric power tools.
A grinder with insufficient power and torque can cause major problems, even with the most advanced abrasive. A lack of power and torque causes the tool to slow significantly under pressure, essentially preventing the ceramic particles on the wheel from doing what they’re designed to do: remove large chips of metal quickly and, in so doing, induce less heat into the material.
This can exacerbate a vicious cycle: Grinding operators see the material isn’t being removed, so they instinctively push harder, which in turn generates excessive heat and bluing. They eventually push so hard that they glaze the wheel, which makes them push even harder and generate more heat before realizing that they need to change the wheel. If working this way on thin tube or sheet, they eventually just break right through the material.
Of course, this vicious cycle can happen even with the best tools available if operators aren’t trained properly, especially when it comes to the pressure they apply to the workpiece. The best practice is to stay as close as possible to drawing the grinder’s nominal rated amperage. If operators are using a 10-amp grinder, they should press just hard enough so that the grinder draws about 10 amps.
If a fabricator processes a lot of expensive stainless steel, using an ammeter can help standardize grinding operations. Of course, in reality few operations use an ammeter regularly, so the next best thing is to listen carefully. If operators hear and feel the RPM dropping rapidly, they’re probably pushing too hard.
Listening for too light of a touch (that is, too little pressure) can be difficult, so in this case it can help to pay attention to the spark flow. Grinding stainless steel produces darker sparks than carbon steel, but they still should be visible and projecting away from the work area in a consistent manner. If operators suddenly see fewer sparks, it’s probably because either they’re not applying enough pressure or the grinding wheel is glazed.
Operators also need to maintain a consistent work angle. If they approach the workpiece at a near-flat angle (almost parallel to the work), they risk overheating a wide area; if they approach at a too high angle (closer to vertical), they risk digging the edge of the wheel into the metal. If they’re using a Type 27 grinding wheel, they should approach the work at 20 to 30 degrees. If they have a Type 29 wheel, their work angle should be about 10 degrees.
Type 28 (conical) grinding wheels are normally used to grind on flat surfaces to remove material on a wider grinding path. These conical wheels also operate best at a lower grinding angle, at about 5 degrees, so they help reduce operator fatigue.
This introduces another critical factor: choosing the right grinding wheel type. Type 27 wheels have a point of contact on the metal surface; Type 28 wheels have a line of contact because of their conical shape; and Type 29 wheels have a surface of contact.
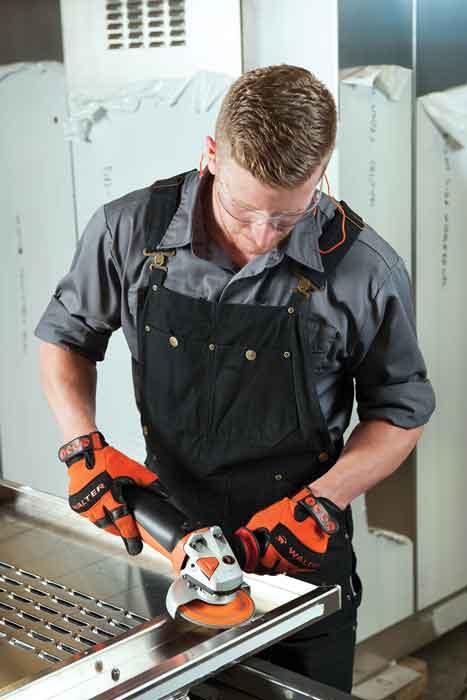
A worker finishes a stainless steel frame using a sanding disc.
By far the most common, Type 27 wheels get the job done for many applications, but their shape makes it difficult to work with parts with deep contours and curves—say, a welded assembly of stainless steel tube. The contoured shape of Type 29 wheels makes it easier for operators who need to grind a combination of curved and flat surfaces. Type 29 wheels do this by increasing the surface contact area, which means operators need not spend a lot of time grinding in each location—a good strategy for mitigating heat buildup.
In fact, this applies when using any grinding wheel. When grinding, operators should never stay in the same place for long. Say an operator is removing metal from a fillet that’s several feet long. He could manipulate the wheel in short up-and-down motions, but doing so could overheat the workpiece, because he’s keeping the wheel in one small area for a prolonged period. To reduce heat input, the operator can traverse the entire weld in one direction near one weld toe, then lift the tool (giving the work time to cool) and traverse the work in the same direction near the other weld toe. Other techniques can work as well, but they all share one trait: They avoid overheating by keeping the grinding wheel on the move.
The commonly used “comb down” technique helps accomplish this too. Say an operator is grinding down a butt joint weld in the flat position. To reduce heat stress and excessive digging, he avoids pushing the grinder along the joint. Instead, he starts at the end and pulls the grinder along the joint. This also prevents the wheel from digging too much into the material.
Of course, any technique can overheat the metal if the operator goes too slowly. Go too slow and an operator can overheat the workpiece; go too quickly and grinding can take a long time. Finding the feed rate sweet spot usually comes with experience. But if operators are new to the job, they can grind on scrap to learn the “feel” of a proper feed rate for the workpiece at hand.
Finishing strategies revolve around the material’s surface condition when it arrives and leaves the finishing department. Establish the starting point (as-received surface condition) and ending point (desired finish), then develop a plan that finds the best path between those two points.
Usually the best path does not start with a highly aggressive abrasive. This might sound counterintuitive. After all, why not start with a coarse grit to achieve a rough finish and then move on to finer grits? Wouldn’t starting with a finer grit be extraordinarily inefficient?
Not necessarily, and it has to do again with the nature of finishing. With every step up to a smaller grit, finishers replace deeper scratches with shallower, finer ones. If they start with, say, a 40-grit sanding or flap disc, they’re putting deep scratches into the metal. If those scratches get the surface close to the desired finish, great; that’s why those 40-grit finishing consumables exist. But if the customer demands, say, a No. 4 finish (a directional brushed finish), the deep scratches created by that 40-grit abrasive will take a long time to remove. Finishers will either be stepping down through numerous grit sizes or be spending a long time with a fine-grit abrasive to remove those large scratches and replace them with smaller ones. All this is not only inefficient, but also introduces excessive heat into the workpiece.
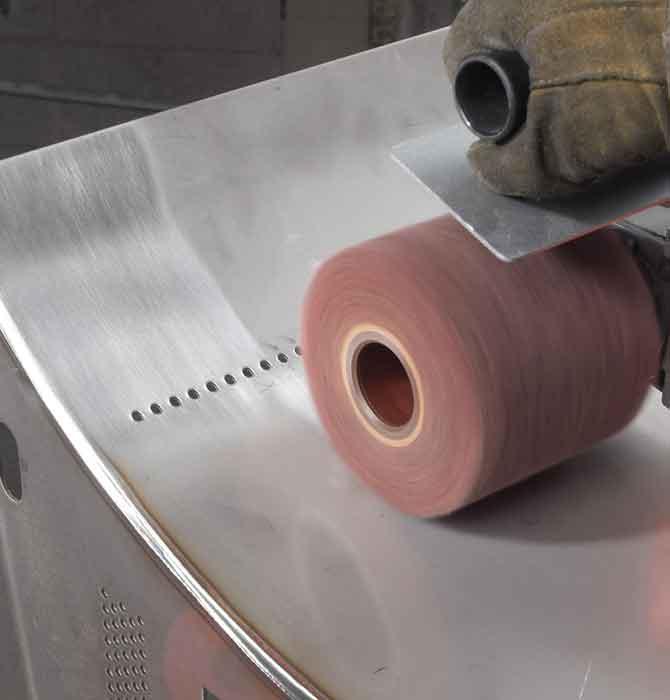
Of course, using a fine-grit abrasive on a rough surface can be slow-going and, combined with poor technique, introduce excessive heat. Here’s where the two-in-one, or interleaved, flap disc can help. These discs comprise an abrasive cloth combined with a surface conditioning material. They effectively allow the finisher to remove material with the abrasive while also leaving a smoother finish.
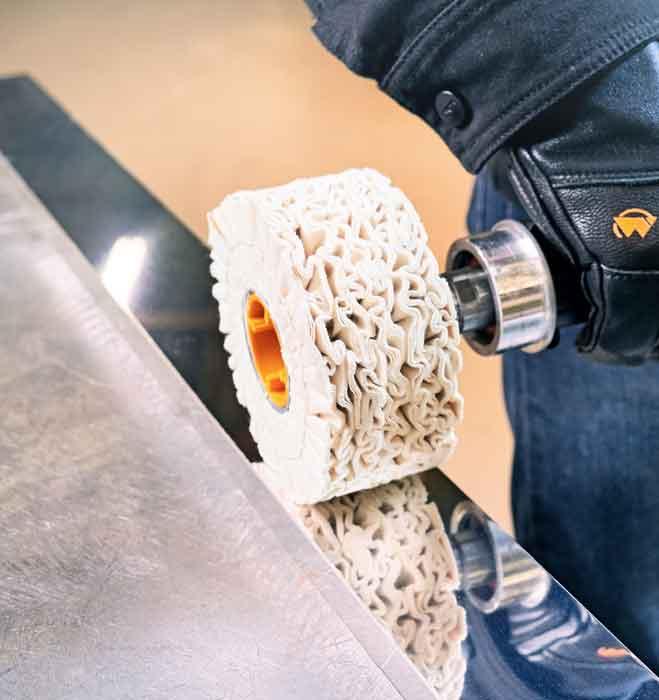
The next step toward the final finish might involve using a nonwoven material, and this illustrates another characteristic unique to finishing: The process works best with a variable-speed power tool. A right-angle grinder running at 10,000 RPM might work with some abrasive media, but it will outright melt certain nonwoven material. For this reason, finishers reduce the speed to between 3,000 and 6,000 RPM before starting a finishing step with a nonwoven consumable. Of course, the exact speed depends on the application and consumable. For instance, nonwoven drums are usually used between 3,000 and 4,000 RPMs, while surface conditioning discs are used between 4,000 and 6,000 RPMs.
Having the right tools—variable-speed grinder, different finishing media—and determining the optimal number of steps essentially provide a map, revealing the best path between the as-received and finished material. The exact path varies depending on the application, but experienced finishers drive down that path using similar finishing techniques.
A nonwoven drum finishes a stainless steel surface. For effective finishing and optimal consumable life, different finishing media run at different RPMs.
First, they take their time. If they see that a thin stainless steel workpiece is getting hot, they stop finishing in one area and start in another. Or they might work on two different workpieces at once. They work a little on one and then the other, giving the other workpiece time to cool.
When polishing to a mirror finish, a finisher might cross-sand with a finishing drum or disc, sanding in a direction perpendicular to the previous step. Cross-sanding highlights areas where the previous scratch pattern needs to be blended, yet it still doesn’t get the surface to a No. 8 mirror finish. To create the desired shiny finish, a felt cloth and polishing wheel are needed after all the scratches are removed.
To achieve the right finish, a fabricator needs to give finishers the right tools, both actual tools and media, as well as communication tools, like samples that establish standards as to what a certain finish should look like. These samples—posted near the finishing department, in training documentation, as well as sales literature—help get everyone on the same page.
Regarding the actual tools—including the power tools and abrasive media—some part geometries can present challenges even for the most experienced employees in the finishing department. Here’s where specialized tools can help.
Say an operator needs to finish a thin-walled tubular assembly of stainless steel. Using a flap disc or even a drum can cause problems, inducing excess heat and sometimes even creating a flat spot on the tube itself. Here, belt sanders designed for tube can help. The belt wraps around most of the tube diameter, spreading the point of contact, increasing efficiency, and reducing heat input. That said, like anything else, the finisher still needs to keep the belt sander moving to different areas to mitigate excessive heat buildup and avoid bluing.
The same applies to other specialty finishing tools. Consider a finger belt sander designed for tight spaces. A finisher might use it to feather down a fillet weld between two sheets at an acute angle. Instead of moving the finger belt sander vertically (a bit like brushing one’s teeth), the finisher moves it horizontally along the upper toe of the fillet weld, then the bottom toe, all while being sure that the finger sander doesn’t stay in one place for long.
Welding, grinding, and finishing stainless steel introduce another complication: ensuring proper passivation. After all these disturbances to the material surface, are there any remaining contaminants that could prevent the stainless steel’s chromium layer from forming naturally over the entire surface? The last thing a fabricator wants is an angry customer complaining about rusted or contaminated parts. Here is where proper cleaning and traceability come into play.
Electrochemical cleaning can help remove contaminants to ensure proper passivation, but when should this cleaning take place? That depends on the application. If fabricators do clean stainless steel to promote complete passivation, they usually do so immediately after welding. Not doing so would mean that the finishing media could pick up surface contaminants from the workpiece and spread them elsewhere. For some critical applications, though, a fabricator might choose to insert additional cleaning steps—and perhaps even test for proper passivation before the stainless leaves the factory floor.
Say a fabricator welds a critical stainless steel component for the nuclear industry. An expert gas tungsten arc welder lays down a perfect-looking stack-of-dimes seam. But again, this is a critical application. An employee in the finishing department uses a brush connected to an electrochemical cleaning system to clean the weld surface. He then uses a nonwoven abrasive and finishing cloth to feather the weld toes and bring everything to a uniform brush finish. Then comes a final brush with the electrochemical cleaning system. After sitting for a day or two, the parts are tested for proper passivation with a hand-held testing device. The results, documented and saved with the job, show that the part was fully passivated before it left the plant.
Grinding, finishing, and cleaning for passivation on stainless all usually occur far downstream in most fabrication plants. In fact, they’re usually performed not long before jobs ship out the door.

A stainless steel sheet is tested to ensure proper passivation.
A piece that isn’t finished properly creates some of the most expensive scrap and rework there is, so it makes sense for fabricators to take another look at their grinding and finishing departments. Improvements in grinding and finishing can help relieve major bottlenecks, improve quality, eliminate headaches, and, most important, improve customer satisfaction.
Walter Surface Technologies is based in Windsor, Conn.

The Fabricator is North America's leading magazine for the metal forming and fabricating industry. The magazine delivers the news, technical articles, and case histories that enable fabricators to do their jobs more efficiently. The Fabricator has served the industry since 1970.
start your free subscription
Easily access valuable industry resources now with full access to the digital edition of The Fabricator.

Easily access valuable industry resources now with full access to the digital edition of The Welder.

Easily access valuable industry resources now with full access to the digital edition of The Tube and Pipe Journal.

Easily access valuable industry resources now with full access to the digital edition of The Fabricator en Español.
In this episode of The Fabricator Podcast, Caleb Chamberlain, co-founder and CEO of OSH Cut, discusses his company’s...


