


Fabricating a custom drive-thru speaker enclosure for a barbecue joint
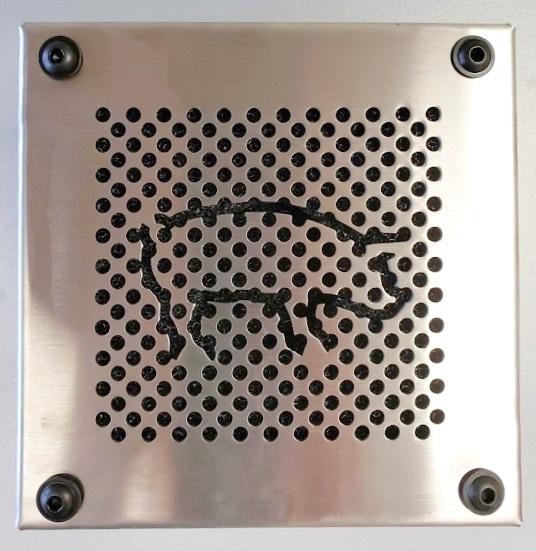
Metal part includes a pig cutout on the front
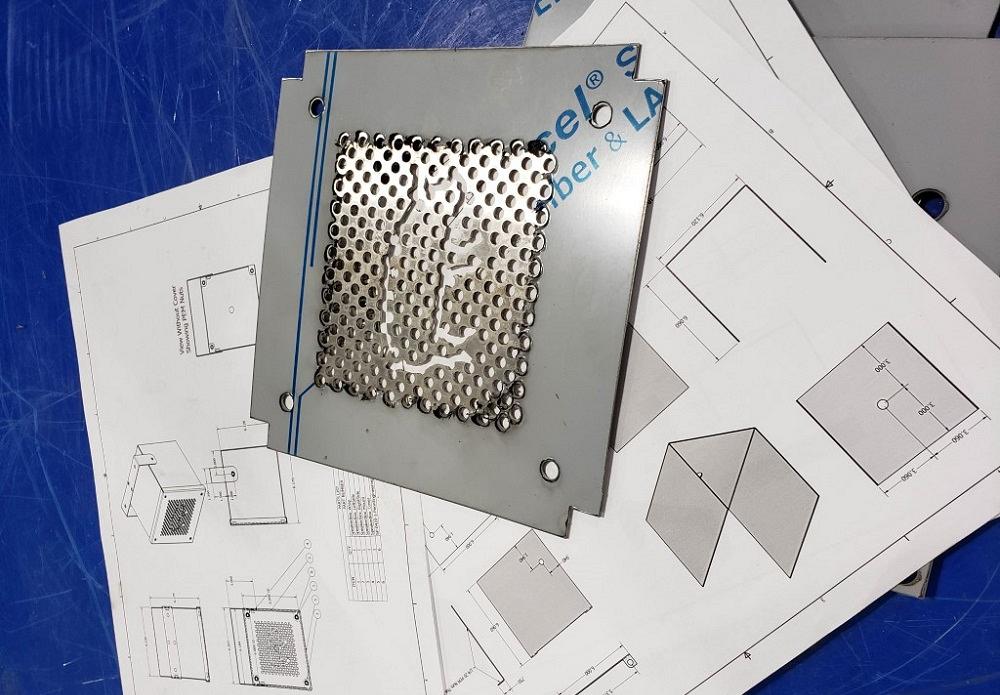
Nick Martin's Autodesk Inventor drawings with the pig cutout. Photo by Nick Martin
As a job shop, you never know what might come in the door: rusty grille pans, horse trailers, weird brackets, or a large chunk of black foam used to hold a drive-thru speaker that needs a new weatherproof enclosure. I like these kinds of jobs, and like I've said before, it keeps you on your toes and keeps your skills in check.
I guess I’m no stranger to weird. My favorite comedy movie series is “Wayne’s World” and I put peanut butter on my waffles. I also live in a crazy fun house with my beautiful wife, a huge bullmastiff puppy, and two daughters with enough personality to bottle up and sell. So, working on odd things is fun for me. When one of our regular customers, Robert Mullet of Marty’s BBQ in our town of Wilson, N.C., came in the office tossing around a black cube of foam, I got kind of excited.
Robert has a strong British accent. You would never know he has been living in North Carolina for years. To keep his restaurant moving, he brings us odds and ends that need fixing. With all honesty, he sounds just like the British character from “Wayne’s World 2,” Del Preston, who keeps telling the story about getting M&M’s for Ozzy Osbourne.
Anyway, he came in my office tossing this black cube around, saying he needed to talk to me or my dad about making something custom. I asked him what he needed. He told me they were upgrading their drive-thru speaker system and needed an enclosure. He said the kits come with everything you need to install the speaker, including the sound-deadening foam, but they do not come with a way to mount them. He showed me some pictures of his old speaker box. We had to make a new one that was large enough to enclose the cubed foam. The cube was roughly 6 by 6 by 6 inches and had to have a hole in the bottom to feed wire, a perforated cover for sound, and a way to mount it to their structure.
I was up for the challenge.
I took a couple notes and asked him to send me the pictures for reference. He told me to just use some scrap metal that we had lying around. As you all know in the metal fabrication world, there is no such thing as scrap metal if you can use it for something else – or even better, sell it! He told me to use some perforated metal for the top, or anything with some holes in it. I told him I would make my own perforations with the laser. He said, “Oh, you can use your fancy, expensive machine that costs XXXX dollars and cut it yourself?” I laughed and said, “For which part of the machine?” He laughed again and said that must have just paid for the computer monitor. Lasers are pricey.
All of our communication was done fairly quickly, and he said he needed it somewhat soon. I’ve been doing a lot of nondesigning work lately, so I was pretty excited to use Autodesk Inventor. I told my co-worker Vasili that I was really looking forward to this. I designed a multi-solid-body part in Inventor so I could easily make the parts work together. Inventor multi-solids are great for small assemblies that need to mate to one another.
I had my design done fairly quickly and showed my dad to see what he thought. He told me that I should add a pig in the middle of the perforations on the cover. I laughed but thought that sounded pretty cool.
Again, I was up for the challenge.
I found a DXF file for another part we build and sell at the Wilson Farmers & Artisans Market. I opened it in AutoCAD, did a quick scale to shrink it down, and offset exterior line. I then saved it as a Block and pasted it into a sketch in Inventor. The pig was then cut out and I added a few tabs to keep the inside in place. Overall, I thought it looked great on screen and I couldn’t wait to see what it would look like after we cut it on the fiber laser.

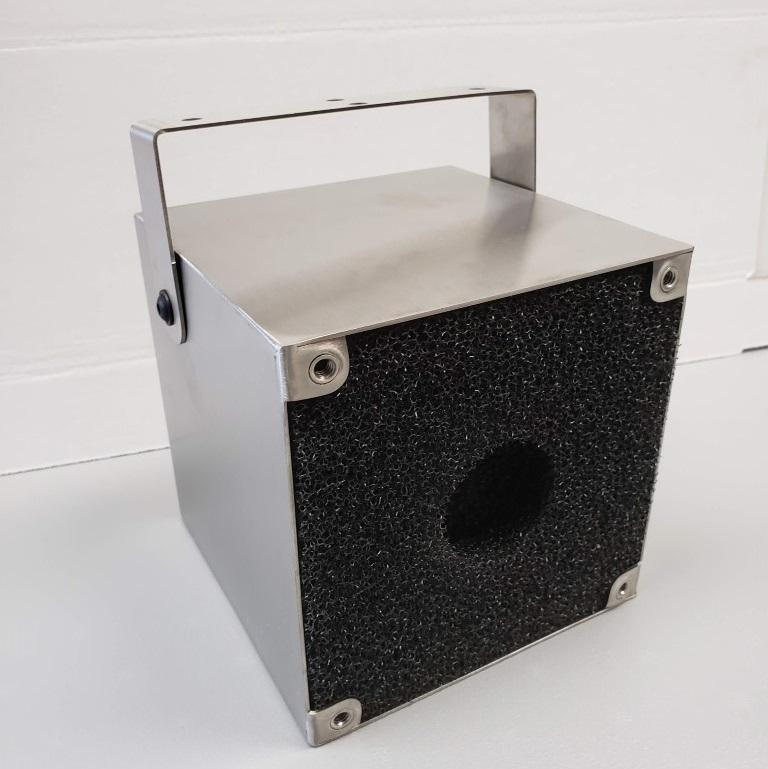
Assembly of the drive-thru speaker box with the cover. Photo by Nick Martin
I shouldn’t have jumped too soon. We ran into a few issues with the arcs and lines on the laser. Everything tooled up and nested well on the laser, but there must have been an issue with the code that was compiled. After looking a little closer, I saw there was an issue with an arc meeting a line segment that formed an odd acute angle. I deleted a couple lines, reposted this to the laser, and the pig was on its way to reality.
Our laser operator, Justin Mullins, came in the office to show me the speaker box cover with the pig. He held it up – and we proceeded to talk into it like we were ordering baked beans and barbecue at the drive-thru. Oh, the humor.
Before we broke the parts on the press brake, we needed to round the edge. Since we had some mild steel parts moving through our Costa Sanders machine, we had to wait a while before the belts would be changed. Instead, we had one of our veteran fabricators, Marty Perry, put an orbital finish on the inside of the parts to remove any imperfections.
We then broke the parts up at the assembly before taking them to our hardware insertion machine, where a few of the parts would get PEM nuts. We haven’t always had this luxury as we would normally use weld nuts. Might as well take advantage of the tools you have.
For assembly, Jason Barnes put this together and the end result turned out to be a professionally done drive-thru speaker. Even if it is getting put high up in the air, it was still a pretty cool project to work on. I hope some of the customers notice the pig in the shadows and wonder where it came from.
In the end, our customer was happy with the results. Jason Barnes was really excited about it and said he was looking forward to seeing it every time he went to Marty’s BBQ.
I guess sometimes the little weird jobs end up being the most fun.
subscribe now

The Fabricator is North America's leading magazine for the metal forming and fabricating industry. The magazine delivers the news, technical articles, and case histories that enable fabricators to do their jobs more efficiently. The Fabricator has served the industry since 1970.
start your free subscriptionAbout the Author

About the Publication

- Stay connected from anywhere

Easily access valuable industry resources now with full access to the digital edition of The Fabricator.

Easily access valuable industry resources now with full access to the digital edition of The Welder.

Easily access valuable industry resources now with full access to the digital edition of The Tube and Pipe Journal.

Easily access valuable industry resources now with full access to the digital edition of The Fabricator en Español.
- Podcasting

In this episode of The Fabricator Podcast, Caleb Chamberlain, co-founder and CEO of OSH Cut, discusses his company’s...
- Trending Articles
1
Tips for creating sheet metal tubes with perforations

2
JM Steel triples capacity for solar energy projects at Pennsylvania facility

3
Are two heads better than one in fiber laser cutting?

4
Supporting the metal fabricating industry through FMA

5
Omco Solar opens second Alabama manufacturing facility
