- FMA
- The Fabricator
- FABTECH
- Canadian Metalworking
Categories
- Additive Manufacturing
- Aluminum Welding
- Arc Welding
- Assembly and Joining
- Automation and Robotics
- Bending and Forming
- Consumables
- Cutting and Weld Prep
- Electric Vehicles
- En Español
- Finishing
- Hydroforming
- Laser Cutting
- Laser Welding
- Machining
- Manufacturing Software
- Materials Handling
- Metals/Materials
- Oxyfuel Cutting
- Plasma Cutting
- Power Tools
- Punching and Other Holemaking
- Roll Forming
- Safety
- Sawing
- Shearing
- Shop Management
- Testing and Measuring
- Tube and Pipe Fabrication
- Tube and Pipe Production
- Waterjet Cutting
Industry Directory
Webcasts
Podcasts
FAB 40
Advertise
Subscribe
Account Login
Search
Manufacturer’s metrology upgrade helps ensure tight-tolerance quality
- January 27, 2022
- News Release
- Testing and Measuring
Situation
Part of the Renk group, Horstman is a manufacturer and global supplier of suspension systems for heavily armored and tracked vehicles. It also produces safety-critical engineering components allied to its core products for the subsea and aerospace industries. These components are up to 1.15 m long by 0.75 m in diameter, made of steel, titanium, and aluminum.
The factory at the company's headquarters in Bath, U.K., was an early adopter of coordinate measurement machines. The company has had a succession of different CMM models over the years, most recently three machines of small, medium, and large capacity.
At Horstman, new designs are being introduced with increasing regularity and to ever-tighter tolerances for hydropneumatic suspensions, electronic and electrohydraulic active vehicle ride management systems, military thermal management systems, and the aerospace and subsea products. That is why the metrology departments were often under pressure and wanted to move quality control technology forward in terms of speed of data acquisition and the accuracy of the data collected, in particular for form measurement.
"As we are involved in the supply of safety-critical, defense-related products, we decided that we needed a second large-capacity measuring machine that could inspect every size of component that we manufacture to provide redundancy in our capabilities if one of the CMMs should break down or require servicing,” said Stephen Ellis, quality manager at the Bath factory.
Resolution
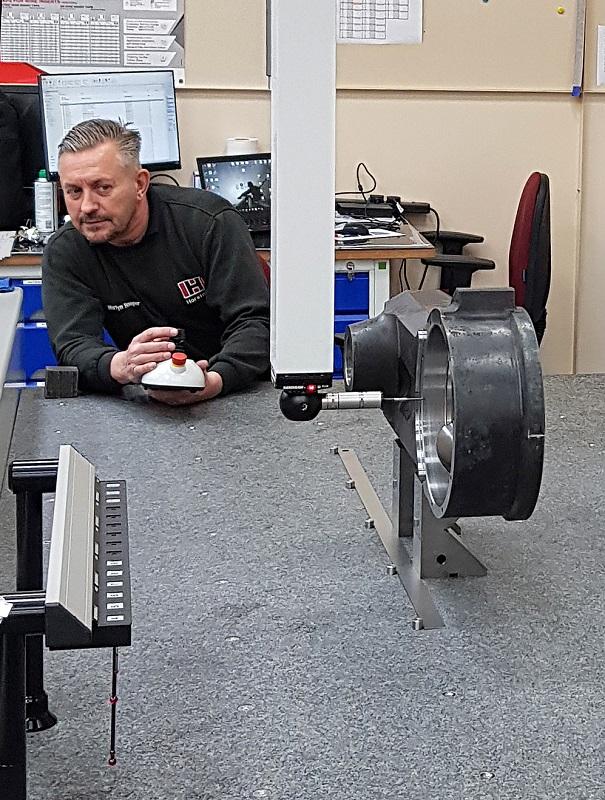
The company chose to install the new LK AlteraM 25.15.12 bridge CMM at its factories in Bath and Sterling Heights, Mich.
"We manufacture some components for our U.S. factory, and they produce others for us, so it was expedient to duplicate the metrology facility in our Sterling Heights plant,” Ellis explained.
The machine, which has a large inspection volume of nominally 2.5 by 1.5 by 1.2 m and is equipped with traditional touch trigger probing and an advanced tactile scanning probe, replaced the smallest of the three previous machines.
The CMM captures dimensions and shapes rapidly, and results are compared with the corresponding CAD model to ascertain fit and finish. Typical measurement cycle times are between 10 minutes and one hour. Features with a total tolerance down to 7 microns need to be inspected, and some parts have reflective surfaces, which is why the manufacturer has not opted for the rapid, high-density point cloud acquisition of laser scanning. It would entail surface preparation, and in Ellis’ opinion, laser sensors do not offer the same level of accuracy and repeatability as tactile probes.
"The contact scanning capability of the new LK CMMs acquires many hundreds of surface points every second, enabling interrogation of form as well as size and position, including of bores 400 mm deep,” said Trevor Prynne, business development director at Horstman.
The latest version of LK's CAMIO 2021 software for programming and reporting has been supplied to the two factories. It also can be retrofitted to other CMMs at both sites in the future to enable interoperability between the different machines. The software features a graphical user interface, single- and multipart loading instructions, program queuing, and advanced error recovery for automated inspection.
subscribe now

The Fabricator is North America's leading magazine for the metal forming and fabricating industry. The magazine delivers the news, technical articles, and case histories that enable fabricators to do their jobs more efficiently. The Fabricator has served the industry since 1970.
start your free subscription- Stay connected from anywhere

Easily access valuable industry resources now with full access to the digital edition of The Fabricator.

Easily access valuable industry resources now with full access to the digital edition of The Welder.

Easily access valuable industry resources now with full access to the digital edition of The Tube and Pipe Journal.
- Podcasting
- Podcast:
- The Fabricator Podcast
- Published:
- 04/16/2024
- Running Time:
- 63:29
In this episode of The Fabricator Podcast, Caleb Chamberlain, co-founder and CEO of OSH Cut, discusses his company’s...
- Trending Articles
Tips for creating sheet metal tubes with perforations

Are two heads better than one in fiber laser cutting?

Supporting the metal fabricating industry through FMA

JM Steel triples capacity for solar energy projects at Pennsylvania facility

Omco Solar opens second Alabama manufacturing facility

- Industry Events
16th Annual Safety Conference
- April 30 - May 1, 2024
- Elgin,
Pipe and Tube Conference
- May 21 - 22, 2024
- Omaha, NE
World-Class Roll Forming Workshop
- June 5 - 6, 2024
- Louisville, KY
Advanced Laser Application Workshop
- June 25 - 27, 2024
- Novi, MI


