Contributing Writer
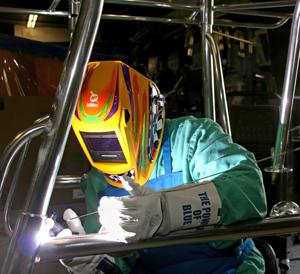
GTAW on anodized aluminum requires different equipment, preparation, and technique than on standard aluminum. Its corrosion resistance makes it ideal for boating accessories, such as this tuna tower, that are exposed to high-salinity environments.
Performing gas tungsten arc welding (GTAW) on anodized aluminum is a bit like trying to poke a hole in a sheet of ice without disturbing the water underneath. In this case, the ice is the hard layer of oxide created by the anodization process and the water is the soft aluminum underneath.
Anodized aluminum is simply standard aluminum that has been treated to produce a thick layer of oxides on its surface. The aluminum base is a very soft material and melts at approximately 1,100 degrees F, but the oxide layer is extremely hard (some types approach the hardness of diamonds) and melts at 3,600 degrees F. The difficulty in welding anodized aluminum lies in removing the oxide layer without burning through the aluminum base.
Interestingly, it is these properties of the oxide layer that make anodized aluminum a useful material in the first place. It is relatively inexpensive, visually appealing, lightweight, and corrosion-resistant, making it suitable for high-salinity environments, such as coastal areas. It is used in the manufacture of tuna towers, rod holders, chairs, and T-tops on sport fishing boats, piers, bow rails, and wakeboard towers.
Without any treatment, aluminum naturally forms a very thin layer of oxides. The process of anodizing aluminum uses an electrolytic chemical application, usually with sulfuric acid, to create a layer of oxides several times thicker than would naturally form —0.0002 to 0.001 inch thick.
The four types of anodized aluminum are standard, bright-finish, colored, and hardened.
Bright-finish anodized aluminum can be visually distinguished from standard anodized aluminum by its shiny, chromelike finish. This type of material has a thicker layer of oxides than standard anodized aluminum, making it more difficult to GTAW, and is used primarily for cosmetic reasons.
Colored anodized aluminum is also used for cosmetic purposes. This material uses dyes in the anodization process, which allow the material to take on different hues, but also introduce potential contaminants into the weld.
Hardened anodized aluminum is almost as hard as a diamond and is very difficult to weld. This type of material is usually used only in highly specialized industrial applications.
Bright-finish, colored, and standard anodized aluminums all use much the same equipment, preparation, and technique as standard aluminum, but they have some unique requirements in order to be welded successfully.
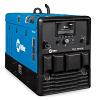
Selecting the right equipment is the first step in welding anodized aluminum successfully. Equipment unique to the process includes a torch with a fingertip control and a 5356-class filler metal. An air-cooled torch is suitable for less than 200 amps, but a water-cooled torch should be used for applications requiring more amperage.
Like standard aluminum, anodized aluminum also requires a 100 percent argon shielding gas or an argon/helium mixture and a 2 percent ceriated (orange stripe) or thoriated (red stripe) tungsten. [Note: Thorium is radioactive. Always follow the manufacturer's warnings, instructions, and the Material Safety Data Sheet for its use.] Pure tungsten (green stripe) also can be used, but only up to about 70 percent the amperage of ceriated or thoriated tungsten.
When preparing the tungsten, grind it to the same type of point that you would when welding steel or stainless steel. Be sure to regrind the tip when it rounds off and causes the arc to become unstable. Repeat this process as necessary.
A power source capable of alternating current (AC) is also necessary because the electrode-positive portion of the current cycle breaks apart the oxide layer.
Although some traditional transformer-based GTAW power sources are capable of successfully welding anodized aluminum, an inverter is highly recommended for its balance and frequency controls.
Balance control allows you to adjust how long the current spends in each part of the AC cycle. For example, a balance control set to 30/70 means that the current spends 30 percent of its cycle in electrode-positive, cleaning the oxide layer from the base material, and 70 percent in electrode-negative, directing the electrical energy into the weld joint and joining the two pieces of material.
Your experience and skill will determine how you set the balance control. A more skilled welder often can use a higher percentage of electrode-negative (80 to 90 percent) in order to work faster.
The frequency control function available on inverter units allows you to determine the length of time that it takes the unit to complete one full current cycle (the combined time spent in electrode-positive and electrode-negative.)
Transformer-based power sources produce an output of 60 Hz (50 Hz in Canada), which is the same frequency that comes from a standard outlet. Inverters, however, are able to adjust the frequency from 20 to 400 Hz. For anodized aluminum, a frequency of about 160 to 200 Hz generally produces the best results. The frequency produces a narrower arc cone and, consequently, a narrower weld bead and HAZ. The strength of the weld increases by reducing the area of the base material exposed to the heat of the arc. A narrower weld bead reduces the time and filler metal needed to make the weld.
An inverter machine also eliminates the need for a backhanding technique. Backhanding, also known as backing around the weld, involves making two passes on each weld joint—one pass going forward to clean off the oxide layer and then reversing direction to add filler metal to the area just cleaned. In addition to doubling the time it takes to weld the joint, backhanding requires the workpiece to be heated twice, and this can reduce the strength of the weld.
Properly preparing the material is critical to ensuring strong and cosmetically appealing welds on anodized aluminum.
The material should be at room temperature for at least an hour before welding, otherwise condensation can form within the aluminum and react with the argon shielding gas, creating porosity and a black, sooty appearance on the weld.
Cleaning any residue, dirt, or other foreign material from the base metal and filler metal with a clean cloth prior to welding helps prevent weld defects such as porosity, inclusions, and lack of fusion.
Although the electrode-positive portion of the AC cycle helps remove the oxide layer that builds up on aluminum, you may want to use a dedicated stainless steel brush to manually clean the material before welding. Using this brush for other purposes will introduce foreign contaminants to the weld joint and compromise the weld's structural integrity. An oxide layer begins to form immediately after brushing, so it is also necessary to rebrush a piece that sits for an extended amount of time without being welded.
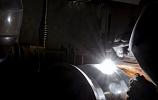
Anodized aluminum requires a technique known as bumping, which is a way to remove the thick oxide layer without putting too much heat into the weld pool. Because it uses a fingertip control switch, a foot pedal is unnecessary for this technique.
Bumping involves very briefly starting an arc using the finger control switch, adding the filler metal, extinguishing the arc, moving down the weld joint about 1⁄16 in., and repeating the process. Turning the fingertip switch off gives the weld pool a moment to cool and solidify before you reintroduce the heat with a new arc.
Although easily described, bumping is one of the more difficult GTAW techniques to master. A proficient operator typically can reach a travel speed of about an inch every 30 to 40 seconds.
The amperage range you use will depend on your skill, with a beginner to intermediate welder using around 180 to 190 amps, and a highly skilled welder around 230 amps.
The thickness of the material will require you to adjust the travel speed—thin material requires a faster travel speed than thicker material—but the amperage range typically remains the same regardless of material thickness.
At those amperage levels, a filler metal of 1⁄8 in. diameter should be used. Anything smaller will melt off before it gets to the weld pool. It is also important when adding the filler metal to insert it at the leading edge of the weld pool while the arc is live and to remove it before extinguishing the arc, so that the filler metal doesn't become trapped in the weld pool as it cools.
The distance between the end of the filler metal and the weld should be no more than the diameter of the torch cup.
Although anodized aluminum certainly poses some unique challenges, its weight, low cost, and resistance to corrosion make it the best option for many applications and environments. Following this advice should help you overcome the difficulties associated with this material and realize its potential benefits.

The Welder, formerly known as Practical Welding Today, is a showcase of the real people who make the products we use and work with every day. This magazine has served the welding community in North America well for more than 20 years.
start your free subscription
Easily access valuable industry resources now with full access to the digital edition of The Fabricator.

Easily access valuable industry resources now with full access to the digital edition of The Welder.

Easily access valuable industry resources now with full access to the digital edition of The Tube and Pipe Journal.

Easily access valuable industry resources now with full access to the digital edition of The Fabricator en Español.
In this episode of The Fabricator Podcast, Caleb Chamberlain, co-founder and CEO of OSH Cut, discusses his company’s...