


Owner, Brown Dog Welding
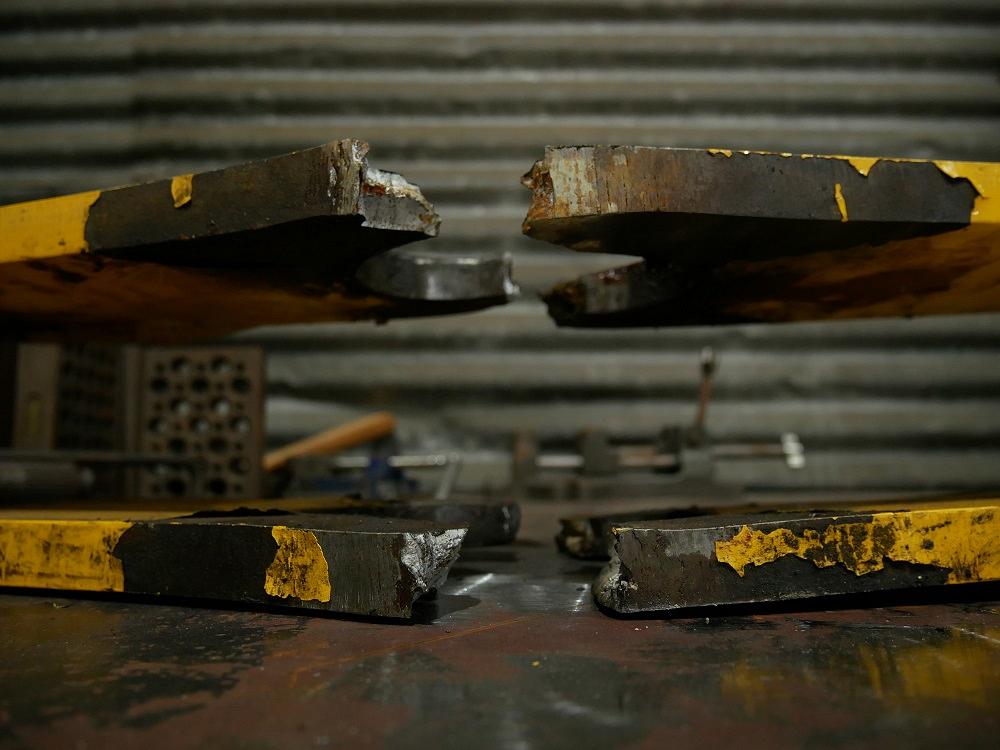
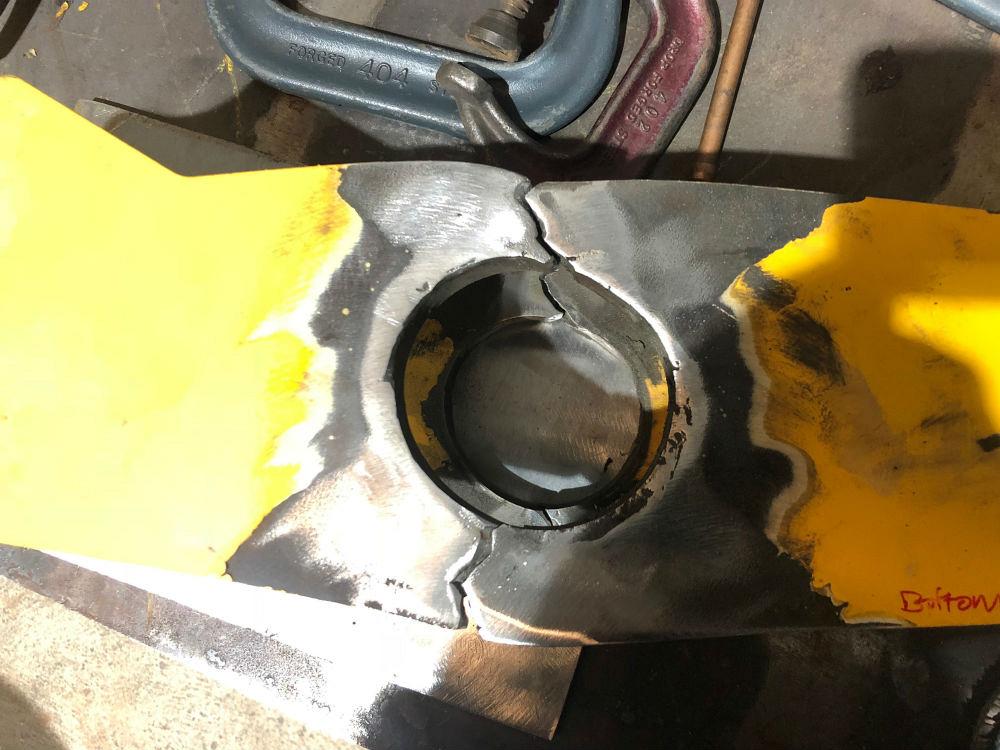
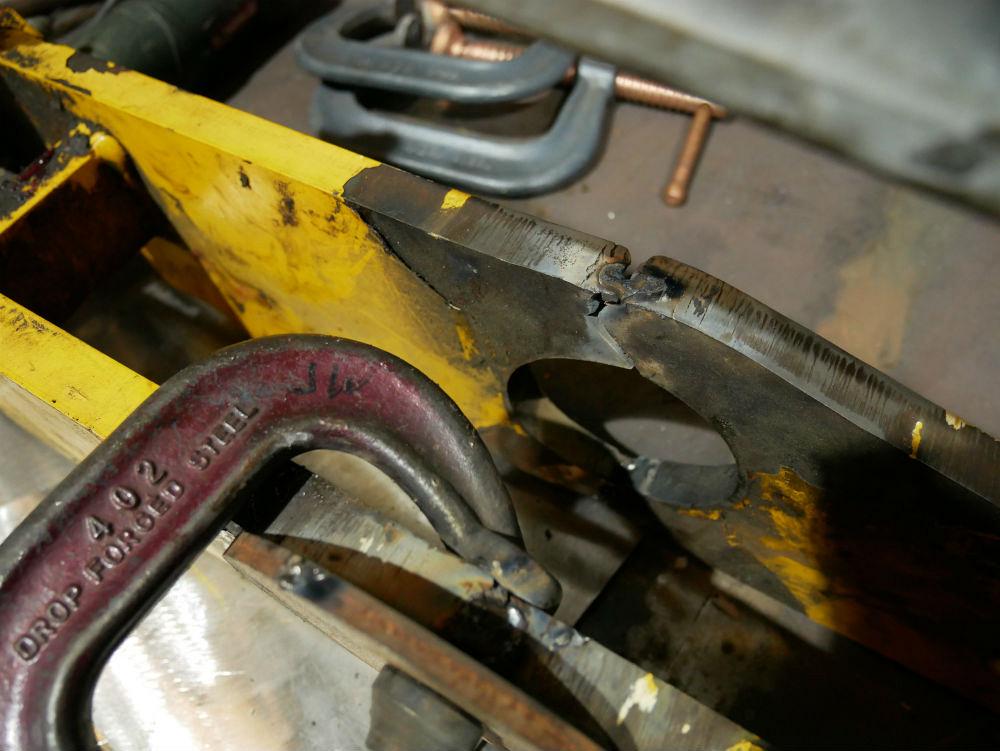
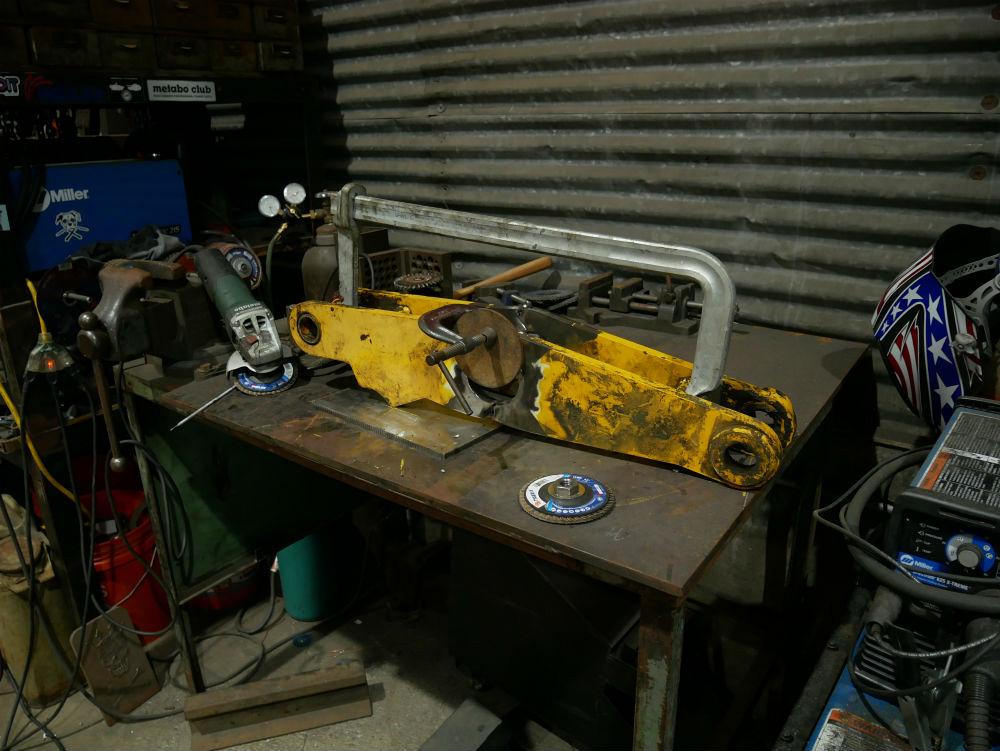
Figure 1: Broken tractor arm.
Recently a local landscaping company brought an arm off of a tractor to me for repair. The metal had snapped apart in four places, both at the top and bottom of (formerly) round holes in two thick plates that were parallel to each other (Figure 1). The shape of the holes told the tale of a part that had been under stress for a while, as it was gouged, oblong, and stretched thin. This made it difficult to know what the original dimensions were, and because I couldn’t get those numbers from the client, I was left to make an educated guess.
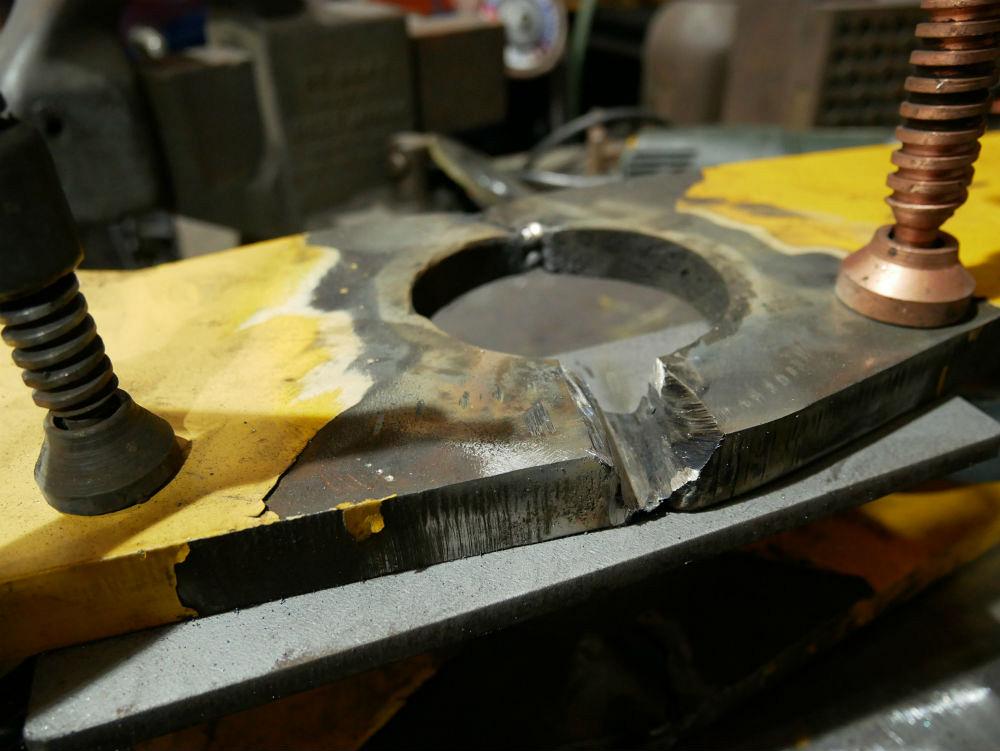
My method for fixing a part where it’s been cracked in two is as follows: I grind, clean, and flatten the sides and corners but leave the actual cracked edges. As long as there’s not too much distortion or elongation, I’ll put the two pieces together like a puzzle (Figure 2), while also using whatever “known” surface the two sides share to help line up the pieces. In this case there was quite a bit of distortion, but there was a very obvious mutual plane that I could use for reference. I was able to clamp a straight piece of metal to connect the two sides before tacking them together (Figure 3; see slideshow for remaining figures).
Here’s where it’s good to know the rules so you can break them. You’re never supposed to weld over a crack. The crack needs to be ground out or it will reappear after welding. But in this case, the crack was integral to line up the broken pieces together. So, I did weld over the crack, temporarily, on one side of each joint (Figure 4). This was to hold the arm where I wanted it while I Ved out the other side. The plates were about ¾ in. thick.
A quick note: When you’re repairing a piece of solid material that’s been snapped in two, you should aim for 100 percent penetration when possible. It might seem like common sense to some of you, but I’ve seen “fixes” where someone just ran a bead around the outside surface. Say you’ve got a 2- by 2-in. steel bar that’s cracked all the way through. A bead that goes in ¼ in. all the way around isn’t going to come close to giving you the strength that the bar originally had. You need to V out the bar and commit to welding it the entire thickness and width.
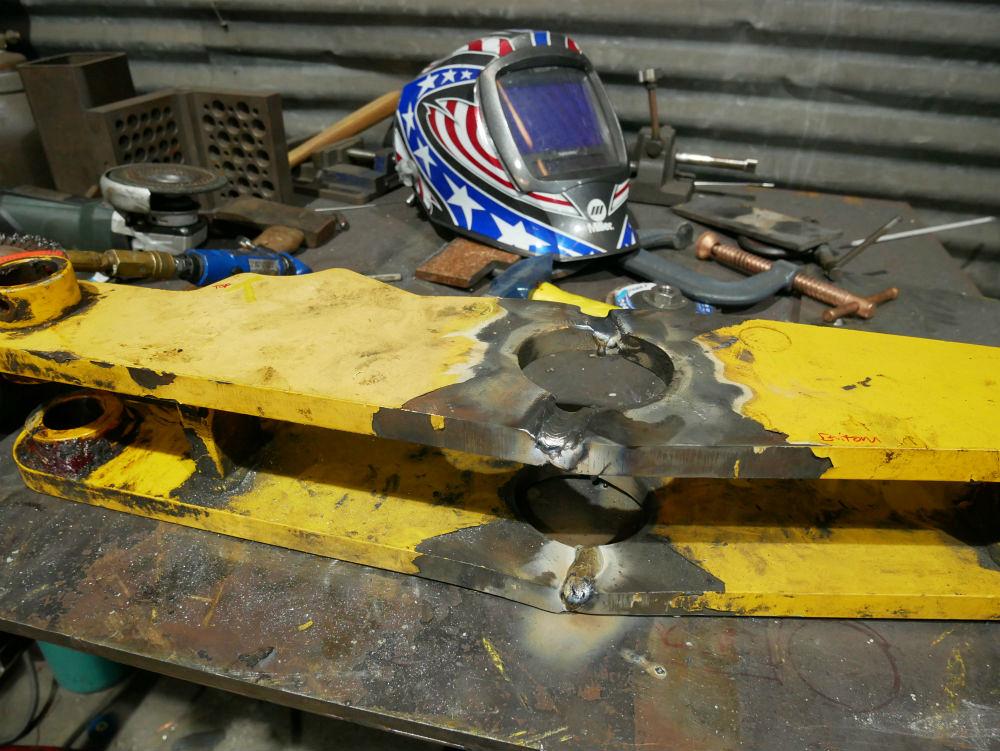
Back to this project. I put the temporary bead on the inside of the part at all four fracture points (Figure 5). Once they were solid, I gouged out the cracked material from the outside, grinding until I reached the back side of the inside bead (Figure 6). From there it was time to pour in the weld. TIG welding the entire thing would have taken forever, and my MIG machine isn’t powerful enough to get the penetration I wanted on the thick plates. I threw a stinger onto my Dynasty 280 and broke out the 7018 electrodes. It didn’t exactly make quick work of the job, but with ⅛-in. and 5/32-in. rod, it did the trick.
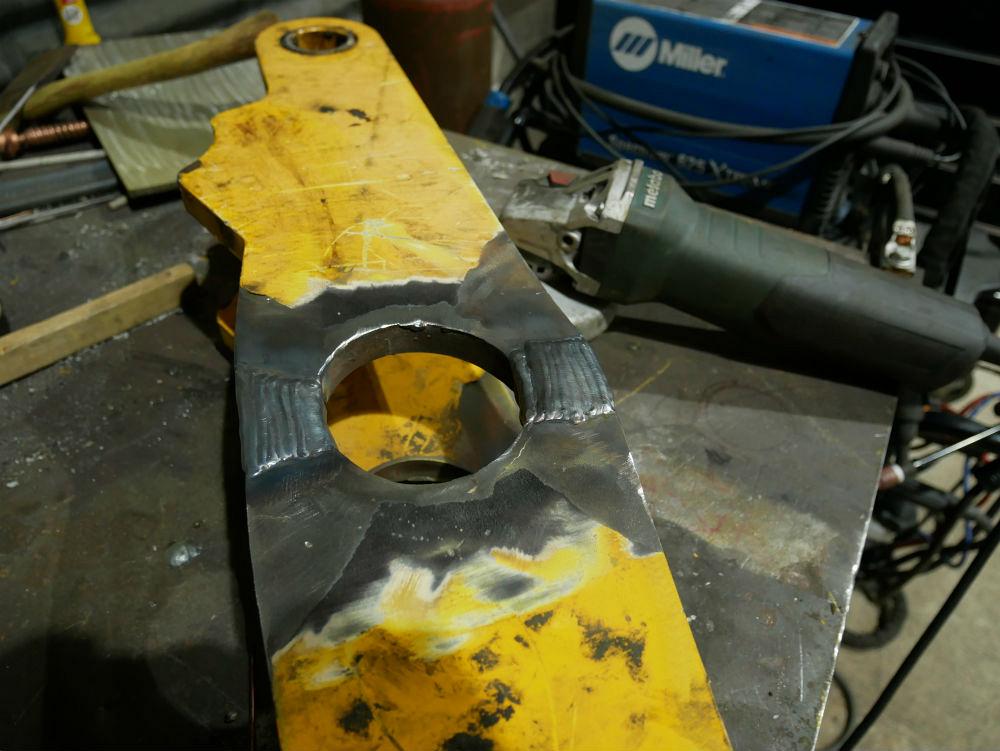
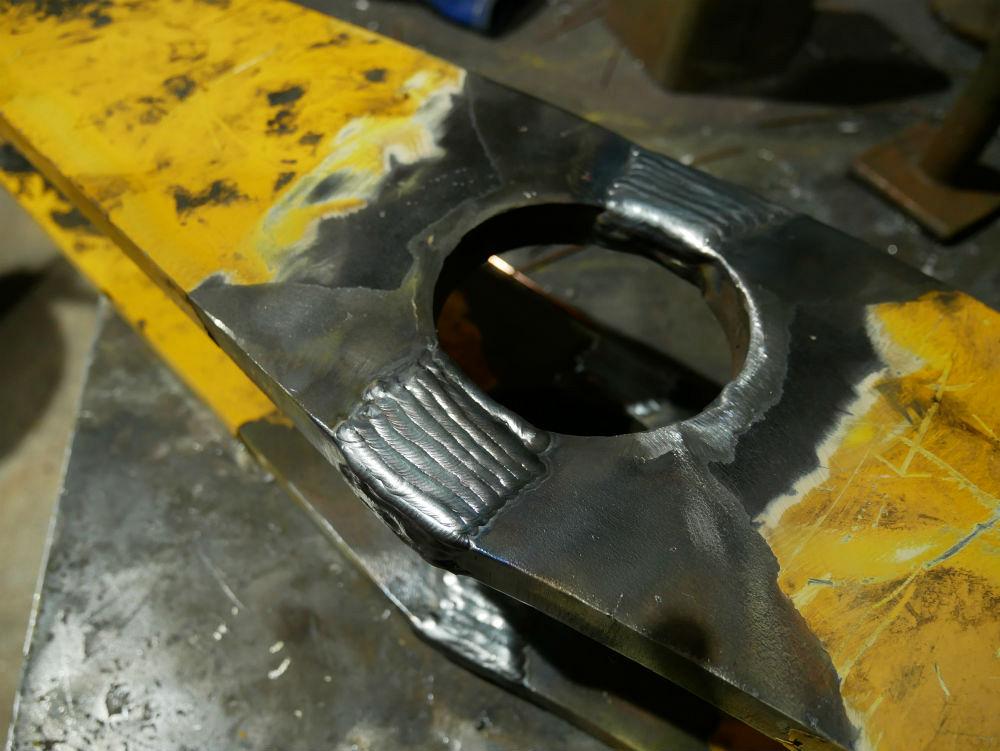
Once the joint was mostly filled, I could grind out the temporary bead from the inside, through the bead and through any remnants of the cracked material, into the new, “good” metal I’d deposited with the sticks. Any hints of my original weld and the fracture were gone (Figure 7).
I capped the joints with TIG-welded beads (Figure 8); it’s just easier to fill the edges and blend the surfaces and saves a bit of cleanup time. The hole remained stretched out a bit, as without knowing the original diameter I wasn’t going to spend a bunch of time on creating a perfect circle that may or may not need to be modified later on. This turned out to be a smart move, as the arm actually has a sleeve that was supposed to be welded in between the plates. The tractor operator failed to mention that to the client. That’s a job I did on-site, and that’ll be the next part of this story!
All images courtesy of Josh Welton, Brown Dog Welding.

The Welder, formerly known as Practical Welding Today, is a showcase of the real people who make the products we use and work with every day. This magazine has served the welding community in North America well for more than 20 years.
start your free subscription


Easily access valuable industry resources now with full access to the digital edition of The Fabricator.

Easily access valuable industry resources now with full access to the digital edition of The Welder.

Easily access valuable industry resources now with full access to the digital edition of The Tube and Pipe Journal.

Easily access valuable industry resources now with full access to the digital edition of The Fabricator en Español.
In this episode of The Fabricator Podcast, Caleb Chamberlain, co-founder and CEO of OSH Cut, discusses his company’s...


