Senior Product Application Engineer
High-pressure waterjets have advanced substantially over the years in terms of longevity and reliability. Still, they need maintenance and repair from time to time. Problems can be avoided or resolved with simple troubleshooting.
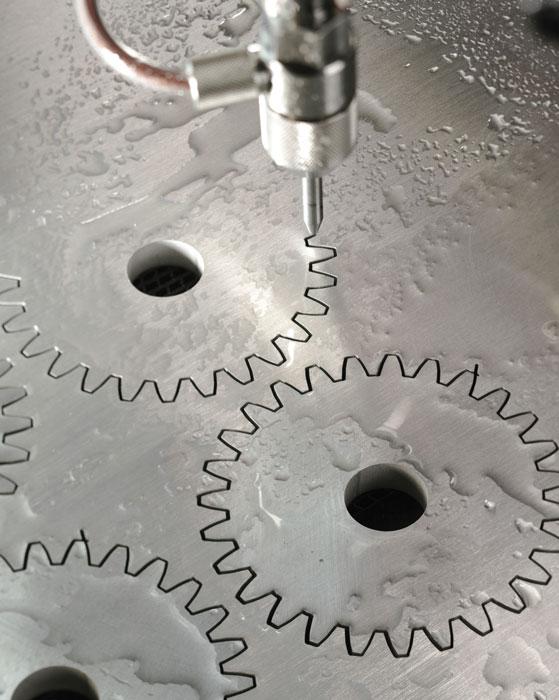
High-pressure waterjets are a versatile alternative to cutting methods such as plasma, laser, and mechanical slitting machines. In contrast with thermal cutting, they can precisely cut metal without leaving a heat-affected zone (HAZ). That makes waterjet the preferred method for cutting metal parts for aerospace and construction applications in which metallurgical changes could impact the integrity of the material.
Like other cutting technologies, waterjet systems have changed quite a bit over the past decade. The newest systems can cut faster and more precisely, and they are more reliable for improved uptime. Engineering advances and advanced system diagnostics that warn of a problem before it starts have made today’s waterjet systems more reliable than those designed even a decade ago, making maintenance more predictable and reducing downtime in general.
Still, as with any mechanical machinery, problems are sure to surface from time to time. Most of them can be quickly resolved with some simple troubleshooting.
The intensifier is probably the hardest-working part of any waterjet system. Because it has more moving parts, more can go wrong. Some of the most common problems are overstroking, water leaks, and short seal life (see Figure 1). Three other common problems with intensifier-based waterjet systems are hydraulic pressure failure, low water pressure, and hydraulic temperature overheating.
It is normal for the intensifier to stroke faster during startup and when changing between low pressure and high pressure; however, during normal operation, the intensifier should stroke smoothly to the left and right at the same speed. Sometimes, though, the hydraulic piston travels faster in one or both directions, or more than the pump can support. This is called overstroking. It will trigger an alarm.
Regardless of whether the overstroking is to the left, right, or in both directions, the first thing you should do is reset the alarm. Next:
Sometimes, if the overstroke alarm occurred in error, these steps will reset your system and resolve the problem. If they do not, then monitoring the intensifier stroke rate will indicate how to proceed.
If the intensifier overstrokes in both directions, some steps you can take are:
If the intensifier overstrokes in only one direction, you should:
Another maintenance area is water leakage. Damage to the high-pressure water seals and the hoops is the most common cause of water leaks from the intensifier. If you see a drip of water every few strokes, it means that the seals are nearing the end of their life and should be replaced within a reasonable period of time. If you see a drip with every stroke, then you should change your seals at the soonest opportunity. If you see leaks in other areas, that likely indicates a worn part, loose fitting, or damaged seat. It is important to address this leakage right away to prevent further damage to nearby components. There are several things to watch for:
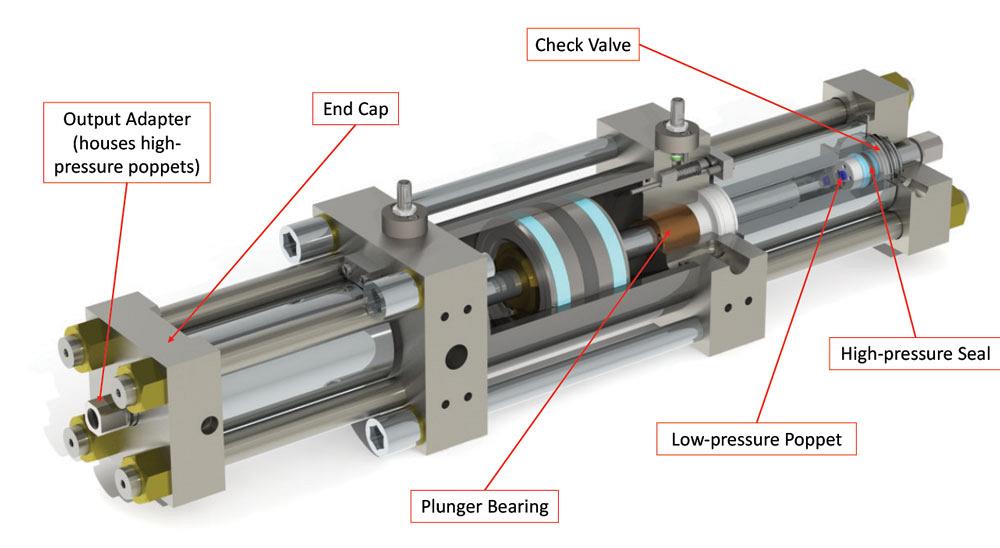
Figure 1
Some of the most common problems with a waterjet intensifier are overstroking, water leaks, short seal life, hydraulic pressure failure, low water pressure, and hydraulic temperature overheating.
If it seems the high-pressure water seals have a short life, some things you can do to help extend the interval between maintenance are:
After intensifier problems, the next most common issue is failure to build hydraulic pressure and, as a result, water pressure. If the pump fails to build hydraulic pressure:
In addition to hydraulic pressure problems, you might also get a high-temperature warning. The normal operating temperature for hydraulic fluid is based on the fluid weight and determined by the pump manufacturer. If the fluid’s temperature rises above the rated temperature, it becomes too thin and degrades, which decreases the lubricity and protective qualities.
If you see an unexpected increase in temperature, then the likely culprit is the cooling system. Returning the temperature to normal depends on whether your system is water-cooled or air-cooled.
If it is water-cooled, make sure the cooling water is turned on and then adjust the water-modulating valve (if equipped) to increase the water flow, which will decrease the hydraulic fluid temperature.
If you have an air-cooled system, the problem could be caused by the ambient temperature in the shop. It may be too hot, in which case you might want to consider installing an air conditioner or other air-cooling system. The problem may also be that the fan is not generating enough airflow. If you suspect that is the cause, check the heat exchanger fins to be sure they are not dirty or clogged. Clean the fins if necessary. In addition, look at the thermal overload device on the fan motor starter inside the electrical enclosure to be sure it has not tripped. If it has tripped, reset the overload.
If the cooling system is not the cause, measure the hydraulic relief valve temperature. If this valve is cracking open, it will generate a significant amount of heat, potentially overloading the capacity of the heat exchanger or cooler. You can also inspect the cord for the hydraulic fluid temperature and level sensor to be sure it is not unplugged or damaged. Finally, inspect the temperature sensor to ensure that it isn’t faulty or damaged.
You may also notice low water pressure, either to or from the intensifier. When water travels away from the intensifier, it is normal for the pump pressure to fall when the cutting head is turned on. However, if the pressure falls too low, you’ll want to take these actions:
When water is traveling to the intensifier, a pressure switch is often present that senses water pressure to the intensifier. If the system senses the pressure is too low, the pump will turn off to protect the system from running without enough pressure to the intensifier. If this happens to you, do the following:
Following these troubleshooting tips will save you time and money on a service technician, helping you pocket more profit.
Arion Vandergon is senior product application engineer—waterjet for Hyperthem Inc., arion.vandergon@hypertherm.com, www.hypertherm.com.

The Fabricator is North America's leading magazine for the metal forming and fabricating industry. The magazine delivers the news, technical articles, and case histories that enable fabricators to do their jobs more efficiently. The Fabricator has served the industry since 1970.
start your free subscription
Easily access valuable industry resources now with full access to the digital edition of The Fabricator.

Easily access valuable industry resources now with full access to the digital edition of The Welder.

Easily access valuable industry resources now with full access to the digital edition of The Tube and Pipe Journal.

Easily access valuable industry resources now with full access to the digital edition of The Fabricator en Español.
In this episode of The Fabricator Podcast, Caleb Chamberlain, co-founder and CEO of OSH Cut, discusses his company’s...