


Owner, Brown Dog Welding
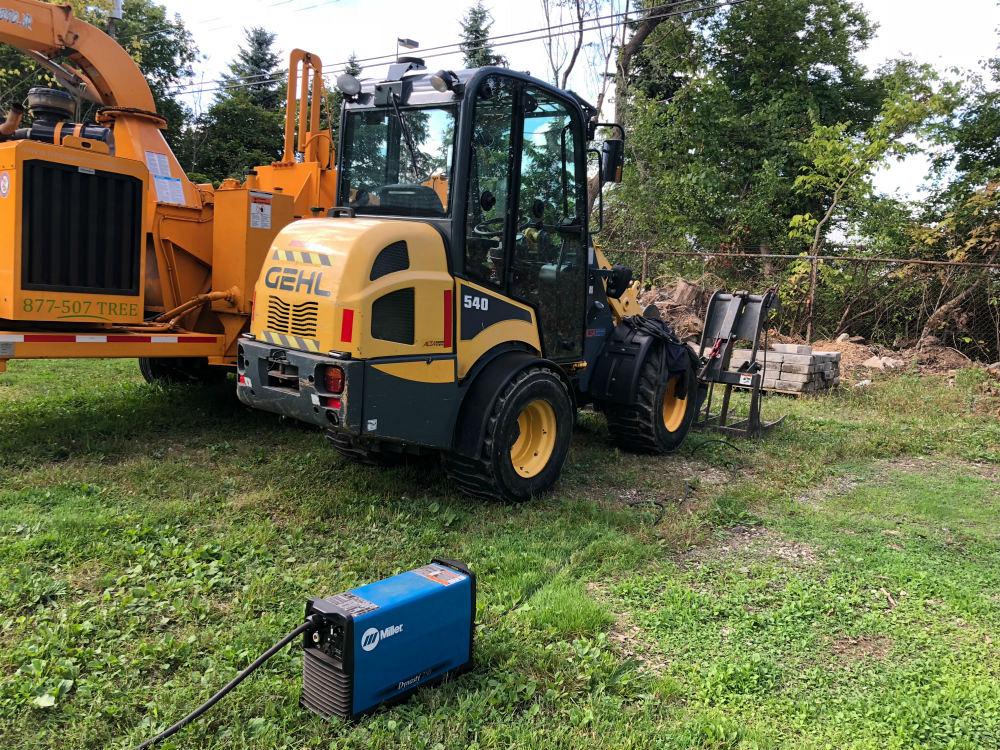
Installing the repaired arm onsite.
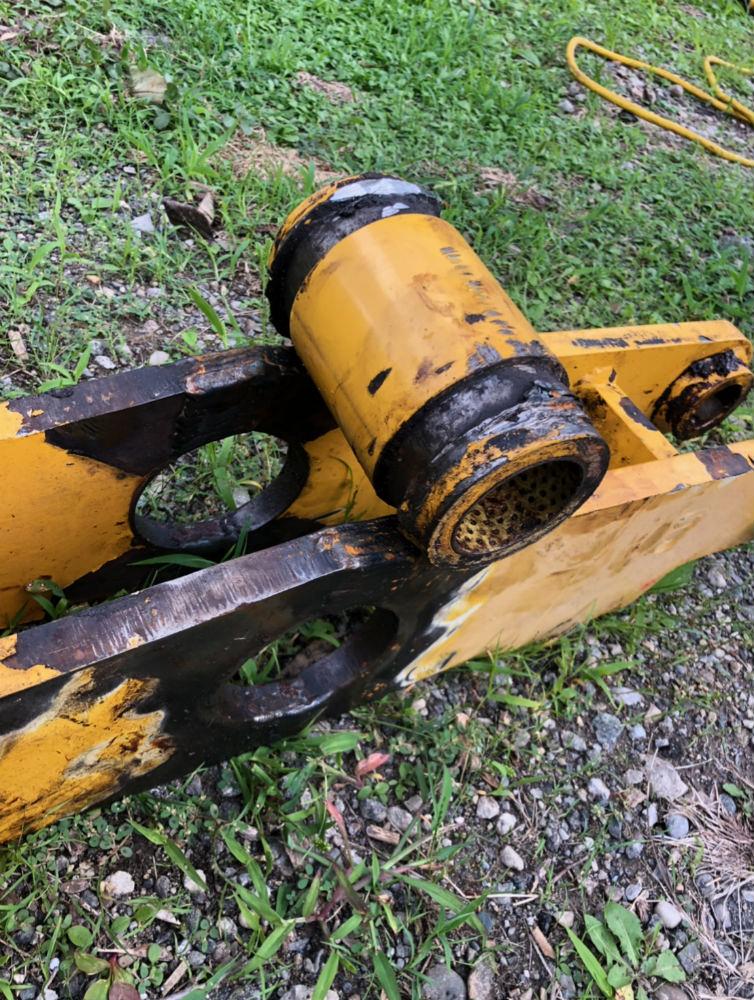
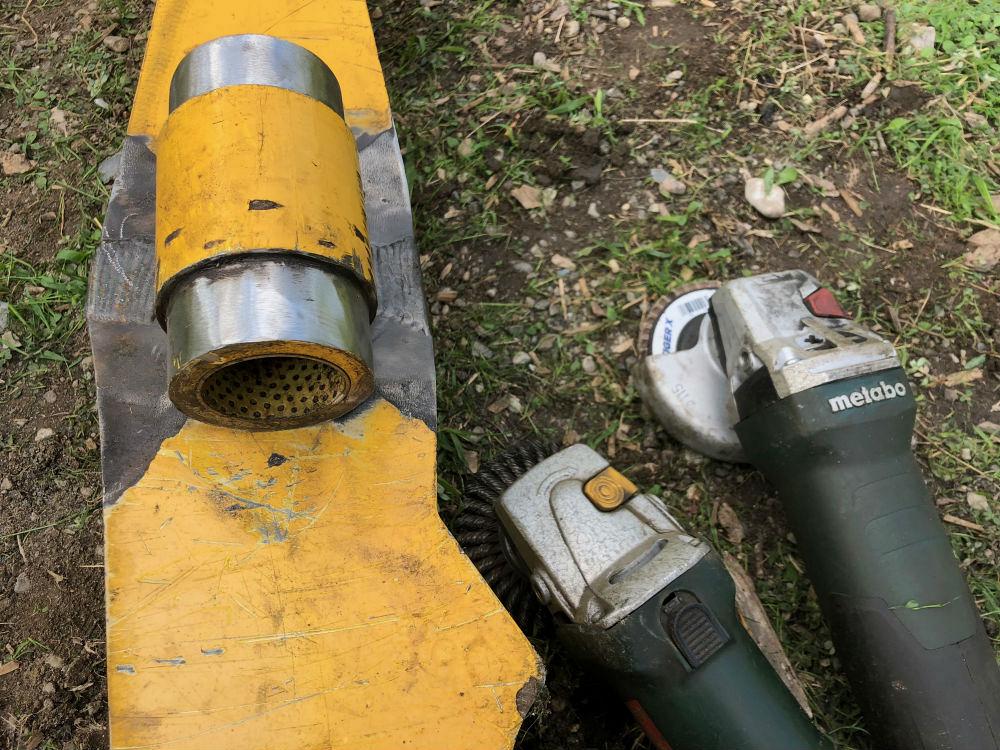
Part I described repairing an arm from a tractor implement that had snapped in two. What I didn’t know was that at some point during the breakdown, a sleeve—basically, a tube—went missing. The sleeve originally slid through the hole and was welded to the arm on either side. When the arm was in place, this sleeve held a pin that acted as a pivot point. The sleeve (Figure 1) was in pretty good shape. The welds from the factory that mounted it to the arm had cracked all the way around on both sides. The arm had stretched and broken in the middle, snapping apart and leaving the sleeve around the shaft it pivoted on.
The middle part of the tube had a larger outer diameter than the inside diameter of the holes it sat in; it had a step-in on both sides. Basically, the arm’s outside plates were supposed to slide over that smaller part of the tube on either side, sandwiching it in. Rather than cut apart the arm, put the sleeve in place, reweld the entire thickness of the plate again in four places, then weld the tube around the outside on both sides, I decided to go a different route that would save a bit of time.
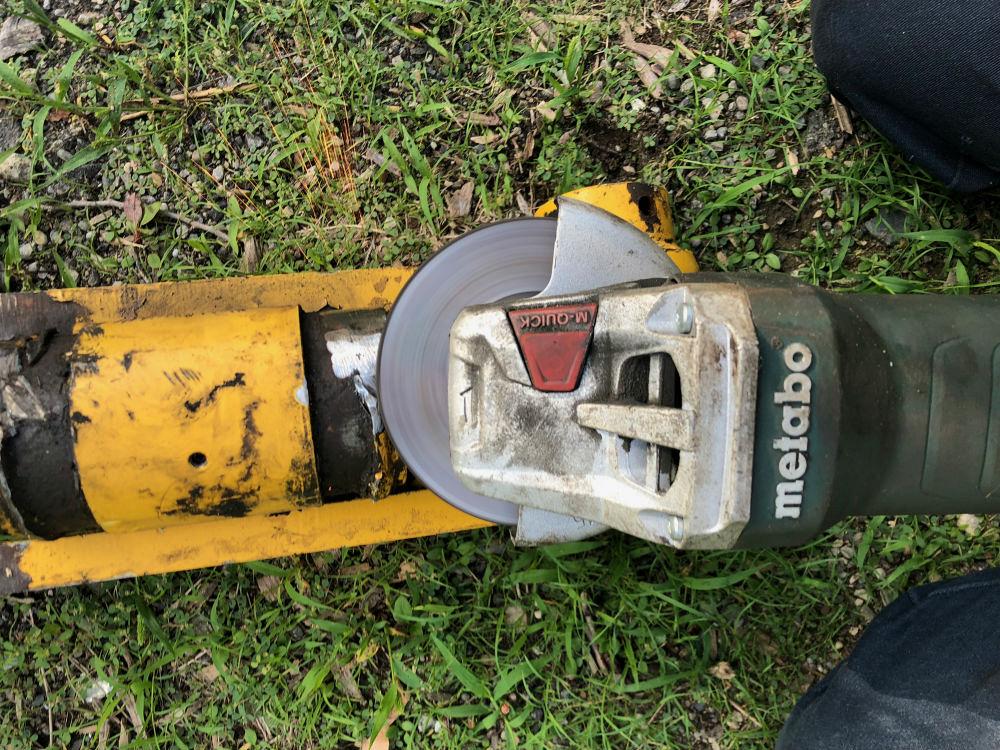
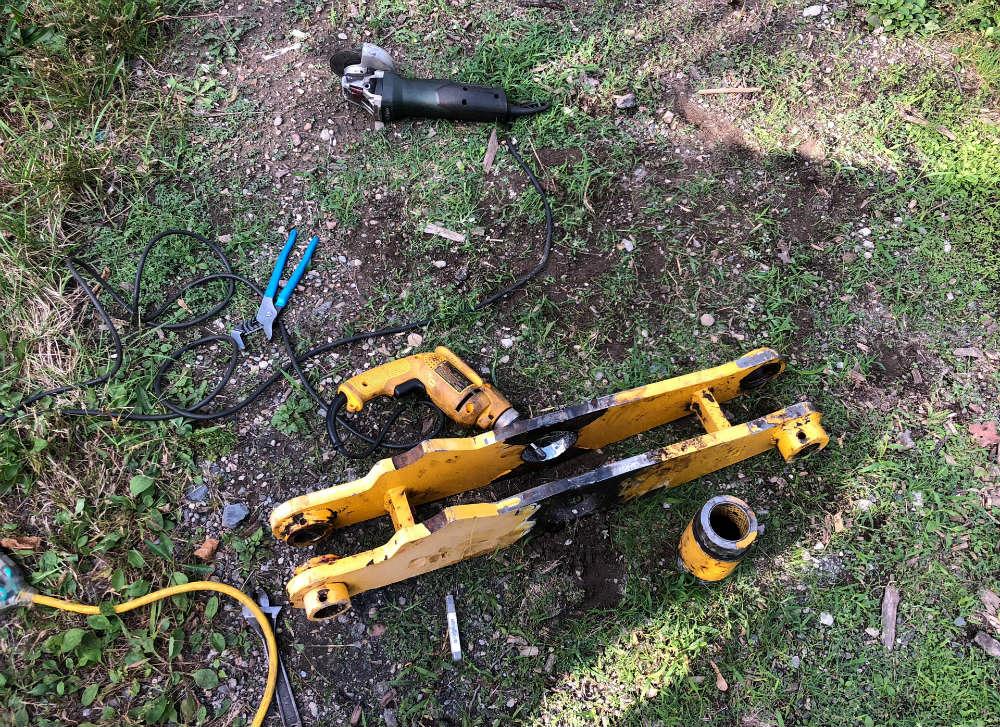
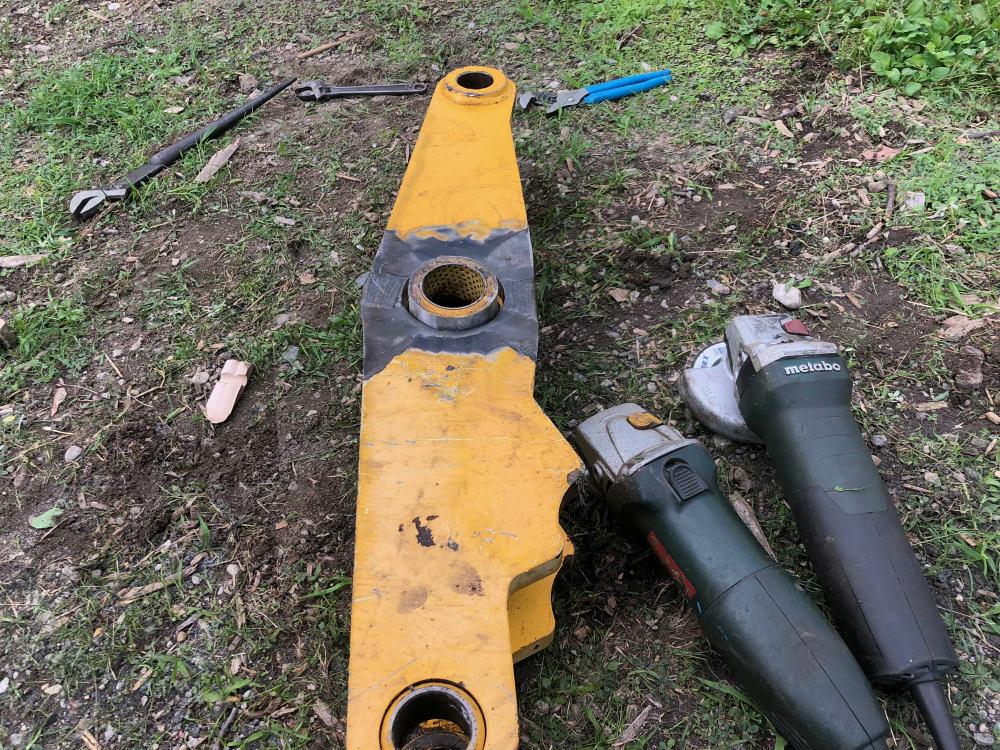
First up was grinding out the old, broken welds on either side of the sleeve (Figures 2 and 3). A: you never want to put a new weld over a broken weld, and B: the sleeve needed to fit into the openings. Then I ground the arm’s hole on one side, just enough so that I could slip the tube through (Figure 4). On the other side, only the smaller part of the tube would fit, so it bottomed out on the plate, helping to locate it. The pictures in the slideshow tell a thousand words, in this case.
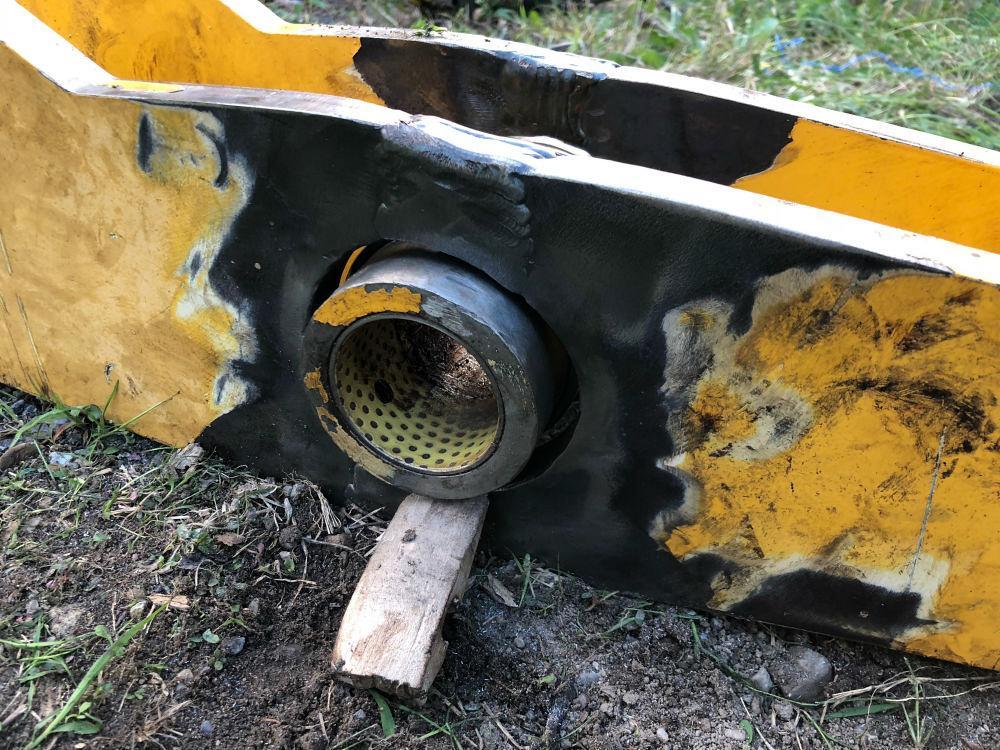
Once the sleeve was in place (Figure 5), I centered and squared it as best I could. In the field you kinda have to use whatever you can find. I used a couple of wood-chips to act as spacers (Figure 6), while I tacked the tube in place. In ideal circumstances, I would have tacked the sleeve in, installed the arm to make sure everything lined up, then taken it apart and welded it. In this instance, although I tried, I just couldn’t do that by myself. Taking care to keep the sleeve evenly spaced on all sides and perpendicular to the arms, I used heavy tacks to keep it that way going into the final weld (Figure 7). There was a large enough tolerance between the sleeve, the shaft, and the rest of the setup that I felt OK about its location.
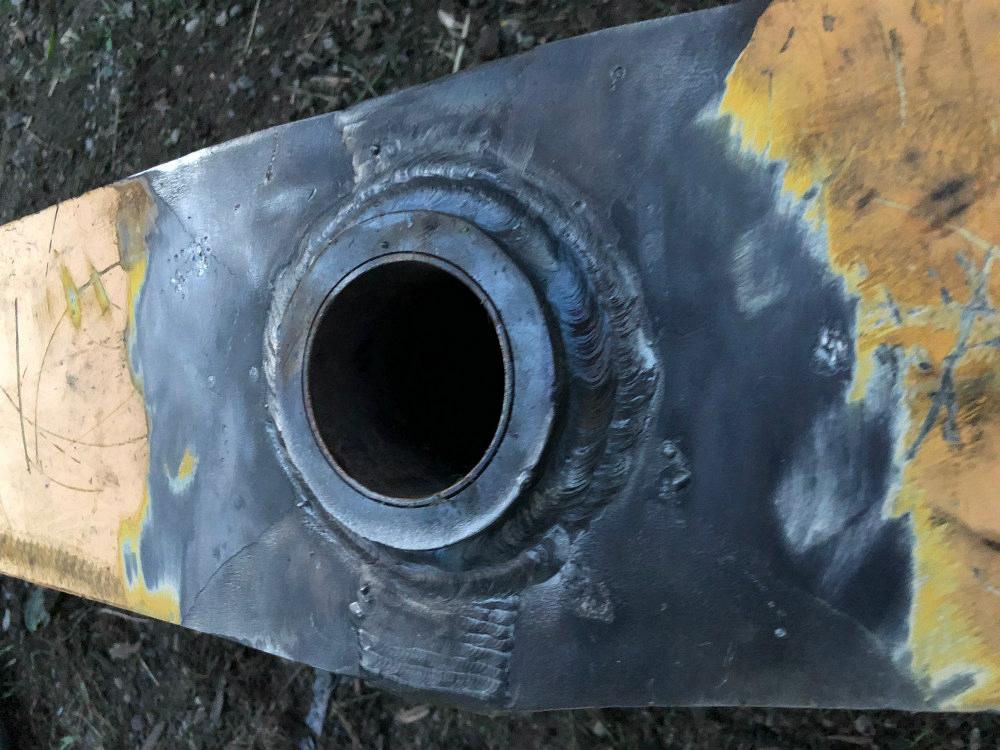
Then it was on to my favorite part, the welding (Figure 8). The site had 220 power, which made my 50-lb. Dynasty 280DX the perfect tool for the job. Just like when I put the arm together in my shop, I used both ⅛-in. and 5/32-in. 7018 rod for the joint. A fairly decent-sized gap all the way around on both sides needed filling, and it took a lot of new metal to make it solid once more. I ran stringer after stringer, and most of the time I could get all the way around without stopping and using one electrode. Weld, wire wheel, weld, flip, weld, wire wheel, and so on and so forth.
Despite stick welding being the best bet for working in bad weather, care still should be taken when it’s nasty out. There were extreme gusts of wind that evening, so I did what I could to keep a tight arc and shield the puddle from the wind with my body. I dealt with a bit of porosity in a few spots, but nothing I couldn’t quickly grind out and reweld.
The sun was going down, and I finished welding both sides just before darkness fell. The part won’t win any beauty pageants, but it shouldn’t split apart again for a long, long time.
All images courtesy of Josh Welton, Brown Dog Welding.

The Welder, formerly known as Practical Welding Today, is a showcase of the real people who make the products we use and work with every day. This magazine has served the welding community in North America well for more than 20 years.
start your free subscription

Easily access valuable industry resources now with full access to the digital edition of The Fabricator.

Easily access valuable industry resources now with full access to the digital edition of The Welder.

Easily access valuable industry resources now with full access to the digital edition of The Tube and Pipe Journal.

Easily access valuable industry resources now with full access to the digital edition of The Fabricator en Español.
In this episode of The Fabricator Podcast, Caleb Chamberlain, co-founder and CEO of OSH Cut, discusses his company’s...


