


Contributing Writer

Figure 1a
The lockbox of FMA Can Do is a success. Now we need the same for a handle pump full of FMA Made Easier.
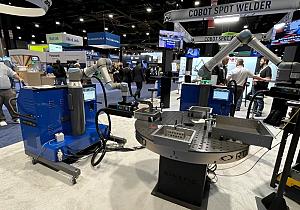
The actors in this product design scenario are shown in Figure 1A. Previous episodes of this column have presented the details of this sheet metal enclosure as well as the fabrication drawing shown in Figure 1B. The grease gun model last appeared in May 2019 with the theme of product manufacturing information (PMI).
Our imaginary product line features safe storage of imaginary FMA Can Do, the official canned spirit of metal fabricators (see Figure 1A). The intent of this contrived mash of models is to provide context for various CAD tasks without violating any patents. The work flow described is specific to a brand of mainstream 3D CAD.
The product development department has discovered a demand for a second product line—an enclosure for locking up the imaginary grease gun. The current enclosure is too small as can be noted in Figure 1A. The options considered are to revise the existing cabinet or to create a larger version to offer two products instead of one.
Because our customers admire the capacity of the Can Do cabinet, it will not be revised. Instead, the CAD task is to create a different cabinet for housing the grease gun. New part numbers, descriptions, parts, assemblies, and drawings are required. This is their initial release.
We imagine that responsible heads have nodded in agreement to those commitments during a succinct and well-paced product line development meeting.
The existing CAD for the cabinet represents significant labor, including a multisheet fabrication drawing. The plan is to copy that work as a starting template for the new design. A little bit of shape-changing in the 3D model should allow the 2D drawing to complete almost by itself. Some changes to the PMI are needed to reflect the new part numbers, revision levels, descriptions, and perhaps materials and finishes.
A CAD brand-specific work flow is needed to create new parts, assemblies, and drawings. In this brand of CAD, a 2D drawing file contains links to the components it displays. A link could be described as a pointer to a 3D model file. If that 3D model is an assembly, that assembly file also has links to the 3D files for the components that it comprises. It’s a relational database, functionally a tree of pointers. Maintenance of CAD-linkage in files is what Certified SolidWorks Professionals master.
Those internal file links are preserved and maintained as precious commodities by the 3D CAD software. These vital file links can be broken with Windows Explorer. Avoid the temptation to just copy and paste files owned by the 3D CAD system as if they were text documents.
A CAD drawing file is technology that displays details from a linked component; in this example the drawing is displaying the Can Do cabinet assembly. If Windows Explorer makes a copy of the drawing file, that copy continues to point to the original 3D model. It does not matter what the name of the copied 3D model might be. The Windows Explorer copy tool does not update pointers. The copied file shows details of the original not the target—Can Do versus Made Easier. What lovely stuff, the language of pointers.
In the sad event that Windows Explorer does get involved badly and links do get broken in a drawing or assembly file, a CAD jockey can use a button that allows entry into a world where broken files learn new reference links. This button appears during the process of opening a drawing file with the CAD software.

Figure 1b
The CAD files for the existing project represent extensive completed labor. They are a starting point for a branch in the design.
In an effort to make Windows Explorer less dangerous, the CAD system installs extensions to Windows Explorer that allow CAD files to be renamed, replaced, or moved. A fourth extension—Pack and Go—is a powerful tool for branching designs.
The existing files for the drawing and sheet metal cabinet parts could be renamed using the aforementioned CAD extension to Windows Explorer. This extension- app renames files much like Save As would do manually within the CAD system. RMB>Solidworks>Rename can be a tedious file-by-file process. But it works when the CAD editor is not available for some reason.
With a top-level assembly and its drawing open in the CAD editor, you can use Save As to create new individual file names using existing components as templates. Save As does its best to preserve links, but unless the drawing file is open and then saved after the Save As for the third components is completed, the drawing file could be left pointing to the wrong component, broken just as Windows Explorer would have harmed it. I occasionally uses Save As when only one component is involved in a branch.
The marvelous solution to the task of branching any design, simple or complex, is Pack and Go. Branching, as used here, is shorthand for using the existing files as a starting point for a new design. Pack and Go makes the file link issue into a nonissue.
Even within Pack and Go, a CAD jockey enjoys many ways to complete a task of branching. I offer the work flow used in my professional design practice as just one of many possible solutions.
First thing always is to fire up the Time Log. Accountability is part of good design practice. The other step one is to plan the change and define the desired result clearly. Paper and pencil help a lot.
A second event in work flow is to make an entry in the Engineering Change log to document the results of planning. The third event is to visit the Part Number log to retrieve part numbers for the planned descriptions.
With a clear understanding of what the new file names (and their locations) will be, I launch Pack and Go from either the top-level assembly or its drawing file. Pack and Go presents an editable table that lists all of the components in the assembly. Check the option to include and exclude drawing files. Either edit by-column selection with select and replace or by-cell with a double-click to edit the target file names.
Along with editing file names so green and lovely, the CAD jockey has the option to include or exclude unchanged components via check boxes for each row in the table. No need to overwrite files that don’t change.
Green file names mean those files are to be created; checked file names are written over existing files. When the Pack and Go table is finalized, a click of the Save button creates the new files while preserving links and leaving the original files alone. In this example 12 interlinked templates were created with a just a single click. Well, single not counting the other clicks.

Figure 2
A data entry form can be used to speed the entry of PMI in the newly created branch of the design.
After saving with Pack and Go, I close the master files and open the branch. As functional templates, the new CAD files are identical to the originals at this stage. That means the descriptions and a few other details have legacy data.
My good self takes time to correct most of the PMI when first opening the branch, before making modeling edits. This gives me an opportunity to verify intended results from Pack and Go, and perhaps most important, verify that the branch opens well with no broken links. Figure 2 shows progress in PMI data entry. The progress in Figure 3 includes a new assembly, some completed typing, and the replacement of the can with the grease gun model.
My less-good self jumps right into shape-changing with the intent of tidying up the PMI as the last sweep through the branch before release. Sometimes, with rue, my other self discovers that I’ve been editing the original file after pretending to branch.
Here’s a CAD tip: Make a good backup before you start branching.
My process for data entry and editing of PMI is to work through the bill of materials (BOM) line by line. Open the component, update its PMI. Open its drawing, update its PMI. Save your work. (In this example, “update PMI” means change the part number, revision, description, and dates.)
While editing PMI in a newly created branch, confirm that the previous data entry for all PMI was completed correctly. All too often, I find errors and suspend branching to fix a mess in the original.
My shop works for many clients, so I experience variations in work flow. For many projects, I use the file name as the part number that appears in the BOM table. File-name-as-part-number saves on data entry but requires some variation in work flow for configured components (or a policy that prohibits the nuisance of configured components).
What I learned as part of my on-the-job training: Engineering is all about lookup and data entry, and design is all about mouse clicking. Fortunately, entertainment can be had in virtual prototyping. It is fulfilling to watch a design evolve on the screen. With drudgery of file names and PMI out of the way, playing with the design is up next.
Figure 3A and Figure 3B show before and after for one of the eight sheets on the drawing. Perhaps it would be better to describe them as template and final design for these figures.
Timewise, the production of an eight-sheet drawing for step-by-step assembly of a custom-sized cabinet took about an hour while distracted with typing about what I was doing—and not counting the time it took to make what I used as a template.
Gerald would love for you to send him your comments and questions. You are not alone, and the problems you face often are shared by others. Please send your questions and comments to dand@thefabricator.com.


The Fabricator is North America's leading magazine for the metal forming and fabricating industry. The magazine delivers the news, technical articles, and case histories that enable fabricators to do their jobs more efficiently. The Fabricator has served the industry since 1970.
start your free subscription
Easily access valuable industry resources now with full access to the digital edition of The Fabricator.

Easily access valuable industry resources now with full access to the digital edition of The Welder.

Easily access valuable industry resources now with full access to the digital edition of The Tube and Pipe Journal.

Easily access valuable industry resources now with full access to the digital edition of The Fabricator en Español.
Patrick Brunken, VP of Addison Machine Engineering, joins The Fabricator Podcast to talk about the tube and pipe...


