


Marketing Manager

A well-designed fixture will hold work in a consistent and repeatable manner, making it suitable for temporary jobs, high-mix jobs, prototyping, and one-off jobs. Photo courtesy of Ling Titone, Strong Hand Tools, Santa Fe Springs, Calif.
The adage “Time is money” is truer now than ever. The expression is universally applicable in the business world, but it’s especially relevant to the welding and fabrication industry.
In welding and fabrication, you cannot sacrifice quality in favor of speed. Your shop’s success rests on accomplishing that trifecta of service: speed, quality, and affordability.
A modular fixturing system can help you to achieve that trifecta. Comprising a ground, flat welding table with a surface of accurately machined holes for the setup of clamps and components at any point on the tabletop, modular fixturing can influence your ability to seamlessly adapt to a range of jobs. It can also offer consistent quality with a trimmed-down production time that controls costs and allows for more precise, customer-friendly, and accurate quoting.
The real benefits of modular fixturing are adaptability and repeatability. Workpieces must be set up securely and precisely to ensure dimensional accuracy during the welding process and to prevent distortion of the finished weldment.
A well-designed fixture will hold work in a consistent and repeatable manner, making it suitable for temporary jobs, high-mix jobs, prototyping, and one-off jobs. Modular fixturing is also beneficial for repeating, high-volume jobs, so you are prepared to respond to a customer’s design changes.
The more familiar you are with your modular fixturing table, the better it can help you achieve quality, accurate weldments quickly.
To implement modular fixturing correctly, you must first understand how to set up a basic frame.
Step 1. Center the workpiece on the modular fixturing table to determine how much space you have to work with. Remember to allow for adequate space for clamping elements in addition to workpieces.
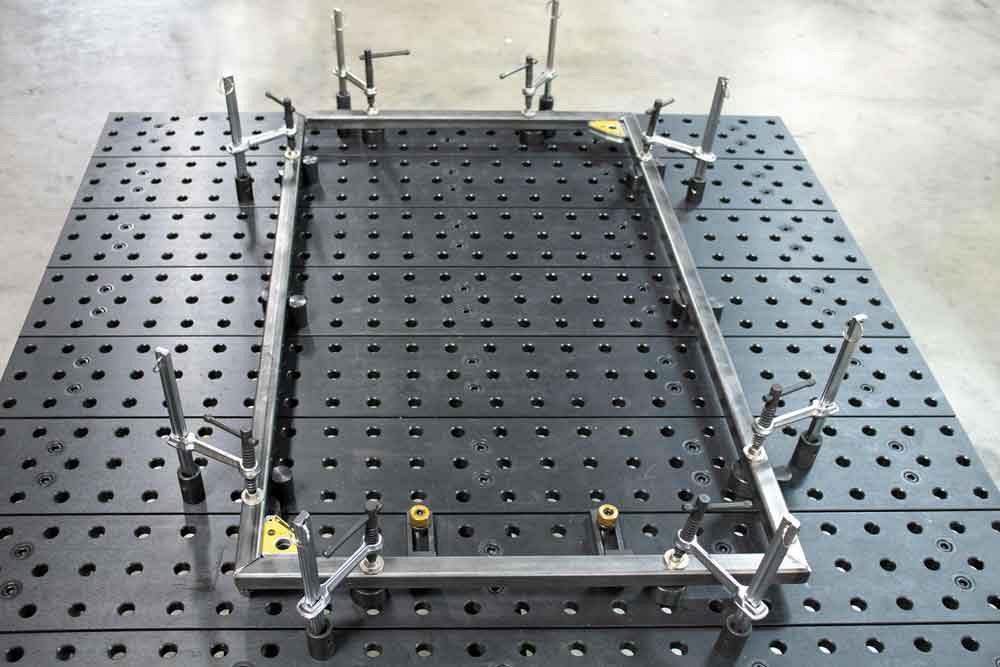
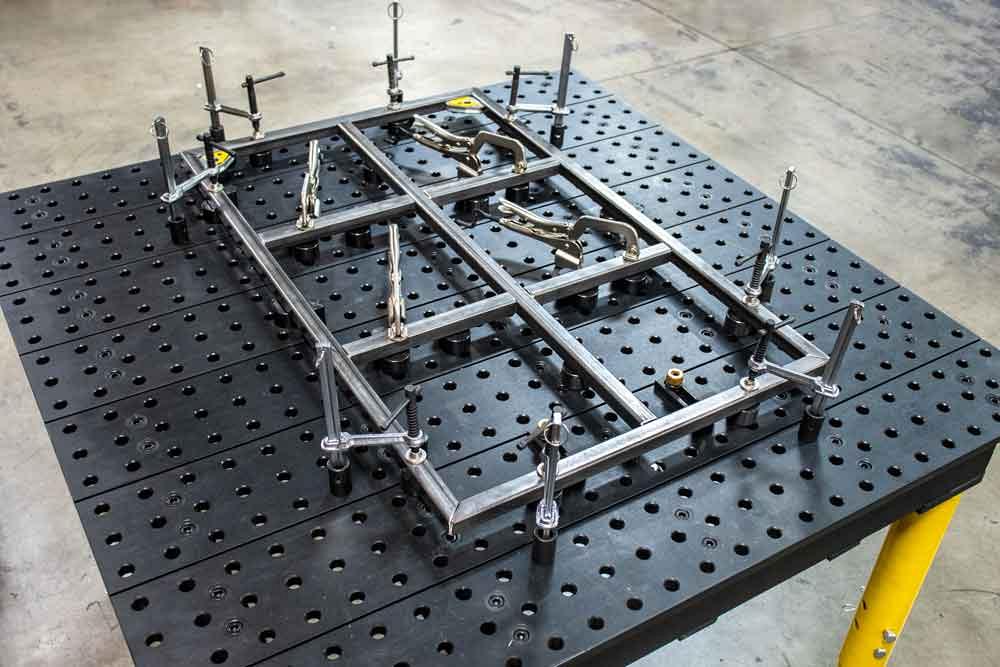
Step 2. Decide on the starting rows of holes in the fixture location. Place stops or posts in the tabletop holes to create the fixed right angle to form the first two sides of the frame (see Figure 1). Line up two stops in a straight line on each side (the holes in a modular welding tabletop make this step easy). Elevate the workpiece from the table using spacers or rests to place all stock at a uniform height, provide better access to joints for welding, and minimize heat transfer to the tabletop to preserve its longevity (see Figure 2).
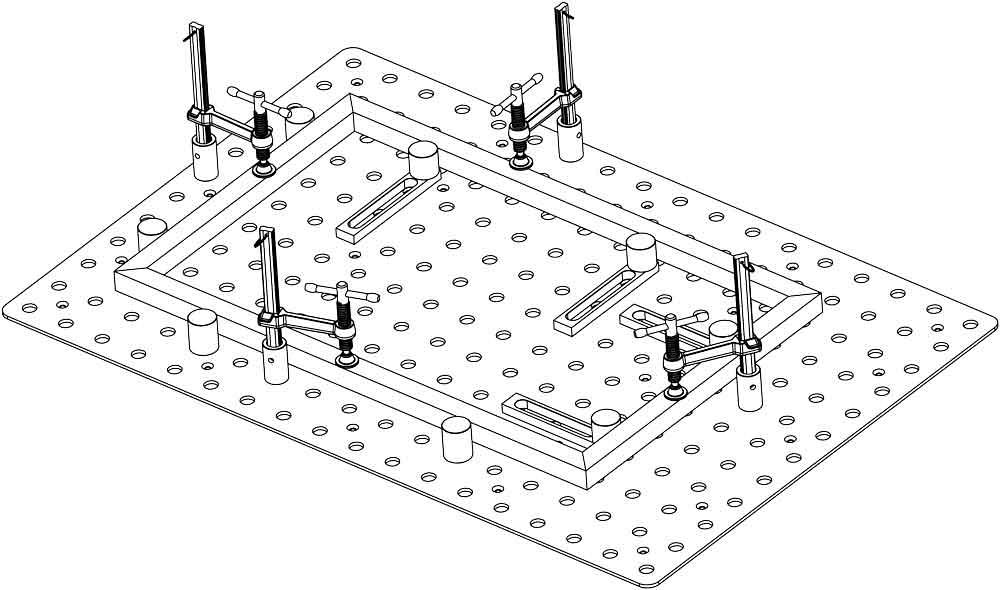
Step 3. Square off the other two sides of the weldment using adjustable brackets to allow for adjustable positioning of the workpieces to set the proper size of the finished frame. Make sure to have stops for the end pieces that don’t interfere with the intended weld path.
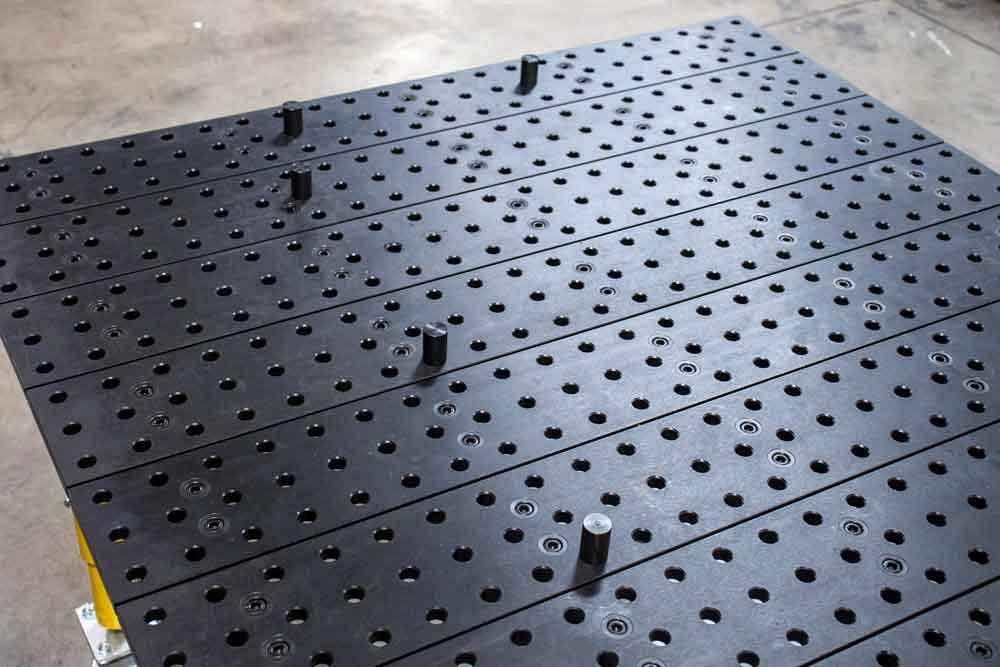
Figure 1
Place stops or posts in the tabletop holes to create the fixed right angle to form the first two sides of the frame. Photo courtesy of Ling Titone, Strong Hand Tools, Santa Fe Springs, Calif.
Step 4. Clamp the workpieces to the tabletop securely (see Figure 3). Use hold-down clamps to ensure workpieces don’t move or warp during tack welding.
Step 5. Check that everything is square before you tack weld.
Step 6. If everything is square, go ahead and make the tack. If not, adjust the workpiece until it is square and then tack.
Step 7. Check squareness on each corner. If you’re satisfied with the end result, complete the final welds (see Figure 4).
Once you’ve gained a working knowledge of how fixturing elements may be used to hold, position, locate, elevate, stop, and clamp down stock, it becomes intuitive to apply those same principles to more complicated weldments.
What about other fixturing requirements? Here are some tips for creating a fixture tailored to the requirements of each unique weldment.
Determine fixture location. If the weldment is small, it may be best to place the fixture close to the edge of the table so you can access it more conveniently.
Ensure the weldment is square. It’s a good habit to square off two perpendicular sides of the weldment using fixed stops so that you know those first two sides will line up with the tabletop holes. The remainder of the fixture can be set up using adjustable fixturing elements so you can compensate when bridging fixturing elements over the tabletop hole pattern.
Think about repeating weldment removal. If you work with repeating weldments, think about how the finished weldment can be removed quickly and easily to speed up production. Depending on the weldment’s size, you can either slide or lift the finished piece off the table. If you slide it off the table, make sure to place all fixturing stops in the same direction, either inside or outside the parts.

Figure 2
Be sure to elevate the workpiece from the table using spacers or rests to place all stock at a uniform height, provide better access to joints for welding, and minimize heat transfer to the tabletop to preserve its longevity. Photo courtesy of Ling Titone, Strong Hand Tools, Santa Fe Springs, Calif.
Simplify tack welding. When setting up a fixture, ensure that it will allow access to all weld joints so you can complete the tack welding all at one time. In cases such as this, a rotary positioner is an excellent option for accessing weld joints since the tabletop can be positioned for optimal access.
Don’t overlook clamping. Simply placing parts against a fixed stop does not replace clamping it down. Clamping will help you to achieve accurate welding and prevent warping during cool-down.
Choose a modular setup. When sourcing a modular fixturing system, choose one with removable individual plates for unlimited fixturing options, especially when you need to remove plates in the center of the table for weldment access, or when you need to increase the width or length of the table to fixture oversized weldments. Always think in terms of how the system will allow you to take on more complex jobs to expand your capabilities and grow your business.
Pam Farley is marketing manager and Kelvin Flores is an engineer at Strong Hand Tools, 8750 Pioneer Blvd., Santa Fe Springs, CA 90670, 800-989-5244, stronghandtools.com.


The Welder, formerly known as Practical Welding Today, is a showcase of the real people who make the products we use and work with every day. This magazine has served the welding community in North America well for more than 20 years.
start your free subscription
Easily access valuable industry resources now with full access to the digital edition of The Fabricator.

Easily access valuable industry resources now with full access to the digital edition of The Welder.

Easily access valuable industry resources now with full access to the digital edition of The Tube and Pipe Journal.

Easily access valuable industry resources now with full access to the digital edition of The Fabricator en Español.
In this episode of The Fabricator Podcast, Caleb Chamberlain, co-founder and CEO of OSH Cut, discusses his company’s...


