


Office Director and Author
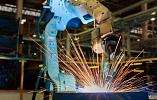
The many choices surrounding horizontal band saws these days can make selecting one a daunting prospect. However, it doesn’t have to be an intimidating process. A little familiarity with the types of saw, features, and options can go a long way in choosing the best saw for your applications. Getty Images
Considering making an investment in a horizontal band saw? It might seem like an easy decision, but the various types and myriad options available these days can make it difficult to know which machine will best fit your needs. Saw frame style, automation, mitering capability, material feeding options, and of course cutting capacity are just a few of the considerations.
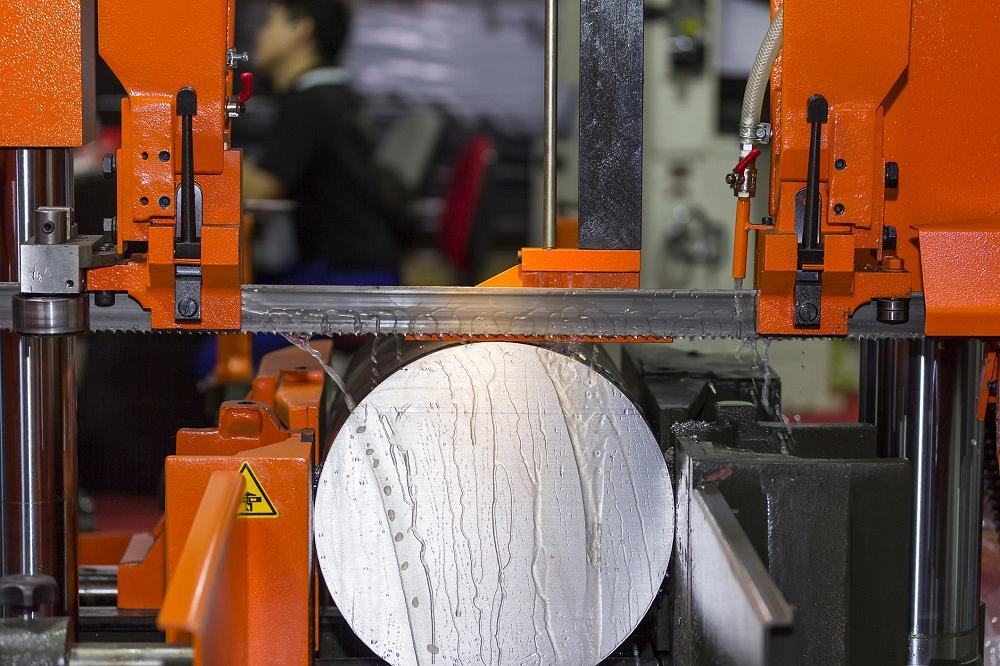
Two common horizontal band saw configurations are scissor type and dual column (see Figure 1). The scissor type has a pivot bearing on one side of the head; the dual-column type raises and lowers the head on precision-ground linear guides.
When a scissor-head machine makes a cut, the blade enters the material at a steep angle, and it traces a long arc based on the circumference of the material being cut, which results in a long cutting cycle. On a dual-column band saw, the blade’s angle is fixed and the cutting path is only as long as the material’s diameter.
The scissoring action can produce a better cut than a dual-column saw. The entry angle is steeper, so the blade wanders less. This isn’t critical on light-wall applications, but as the wall thickness increases, this factor is increasingly important.
The feed pressure is another differentiator. The feed pressure on a pivoting-head saw varies across the length of the blade. It is greatest near the pivot point and least at the end opposite the pivot point.
Dual-column saws are much more rigid than their pivoting counterparts because the dual columns hold both ends of the head. This results in nearly constant feed pressure and speed across the entire width of the cut. This rigidity also reduces vibration, which improves cut quality and blade life. The drawback? The price. While dual-column machines tend to produce better cuts faster, they generally cost more. It is worth noting that the larger capital expense can be recovered through increased productivity. The larger investment often makes sense for demanding production lines working with large-diameter materials.
The simplest saws are manual, the most advanced are fully automatic, and in the middle of the pack are semiautomatic saws.
Manual band saws require operators to use their physical strength to lift the head after each cut. Saw heads can be heavy, and the process isn’t very fast. The wear and tear on the operators, the risk of injury, and the time required to lift the head require careful consideration.
Semiautomatic saws rely on a hydraulic piston to raise and lower the cutting head. To run the machine, the operator pushes a button to raise the head, clamps the material into the saw’s vise, and pushes the Start button. The saw makes the cut and lifts the head. Semiautomatic saws are a good fit if you need to make a few cuts in a length of material.
In addition to a hydraulic system that raises and lowers the saw head, a fully automatic saw is equipped with either driven rollers in the vise or a shuttle vise that advances the material. Most fully automatic saws also feature a digital piece counter.
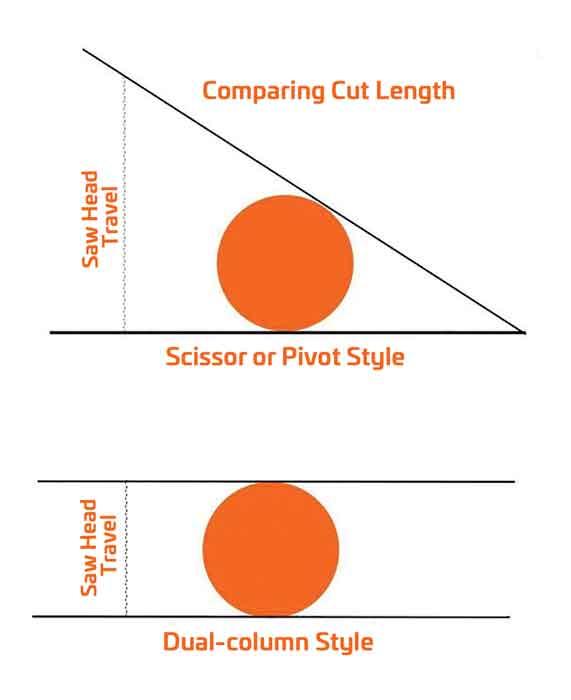
Figure 1
Although the diameter is the same, the cutting time varies with saw design. The cutting head of a scissor-type saw pivots (top), so the cutting time is based on the distance traveled by the nonpivoting side of the cutting head. On a dual-column saw (bottom), the distance is equal to the workpiece’s diameter.
The standard vise on fully automatic saws tends to be the powered roller style, which uses three to five cylinders arranged vertically against each side of the material. One side is grooved to assist with capturing and advancing the material; the other side is smooth, containing a limit switch activated by the pressure of the material inside the vise.
The other option is a shuttle vise style. As the name implies, it shuttles back and forth, retracting to clamp incoming material and advance it toward the cutting head. Shuttle vises are the best option when bundle cutting, in that they usually provide enough power to handle large, heavy batches of material and clamp with enough force to prevent slippage within the bundle.
After setting a desired cut length and a part count, the operator presses Start and the saw does the rest, feeding and cutting until it has completed the production order.
Three events bring an automatic saw to a stop. The first is completing the job. The second is running out of material. When this happens, most saws pause and wait for more material, then complete the cycle. The final event is a blade failure. Many modern saws are equipped with a system that detects blade failure and brings the saw to a halt.
For some fabrication projects, a miter cut might be an option to making a better-looking assembly. On others, mitering is a necessity. Two saw platforms for mitering are swiveling-head saws and swiveling-vise saws (see Figure 2).
A swiveling-head machine feeds the material into the saw in the same manner as a machine without mitering capability: The material feeds along the saw’s base. The head does the swiveling to accomplish the miter cut, so the saw doesn’t need a lot of additional clearance. The disadvantage is in the machine’s price. This type of machine needs a more robust frame, which pushes up the cost.
On a swiveling-vise machine, the vise clamps the material at the required angle and swings the workpiece to the necessary orientation. As the material length increases, the necessary clearance increases. In shops that don’t do miter cuts often and have sufficient room, a swiveling-vise machine is the most economical option.
Choosing between fully automatic mitering and semiautomatic mitering is mainly a question of volume.
For making repeated mitered cuts, a fully automatic mitering saw usually is the better investment. These machines typically provide mitering in just one direction, so they are well-suited to high-volume applications that require consistent miters.
It’s intuitive that bundling material reduces production time and cost. Cutting more than one tube at a time seems to be a time-saver, but this is just a guideline. It doesn’t apply to every case.
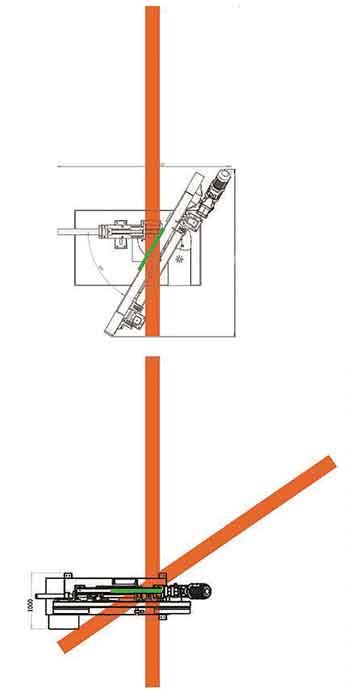
Figure 2
A miter saw with a swiveling head (top) conserves space but costs more than one with a swiveling vise (bottom).
Effective bundle cutting requires a secure bundle. If the material in the bundle does not have adequate pressure holding it together, vibration (chattering) results, which can reduce the saw blade life by 25 percent.
Two typical strategies for securing a tight bundle are to place straps just behind each of the cut locations and to tack weld the ends of the material. Both of these methods take one of the most valuable shop resources: time. It takes time for the operator to stack the material efficiently, secure the material, and move the bundle to the saw.
Purchasing bundled material saves a lot of time, as does using a saw with hydraulic top clamping, which helps to secure the bundle during the cut by applying additional downward pressure to keep individual pieces secure.
What about operator loading and unloading? Surely it is faster to move one bundle than six individual pieces, right? Once again, it seems like the bundle would be the faster way to go. However, as the bundle size grows, it becomes heavier and more unwieldly. This increased weight slows your operator’s movements, and you might need to add another operator or machine to assist with loading the material into the production line. Also, if your bundle is heavier than your feed system can handle, the saw is unable to advance the material. Using a shuttle vise to advance the material bundle helps to keep your bundles tight as the vise secures around the bundle before advancing it.
In summary, bundle cutting can only save you money if you invest in proper equipment.
Some options are available to help maximize a saw’s capability and productivity.
For shops that do a lot of bundle cutting, a hydraulic top clamp speeds bundle preparation. The top clamp assists the vise by providing pressure from a second direction—vertically—reducing the need for tack welding or strapping.
No matter how you saw, you’re going to have to deal with chips from time to time. In most cases, the chips fall into a chute so they don’t get flushed into the coolant collector, but the chute can get jammed, especially when the application generates large chips. A chip-removal conveyor is a good option for any high-volume environment in which the saw is needed almost continuously. A chip conveyor helps to ensure your chip chute doesn’t overflow, reducing downtime and saving money. The chip auger especially helps to move large, heavy chips (for example, the debris generated when cutting iron workpieces with a large-tooth blade).
You can help fight fatigue by adding a roller table or a motor-driven roller conveyor.
Roller tables, as the name implies, feature several cylinders that roll as material is moved across them. While they cannot initiate movement, the rollers greatly ease material movement.
Motor-driven roller conveyors are recommended for use in conjunction with hydraulic top clamps and shuttle vises in fully automatic horizontal band saws. These conveyors help the shuttle vise to move heavy materials into position to be cut. Combining a shuttle vise, hydraulic top clamp, and motor-driven roller conveyor results in a machine made for mass production with minimal hands-on time.
How much saw do you need?
Increasing the cutting capacity means more than having a larger cutting envelope. As the sawing capacity increases, the motor horsepower tends to increase, facilitating efficient cutting speeds. As with many of the other features and options, as the capacity increases, so does the price.
A common guideline is to consider the size and type of material your shop cuts frequently (daily) and add an inch or two to the maximum capacity. This allows your shop to accept some one-off applications while preventing you from buying more machine than you really need.
Ebony Goldsmith is office director and author for KAAST Machine Tools Inc., 3 Merion Terrace, Aldan, PA 19018, 610-441-7317, e.goldsmith@kaast-usa.com, kaast-usa.com.
The Tube and Pipe Journal became the first magazine dedicated to serving the metal tube and pipe industry in 1990. Today, it remains the only North American publication devoted to this industry, and it has become the most trusted source of information for tube and pipe professionals.
start your free subscription
Easily access valuable industry resources now with full access to the digital edition of The Fabricator.

Easily access valuable industry resources now with full access to the digital edition of The Welder.

Easily access valuable industry resources now with full access to the digital edition of The Tube and Pipe Journal.

Easily access valuable industry resources now with full access to the digital edition of The Fabricator en Español.
Patrick Brunken, VP of Addison Machine Engineering, joins The Fabricator Podcast to talk about the tube and pipe...