President
Q: I bought some anodized 6061-T6 tubing to make a structural framework and I’m having trouble welding it. The welds are black and ugly. Can you help?
A: I think I can help. First, it would be helpful to explain what anodizing is. Anodizing is a reverse plating operation of sorts in which the aluminum is placed in an electrochemical bath where a current is applied. The result is that a very thick coating (about 1,000 times thicker than natural oxide) of aluminum oxide forms on the aluminum.
The coating is usually a clear satin color, although various alloys can give different colors to the anodized coating. The coating is also fairly porous. This allows it to accept various dyes, which are what you are looking at when you see bright red or blue aluminum baseball bats, for example. The anodized coating gives the aluminum an attractive, uniform, hard surface that is also highly resistant to corrosion.
The characteristics of this aluminum-oxide coating make it very difficult to weld. First of all, aluminum oxide is an electrical insulator, so starting and maintaining a stable arc is difficult. Second, although aluminum melts at 1,260 degrees F, aluminum oxide melts at around 3,700 degrees F. So the oxide doesn’t melt during welding, which causes the weld puddle to be gummy and not fluid like it normally is. Last, as I said previously, the oxide is porous, so it will absorb water or water vapor from the air. When you attempt to weld over that, the water is liberated and produces a very porous weld.
So as a general recommendation, I would advise you not to weld over anodized coatings. Instead, use a sanding or grinding disc to remove the anodizing in the area you want to weld, and then weld as you normally would. You should have no problem.
However, there is a rather specialized technique that can be used to weld over anodizing with good results. I must warn you, though, that it takes quite a bit of practice to become proficient. In this technique, set the welding power supply to its maximum current output and use the foot pedal as an on/off switch. Energize the arc just long enough to form a puddle and add a bead of filler, then immediately extinguish the arc. Move the torch about half the weld puddle diameter and repeat the process. You are essentially making a weld bead that consists of a series of overlapping spot welds.
Sounds strange, doesn’t it? But it works. As I said, though, it requires quite a bit of practice to learn this technique, so make sure you have a lot of scrap aluminum to practice on before you use it on production parts.
President
Aluminum Consulting Inc.
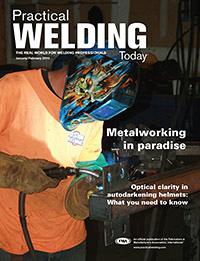

The Welder, formerly known as Practical Welding Today, is a showcase of the real people who make the products we use and work with every day. This magazine has served the welding community in North America well for more than 20 years.
start your free subscription
Easily access valuable industry resources now with full access to the digital edition of The Fabricator.

Easily access valuable industry resources now with full access to the digital edition of The Welder.

Easily access valuable industry resources now with full access to the digital edition of The Tube and Pipe Journal.

Easily access valuable industry resources now with full access to the digital edition of The Fabricator en Español.
In this episode of The Fabricator Podcast, Caleb Chamberlain, co-founder and CEO of OSH Cut, discusses his company’s...