


Contributing Writer
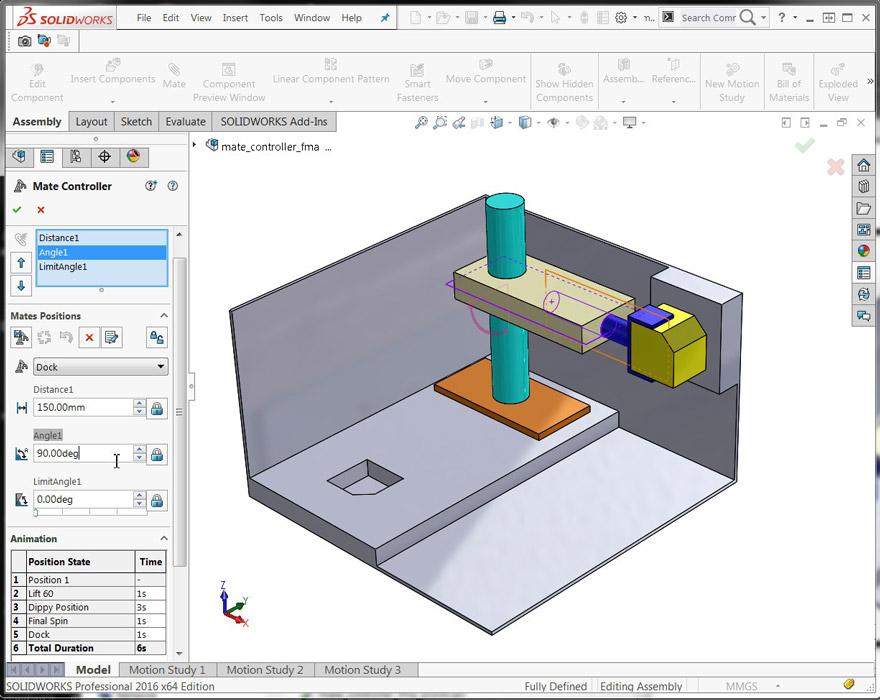
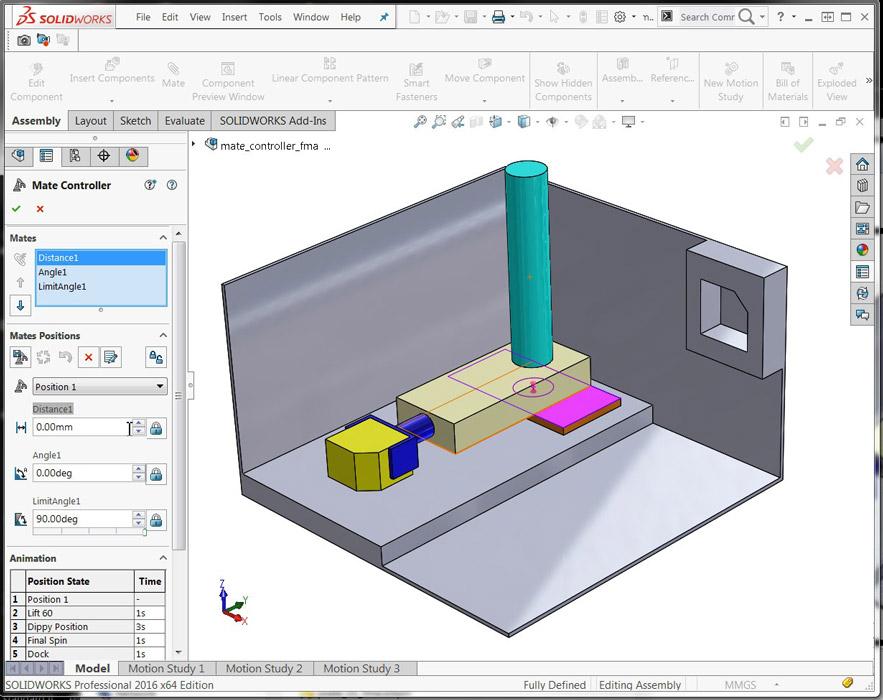
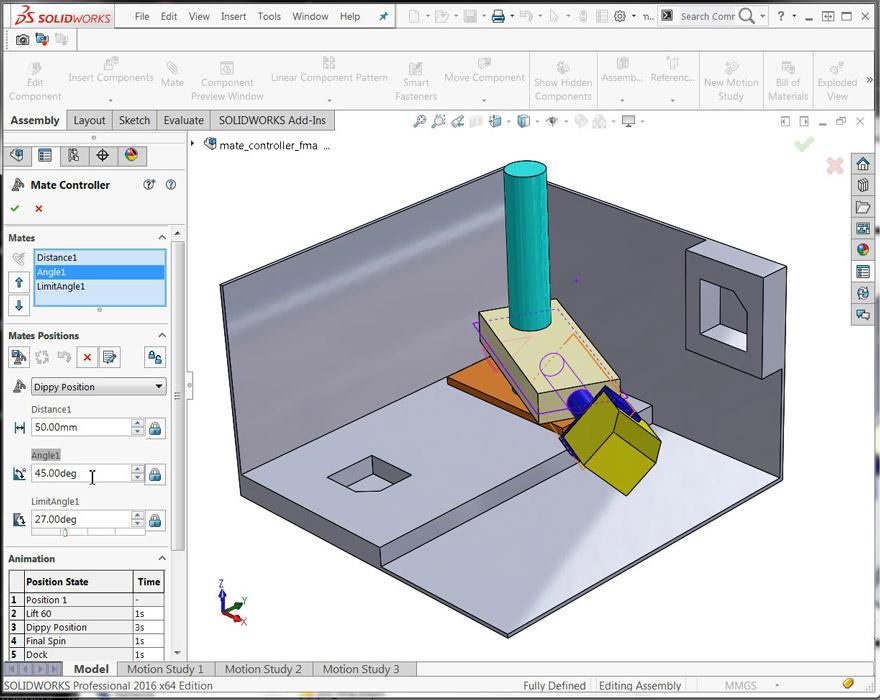
Figure 1
This is the first of eight positions in the animation. The model is positioned with the yellow block docked in the wall. Mates between the yellow block, blue gripper, tan arm, cyan pole, and brown plate create kinematic connections.
Editor's Note: If you would like to download the 3-D CAD files associated with this column, click here.
Animations based on exploded views were discussed in the previous edition of this column (“Shop technology and 3-D CAD: Using animation tools in design review,” Precision Matters, The FABRICATOR, March 2016, p. 50). We now turn our attention to animations that simulate how a mechanism operates. As part of the discussion, we are considering two types of software—3-D CAD for creating geometry and a composer tool for creating interactive documents.
This is a demonstration of using five static positions of a model to create an animation of realistic motion. Software does most of the work. All we have to do is position the model and save it five times. Well, there’s a bit more to it than that.
We offer three short sample animations. Their differences are mostly in how they are created; they appear very similar when played. (One AVI was created using the Animation Controller tool, built into the 3-D CAD workstation. One AVI was composed using “views” that were drag-dropped onto the timeline; the views were created by rotating and translating the components relative to each other. The last AVI was also composed using a timeline, but the technique relies on position keys and kinematic links between actors. The composed links function similarly to CAD mates; unlike mates, the links allow mouse drag in a realistic kinematic way. This makes it a breeze to drag positions onto the timeline to compose the animation sequences.)
As an alternative to watching the AVIs, Figures 1 to 5 show various positions in the AVI. As an acknowledgement for use of the model, the model shown may be found in a tutorial that ships with the 3-D CAD software.
Our sample AVIs show a robotic manipulator transporting a box between two docking pits. Each pit fits the box snugly, so the orientation of the box is important to prevent interference when it is docking.
For live demonstrations, the technique of child-parent links is quite spectacular. Mouse positioning of the model is simple, and no particular CAD skill is required. The positioned model can be used to create static views as well as key points on a timeline.
As easy as it is to use, the composer software is distinct from the 3-D CAD workstation. It might surprise a seasoned CAD jockey how similar and yet different the software is. A general work flow for composing is to import the 3-D CAD and then link actors child-to-parent, set the link points, set the link orientations, set the link types, and if desired set link limits. That might sound like quite a few settings, but it is all pretty simple—just click on child, then click on parent.
If kinematic mouse-drag of the assembly is not important, then the child-parent links and all of their settings can be avoided. For purposes of discussion, our immediate goal is to create an animation. Kinematic links could help, but there are alternative work flows.
One easy way to compose an animation is to drag views onto the timeline. An easy way to make views is to translate or rotate actors into position and hit the Save-View button. In addition to being graphic snapshots, views also retain information about the location, settings, and appearance of everything in the scene.
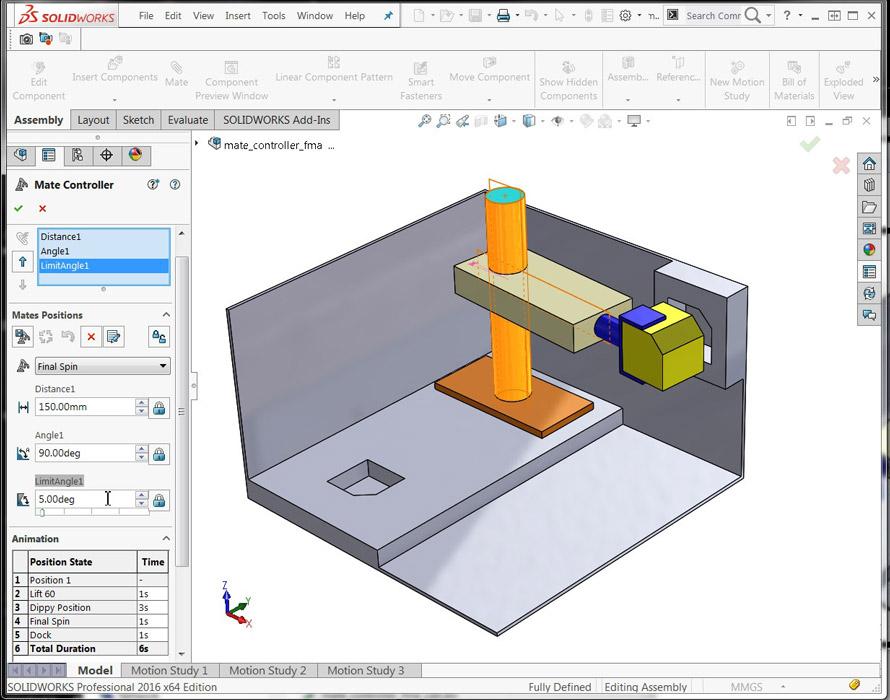
Figure 2
This is the second position in the animation. The yellow block is oriented to match the shape of the docking pocket.
We are particularly interested in the fact that views capture the position of our mechanism. When we switch between views, the image displayed morphs in very realistic transitions. All we have to do is capture a few strategic positions and the software does all of the work. It’s very moving.
An animation timeline can be simply a means of automating the switching between views, or it can be more complex, such as changing points of view and making actors appear or hide.
If you are working exclusively within the 3-D CAD environment, the Animation Controller tool (newly released in 2016) is nearly as spectacular as composer tools. Angle and distance mates, including the limited variety, are used to dynamically position the model. Sliders and direct entry boxes make for intuitive setting of values. Instead of graphic views to capture positions, the Animation Controller creates a list of positions in a familiar drop-down data entry panel.
Our list of captured positions can be played in sequence by the Animation Controller. This is similar to the way that the Explode tool can animate explode/collapse, as discussed last month.
It is easy to edit the sequence of captured positions steps. As the model’s mates are changed from position to position, the animation progresses on-screen. There is an option to save this play sequence as an AVI.
If the animation needs to control the observer’s point of view, a motion study timeline can be set up with a wizard that imports the positioning keys from the Animation Controller’s playlist. From there, you can add keys to control the scene as desired. The motion study timeline can also be used to generate an AVI.
Whether using playlists of captured positions or keys on timelines, the CAD jockey’s goal is to give the audience time to absorb the message. Movie tip: A short pause at the start of the animation gives time for the eyes to focus on the player’s window.
A favorite tip for smooth movies is to end the animation with the starting scene. As a result, when the audience uses the AVI player in loop mode, the AVI will not have a jerky motion from end to start.
For all of the demo AVIs, four positions were captured first. To create the reverse sequence, a CAD jockey only has to add copies of those positions to the timeline.
Windows copy and paste operations work very well with keys on a timeline. To create a pause in motion, just copy and paste the desired positioning key. CTRL-drag is a handy method of doing this copy-paste in one step.

Figure 3
This is the third position in the animation. The angle of the cyan pole has changed. This positions the yellow block over the floor pit.
When using a motion study timeline, you can group-select several keys and right-mouse-click to select reverse. This is a handy method of creating a reverse sequence of motion.
If you use the Animation Controller, save-as-new-position is a good way to create copies for reverse playback, followed by editing the position list sequence to obtain the desired playback.
It is good to have options as a moviemaker. For working with a mechanism in CAD, the addition of mates is a routine part of the job. Animation Controller allows those mates to be used to quickly produce animations. The process is nearly as entertaining as watching the result.
If a more detailed animation is required, a motion study timeline can incorporate the results from Animation Controller and also include keys to control the scene and appearance of components.
Using familiar CAD skills for position capture and timeline keys, we can use dedicated software to produce animations that are part of an interactive document. The Composer timeline editor is different in a good way. It has a few advantages over the CAD timeline editor. The ability to window-select a region of time and then expand or collapse time with the mouse is very useful.
As a movie director, you know that the selection of point of view, lighting, and scenery are methods to achieve the goal of a well-informed audience. Perhaps entertained, as well.
Gerald would love to have you send him your comments and questions. You are not alone, and the problems you face often are shared by others. Share the grief, and perhaps we will all share in the joy of finding answers. Please send your questions and comments to dand@thefabricator.com.


The Fabricator is North America's leading magazine for the metal forming and fabricating industry. The magazine delivers the news, technical articles, and case histories that enable fabricators to do their jobs more efficiently. The Fabricator has served the industry since 1970.
start your free subscription
Easily access valuable industry resources now with full access to the digital edition of The Fabricator.

Easily access valuable industry resources now with full access to the digital edition of The Welder.

Easily access valuable industry resources now with full access to the digital edition of The Tube and Pipe Journal.

Easily access valuable industry resources now with full access to the digital edition of The Fabricator en Español.
In this episode of The Fabricator Podcast, Caleb Chamberlain, co-founder and CEO of OSH Cut, discusses his company’s...


