Product Specialist, Saw Division
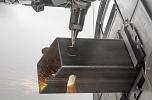
Tube and pipe present several sawing challenges, many of which can be resolved with a thorough understanding of sawing mechanics and the specific issues that arise when sawing tubular workpieces. Eliminating sawing problems helps in three areas: improving cut rates, increasing saw blade life, and optimizing cut quality.
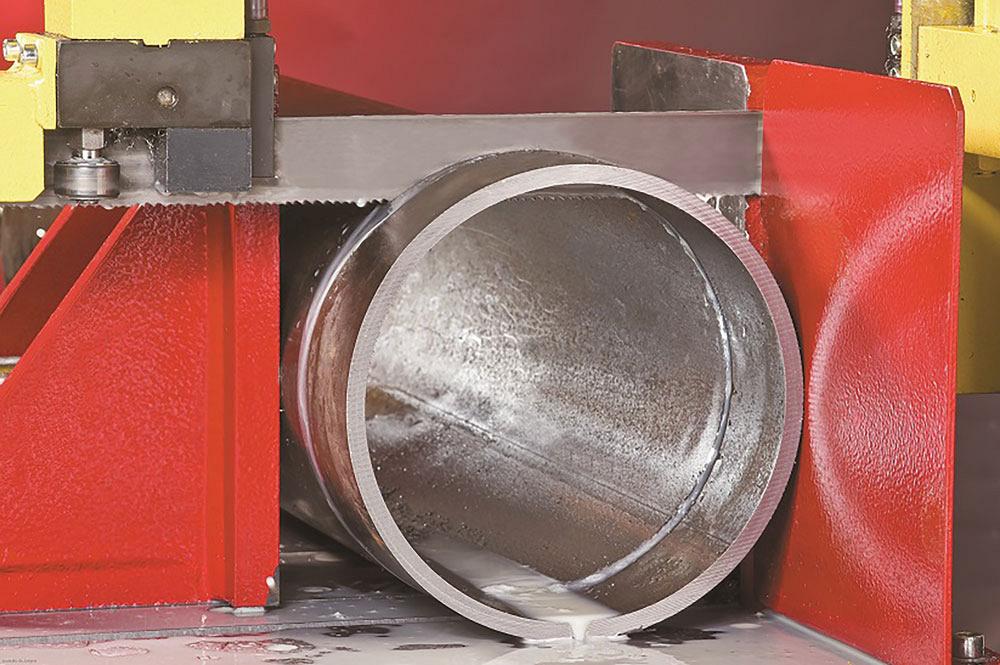
When cutting a hollow workpiece, the blade performs an interrupted cut. It enters and exits one wall of the material, then enters and exits the other wall. Compared to cutting a solid workpiece, this puts additional force and stress on each tooth; when one tooth leaves contact with the cut and the next tooth enters the cut, the force is so great that it can actually break a tooth. After the stress causes a tooth to chip, or rips the tooth out altogether, the forces are even greater on the remaining teeth. Premature blade failure is a likely result.
Round workpieces present challenges in coolant distribution. The workpiece’s shape can divert coolant from the cut, leading to inaccurate cutting and increasing heat buildup. Both of these problems will prematurely destroy the tooth edge.
Many conventional bi-metal blades also produce a heat-affected zone (HAZ), an area in which the heat increases so much that it changes the characteristics of the steel. Cutting through the HAZ can cause the teeth to tear away from the blade. Likewise, if the blade speed is too low for the material, the process doesn’t provide enough penetration per tooth, causing more rubbing than cutting. This also can overheat the material.
Another challenge involves improper blade pitch, which is the number of teeth per inch. The number of teeth that contact the workpiece can affect both blade performance and durability. Too few teeth in contact with the work can lead to early tooth strippage; too many teeth can reduce the blade speed and ultimately make the material impossible to cut.
A constant-pitch blade can increase harmonic vibrations, leading to excessive noise, undesirable saw or saw blade vibrations, and in severe cases, bad cuts. Fabricators can get around this problem by selecting variable-pitch blades, which can greatly reduce harmonic vibrations. The varied tooth spacing interrupts the rhythms that lead to harmonics and improves chip evacuation.
Although every band saw blade looks somewhat alike, they vary substantially. Blade manufacturers develop new concepts in how they are constructed and incorporate new features as time goes on, making blades cut faster and last longer.
In decades past, a band saw blade might well have been a single strip of sheet steel with teeth that were cut into it, whereas an advanced blade these days is more likely made from several components. One example is a blade made from a patented process in which two strips of high-speed steel wire are joined to a backing steel. The joining process, solid-state diffusion bonding, uses about 20 percent of the heat used in a conventional welding process and generates 170 percent more weld contact area than conventional processes. The result is a significantly reduced likelihood of fracture and breakage at the interface of the two materials.
Shortly after initial use, blades made by this process develop a U-shaped groove, 0.001 to 0.002 inch deep, between the two high-speed steel edges. The cutting action of the grooved-tooth geometry produces two chips that are easier to remove and therefore less likely to weld to the saw teeth than conventional chips. The groove also permits increased coolant flow to the cutting surface. Proper coolant flow cools and lubricates the blade and flushes out chips.
Blade Breakage
Premature Tooth Wear
Jagged Cut
Wandering Cut
Chip Debris Accumulates in Blade Teeth
Broken Teeth
Wear or Damage on Blade Backing
Blade Twisted in Cut
Finally, saw operators should rely on their own cutting experience to prevent small sawing problems from turning into big ones. In addition to looking for clues, listening for clues can be a big help. If a cut doesn’t sound right, it’s a sign that something is amiss, and the troubleshooting should start sooner rather than later.
Kent Moreau is a product specialist, saw division, for L. S. Starrett Co., 121 Crescent St., Athol, MA 01331, 978-249-3551, www.starrett.com.

The Tube and Pipe Journal became the first magazine dedicated to serving the metal tube and pipe industry in 1990. Today, it remains the only North American publication devoted to this industry, and it has become the most trusted source of information for tube and pipe professionals.
start your free subscription
Easily access valuable industry resources now with full access to the digital edition of The Fabricator.

Easily access valuable industry resources now with full access to the digital edition of The Welder.

Easily access valuable industry resources now with full access to the digital edition of The Tube and Pipe Journal.

Easily access valuable industry resources now with full access to the digital edition of The Fabricator en Español.
In this episode of The Fabricator Podcast, Caleb Chamberlain, co-founder and CEO of OSH Cut, discusses his company’s...