How to bend bar on the press brake
Press brake operators need two things: a custom tool and a gauging strategy

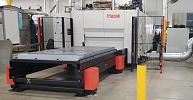
Bending round bar on the press brake isn’t difficult, but it does require special tooling. High-volume projects might require a special machine. Getty Images
Question: I work for SIGN Fracture Care International, a nonprofit international medical implant company. We donate our implants to third-world hospitals and surgeons to help the financially challenged recover from longtime bone injuries. If interested, you can look us up by clicking here.
We have been bending round bars in-house for years to some incredibly tight tolerances. We bend between 6- and 12-mm -dia. 316L stainless steel rod between 280 and 420 mm long. Some have one bend and others have two, one that’s bent 1.5 degrees and another to 9 degrees.
The global need for medical implants is increasing dramatically, especially with improved accessibility to transportation (and the proliferation of traffic accidents) in third-world nations. We need to grow beyond the processes and methods that have gotten us to where we are over the past 20 years.
We started with manual bending and now use a hydraulic stamping press that we’ve fitted with a fixture that can bend five parts at once. However, this setup usually requires more than one cycle to meet our bend specifications.
We’re looking for a higher-volume production bending system. I would really appreciate any assistance you may be able to provide for our need.
- Paul Gee, SIGN Fracture Care International
Answer: If responding to your email in the form of a published column does not answer your question, it will at least help promote your cause. To my readers, check these folks out. They do some remarkable things with implants in developing countries. While we are discussing worthy charities, do not forget the charities and scholarships from the Fabricators & Manufacturers Association as they produce some remarkable results as well.
There are many ways to accomplish your forming project. Several manufacturers offer a variety of specialized CNC machines capable of forming round bar to remarkably high standards with little human intervention. Depending on your projected volume of work, these types of machines might be a viable option for you.
Rod Bending on a Press Brake
I am no expert in bending rod with these specialty machines. However, I can tell you about the bending of bar to some precise standards using a press brake, an excellent option for shorter part runs. Besides, it’s not that difficult to do!
Several manufacturers make tools like what I’m about to describe. Although these tools are expensive, they can be worth every dime for many operations. On the other hand, if you work for a small mom-and-pop (or nonprofit, for that matter) and can’t afford such tools, you can build one yourself.

Figure 1
In this custom bar-bending press brake tool, freely spinning pulley wheels act as the die shoulders, while the punch is grooved to match the bar being formed.
What You Will Need
You’ll need two things: a special punch and die set and some custom gauging. Let us begin with the punch and die set.
The tool set illustrated in Figure 1 is made for bending round bar. It consists of a couple of pieces of 0.5-in.-thick steel plate cut to fit a European precision-ground tool bolster (toolholder or riser) separated by a couple of heavy-duty pulley wheels.
The punch, or upper tool, is grooved to the diameter of the rod to be formed. Likewise, the punch can be cut to the desired bend radius along the X axis.
The top of the punch could be cut or shaped to the required profile for mounting into your style of press brake, be it traditional planer, European precision-ground, or the New Standard. The upper tool can be made from either a modified press brake punch or another pulley wheel. But unlike the two lower pulley wheels, the upper pulley wheel does not need to spin.
How to Build Your Die
Dies can be made to bend a specific-diameter rod. You can build it out of two pieces of steel plate—say, 0.5 or 0.625 in. thick—cut to shape with holes to accommodate the pulley wheel axle and a couple of washers spacing the side plates apart just enough so the pulley wheels can rotate freely.
The axle center positions are fixed because the die is designed to bend a specific-diameter bar to a specific inside radius. The diameters and widths are somewhat limited when compared to a typical custom-designed tool. Nonetheless, it is still fully functional.
If you’re building your own tool, of course, you can get creative to make it both functional and flexible. For example, you can make the die’s axle centers adjustable by narrowing or widening the gap between wheels. When you change the distance between centers, you can also change the developed inside radius and bend deduction.
To accomplish this, place a series of holes in the die’s side frame. These holes create different positions for the pulley wheel’s axle bolt. You also could make it infinitely adjustable by cutting a slot and adding an adjuster that allows an operator to move and then secure the roller axle in position. The locking mechanism needs to be secure and strong, able to withstand the forming forces. Any play in the axle position could affect forming accuracy, and the last thing you want is the tool collapsing under bending pressure.
Once the die is adjusted and the axles are locked, you have just two things left to do. You need to center the die and punch and set the depth of penetration into the die space to set the bend angle.
Gauging the Bar
The gauging is a little different. It’s a lot more than just touching off a stop to hold a linear dimension. You also need to hold the required angular relationship to the previous bend, and that is not as easy as it sounds.

Figure 2
To build a sidegauge, you can build a side plate mounting on the back of the die, as shown in this rough sketch.
Imagine that you’ve made the first bend, and you are happy with the results. However, the next bend is not only reversed from the first bend but 90 degrees to one side. To accomplish subsequent bends in a part, you will need a form of sidegauging.
In addition to the backstop—the one setting the dimension of the bend—you need to add a flat surface as a sidegauge. After the first bend, you’ll hold the bent rod flush against the surface to hold the angular relationship to the previous bend, while the standard stop holds the dimension.
You will need to perform some fixturing to hold these sidegauge surfaces in place. They will be unique to your project; it just takes some time to think about what you are trying to accomplish.
For instance, you can create these gauging surfaces by mounting a bar onto one of the die sides protruding from the back of the die. On that bar, slide two pieces of tubing with locking bolts. Mount your flat plate to those pieces of tubing (see Figure 2).
This sidegauging will require you to reset the plate angle and position for every bend, so it is neither fast nor efficient, but it can produce a consistent product. Note that this gauging issue would need to be solved even if you bought a custom-made tool.
No Substitute for a Production Machine
These pulley wheel tools will probably not produce perfect results if the radius of the wheel is much larger than the diameter of the rod, such as when you have a 0.25-in. rod being bent with a pulley wheel having a 1-in. radius. The bar would twist, slip, and slide throughout the bending cycle, giving you less consistent parts. For the best results, try to get a wheel with a radius (width) that’s the same as the rod diameter.
Of course, all this is no substitute for a production bar-bending machine, and considering your desired volumes, you may well need one. That said, this information might be of use if you have an area devoted to prototyping, product development, and similar work.
Again, I am no expert when it comes to production bar-bending machines. But I do have a magazine column, and I can spread the word about the important humanitarian work your organization does. From your website (again, www.signfracturecare.org), I see you do work in 53 countries and have helped more than 300,000 patients with their previously untreated bone fractures. Thanks to you and your team for all the work you do. Good luck expanding your bar-bending capability in the months and years to come, and I wish you all the best.
Steve Benson is a member and former chair of the Precision Sheet Metal Technology Council of the Fabricators & Manufacturers Association International®. He is the president of ASMA LLC.
About the Author

About the Publication

subscribe now

The Fabricator is North America's leading magazine for the metal forming and fabricating industry. The magazine delivers the news, technical articles, and case histories that enable fabricators to do their jobs more efficiently. The Fabricator has served the industry since 1970.
start your free subscription- Stay connected from anywhere

Easily access valuable industry resources now with full access to the digital edition of The Fabricator.

Easily access valuable industry resources now with full access to the digital edition of The Welder.

Easily access valuable industry resources now with full access to the digital edition of The Tube and Pipe Journal.

Easily access valuable industry resources now with full access to the digital edition of The Fabricator en Español.
- Podcasting

Seth Feldman of Iowa-based Wertzbaugher Services joins The Fabricator Podcast to offer his take as a Gen Zer...
- Trending Articles
1
JM Steel triples capacity for solar energy projects at Pennsylvania facility

2
Fabricating favorite childhood memories

3
How laser and TIG welding coexist in the modern job shop

4
Robotic welding sets up small-batch manufacturer for future growth
5
Ultra Tool and Manufacturing adds 2D laser system