


Owner, Brown Dog Welding
Sometimes a step gets lost in the shuffle, or an engineering problem shows up late in the game, or a repair needs to be made without disassembling the overall piece. Perhaps a broken metal tab is near a rubber seal, a lever snaps on with a plastic handle, a welded add-on to a finished product near is plastic or leather. The bottom line is, you need to put heat into an object in a very controlled, confined area, because if the elevated temperatures extend too far, they will damage parts with lower melting temps.
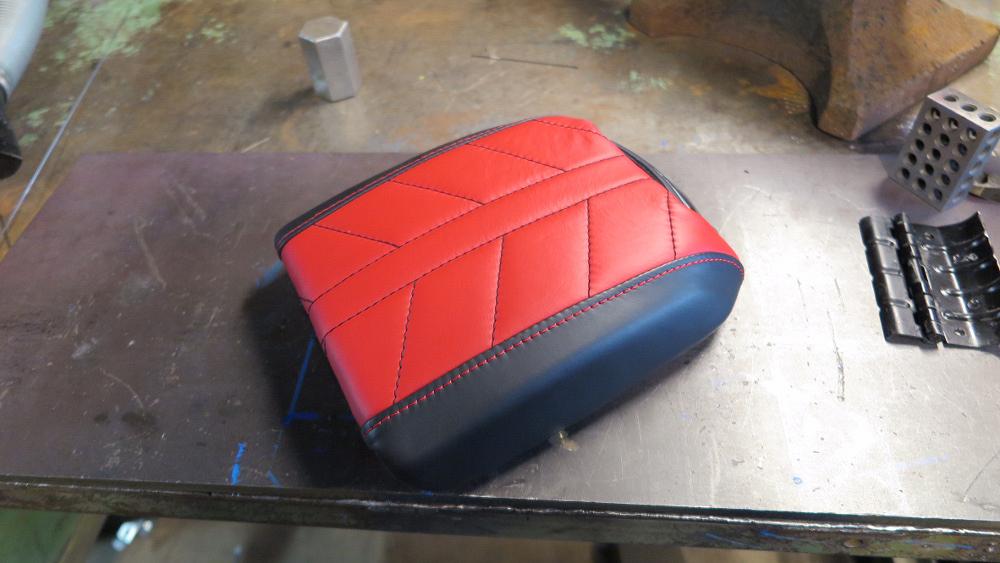
I like these kinds of challenging scenarios. Each situation plays out differently; your only real guides are experience and common sense. In the project I’m gonna walk you through here, a center console for a one-off Corvette had been skillfully and painstakingly covered with a custom leather design by my friend Shawn Paul of SPC Interiors.
A mounting tab had been cut off so cleanly by someone previously working on the car that is wasn’t discovered until after the car was being put back together that it needed to be reattached. At this point the car was at Ice Nine Group undergoing final assembly when another friend, Keith Strong, gave me a call to help remedy the situation.
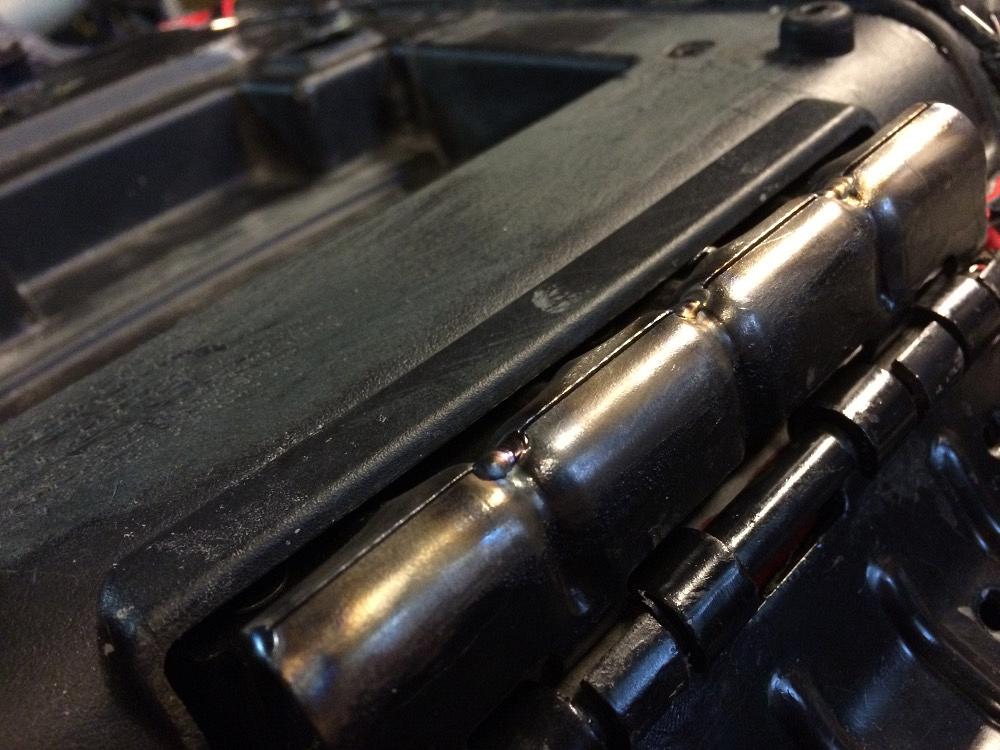
I took care to set the piece on a soft surface, so as not to damage the leather. I also cleaned the edges where the tabs were going to be welded together, because the cleaner the material, the less heat you need.
I used a C-clamp to hold the pieces together, and for the ground I had a “third hand” direct the current from the table to as near as possible to where the welding was happening. You don’t want the arc to wander, or to try to jump through the leather (or whatever material you’re protecting from the heat).
Once it was set in place, I put a damp rag in between the joint where I would be welding and the plastic and leather assembly. The slightly wet rag acts as a bit of a buffer, helping to soak up some of the heat before it reaches the easily melted materials. Then I used several short tacks and two small beads to secure the two pieces together. There is never much stress at this joint, and this is definitely a situation in which you want to use as little weld (and heat) as necessary—just enough to keep them together.
In the end I had the tab back in place where it had been cut, and the leather looked as good as when it was first wrapped around the lid. A little thoughtfulness went a long way in this repair.
All images courtesy of Brown Dog Welding.
The Welder, formerly known as Practical Welding Today, is a showcase of the real people who make the products we use and work with every day. This magazine has served the welding community in North America well for more than 20 years.
start your free subscription

Easily access valuable industry resources now with full access to the digital edition of The Fabricator.

Easily access valuable industry resources now with full access to the digital edition of The Welder.

Easily access valuable industry resources now with full access to the digital edition of The Tube and Pipe Journal.

Easily access valuable industry resources now with full access to the digital edition of The Fabricator en Español.
In this episode of The Fabricator Podcast, Caleb Chamberlain, co-founder and CEO of OSH Cut, discusses his company’s...


